How to Build a B2B Customer Portal in 6 Steps
Managing B2B sales is quite a bit different from selling to the public. This can present challenges, including managing communications, securely hosting product information, and effectively handling inventories and fulfillment.
Today, we’re looking at one solution - building a custom B2B portal.
Most often, business customers don’t have the same priorities as typical consumers. Above all, they want a fast, secure way to order from trusted suppliers.
That’s where portals come in.
We’re building a secure, gated solution where external users can create, manage, and process orders - as well as manage their own internal accounts.
By the end, we’ll have a fully functioning customer portal that we can deploy to the cloud or on our own infrastructure.
Even better, with Budibase, we’ll have a working solution in a fraction of the time it would take us with traditional development tools.
But before we jump in…
What is a B2B customer portal?
At the most basic level, a B2B customer portal is an interactive web app where external users can access our products and services.
Of course, the specifics of this can look quite a bit different depending on our specific business model.
Some of the most common features include product catalogs, order processing and management, communications, payment handling, and more.
On top of this, we’ll need tools for internal users to manage related tasks and processes, as well as monitoring activity.
Therefore, a successful portal must offer appropriate UX, functionality, and data exposure for different kinds of users - based on the specific tasks they need to perform.
So…
What are we building?
We’re building a customer portal for a B2B company selling physical products.
This will be centered around an internal product catalogue where customers can browse, search, view, and order products. They’ll also be able to view and track their orders - or update their account information.
Internal users will be able to carry out a range of administrative functions related to product, order, and customer data.
We’re going to build all of this on an existing PostgreSQL database representing our inventory. We’ll provide the necessary queries to create and populate each of our database tables a little later so you can build with us.
We’ll also make extensive use of Budibase’s built-in RBAC system to provide experiences that are fully tailored to the needs of individual user groups.
Let’s jump in.
How to build a B2B customer portal in 6 steps
If you haven’t already, sign up for a free Budibase account to start building as many apps as you want, using just about any kind of existing data.
The first thing we’ll need to do is create a new Budibase application. We can choose a pre-built template or import an existing app file, but today, we’re going to start from scratch.
When we choose this option, we’re prompted to give our app a name and URL extension. We’re going to call ours B2B Customer Portal.

1. Setting up our data model
Once our app is created, we need to choose which kind of data source we’d like to connect it to. Budibase offers dedicated connectors for relational databases, NoSQL tools, APIs, Google Sheets, and more - alongside our built-in low-code database.
When we connect to external databases, Budibase acts as a proxy, querying your data without directly storing it.
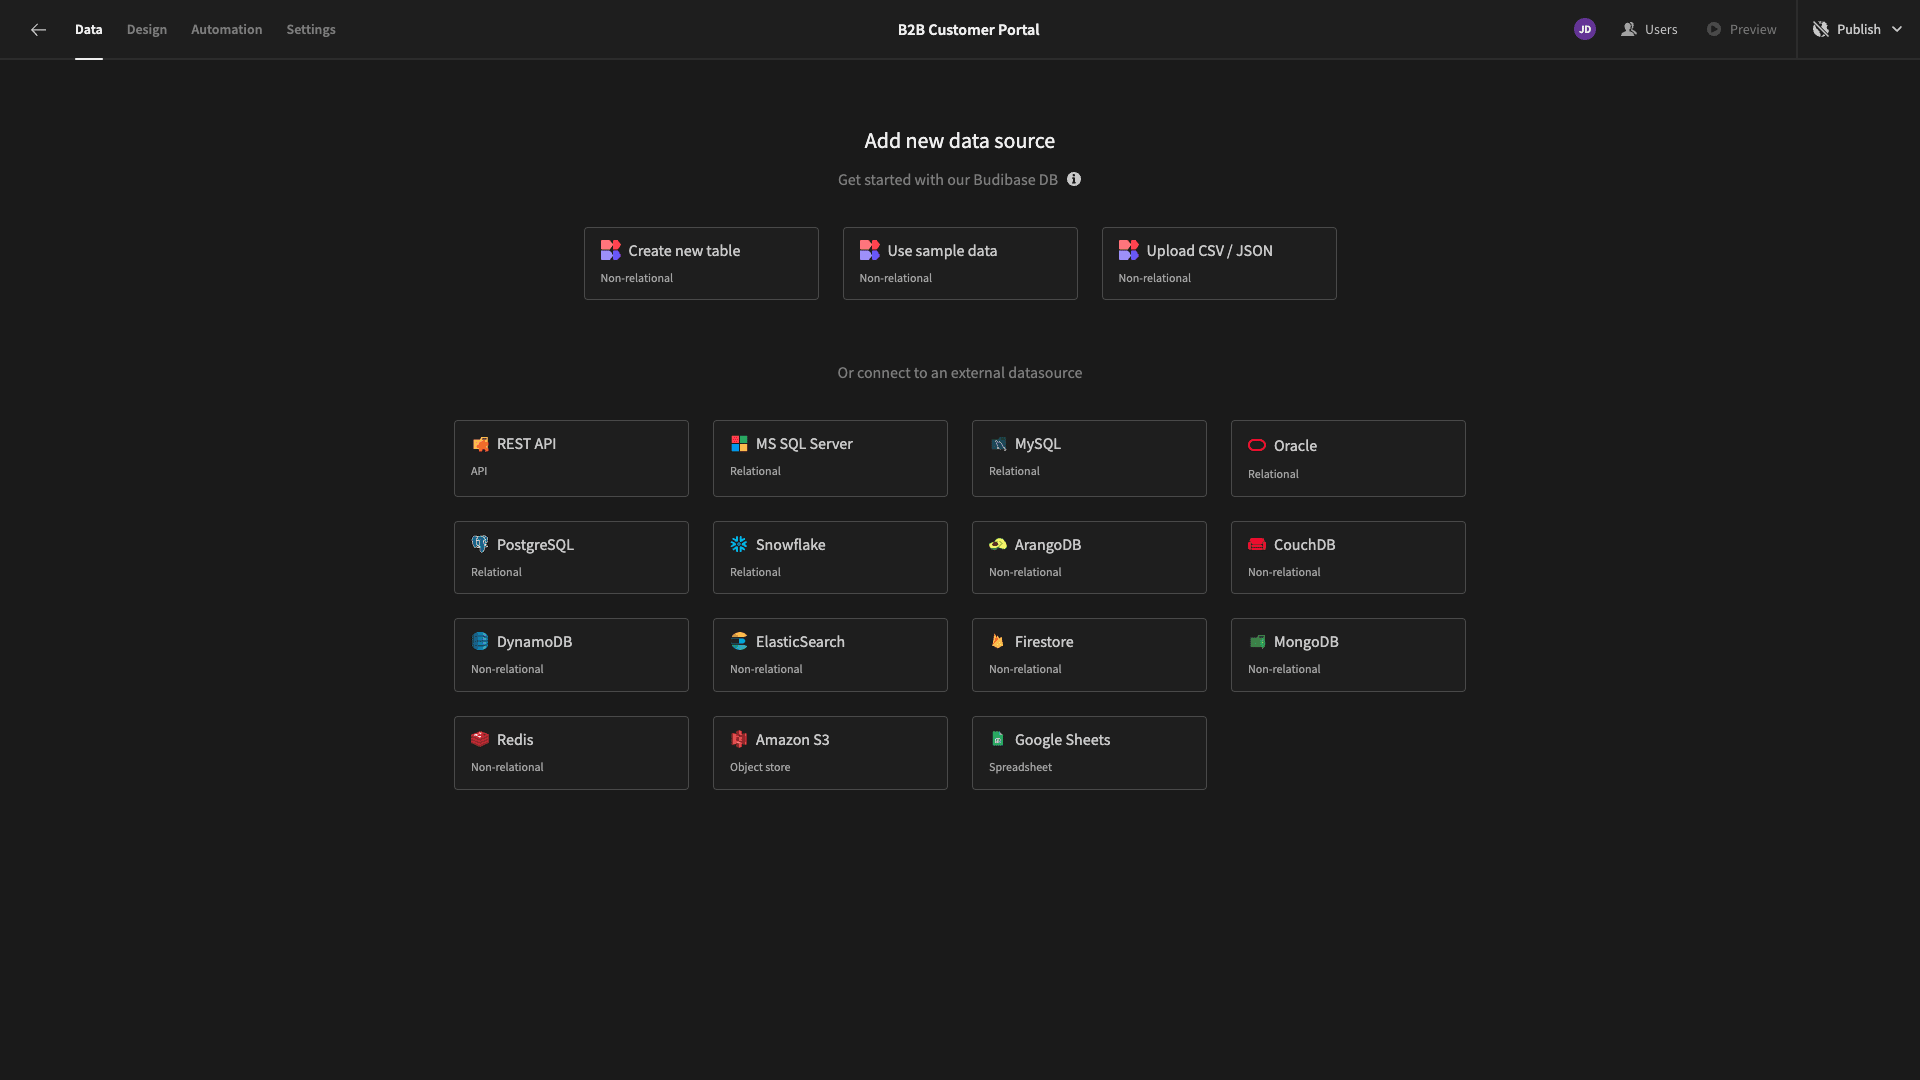
As we said earlier, we’re going to connect to a Postgres database.
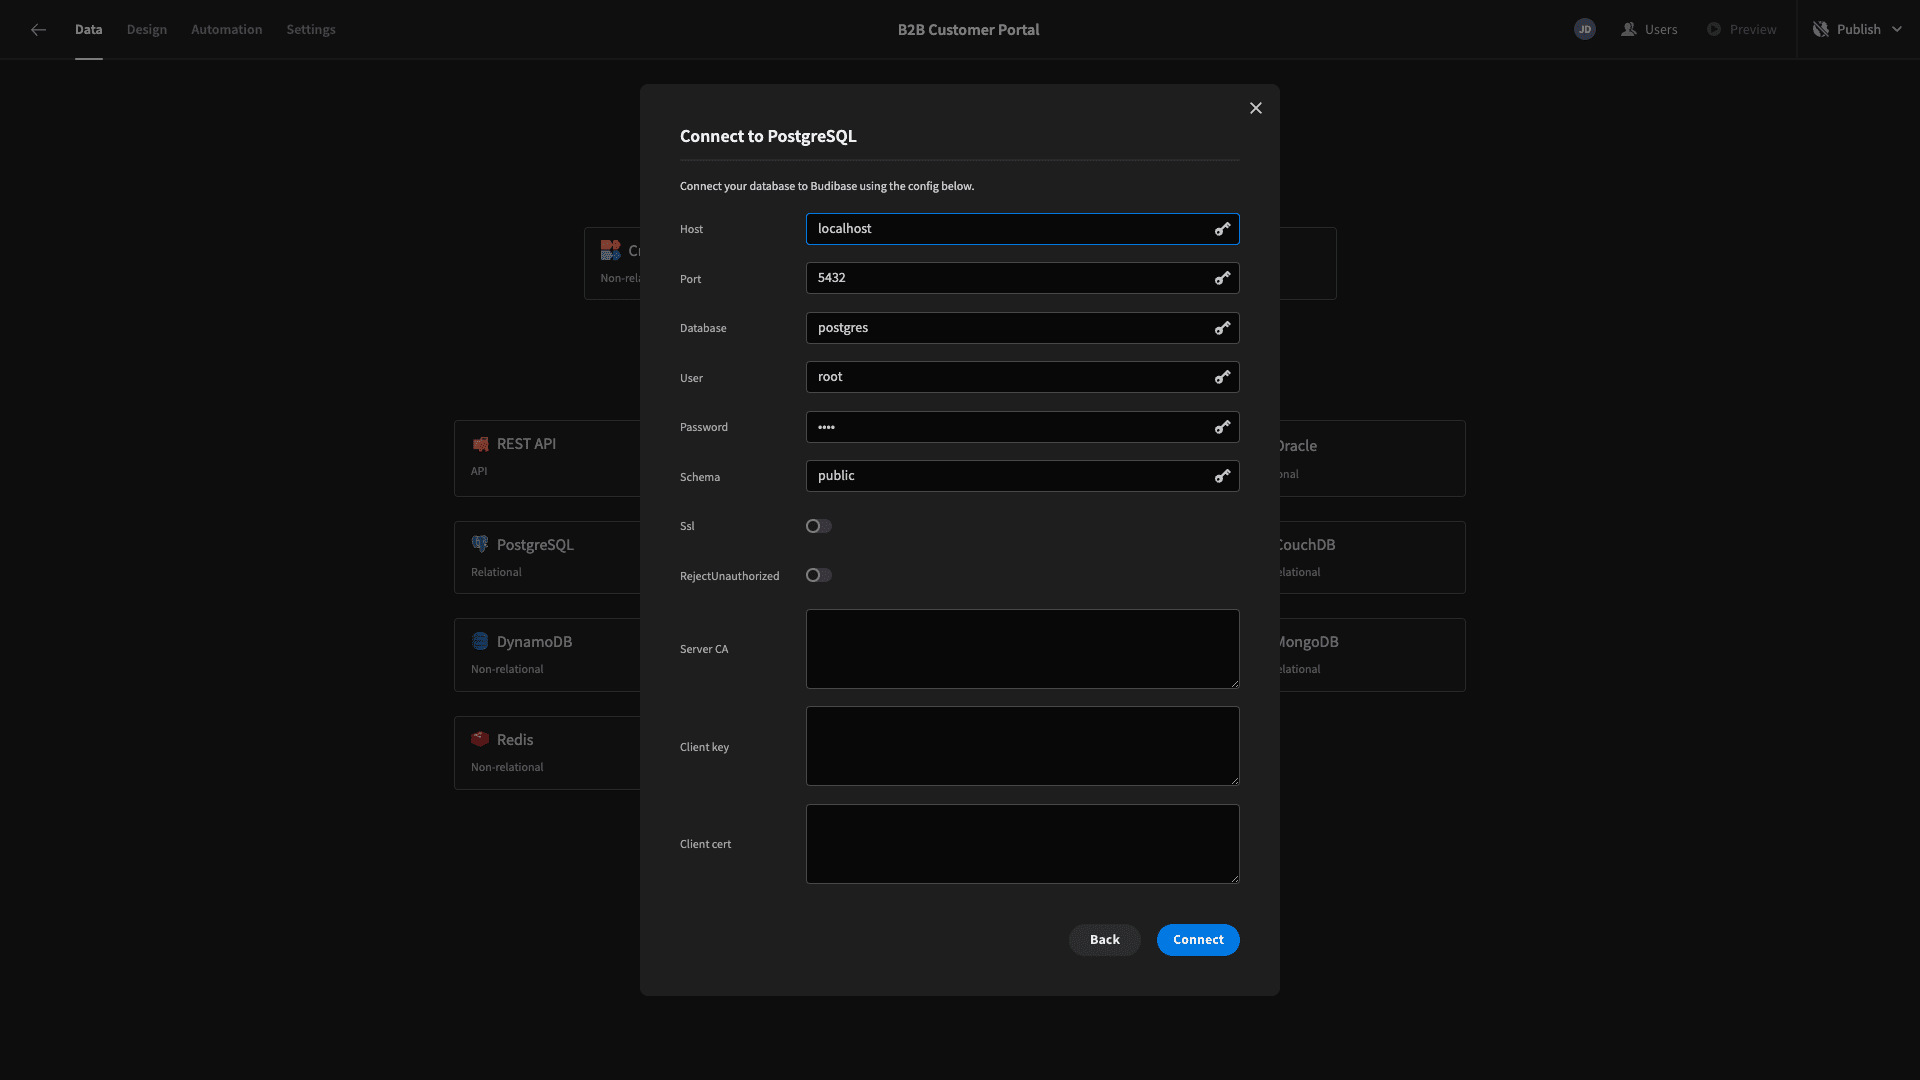
When we select this, we can input our database credentials - either manually or using details we’ve stored as secure environment variables within Budibase.
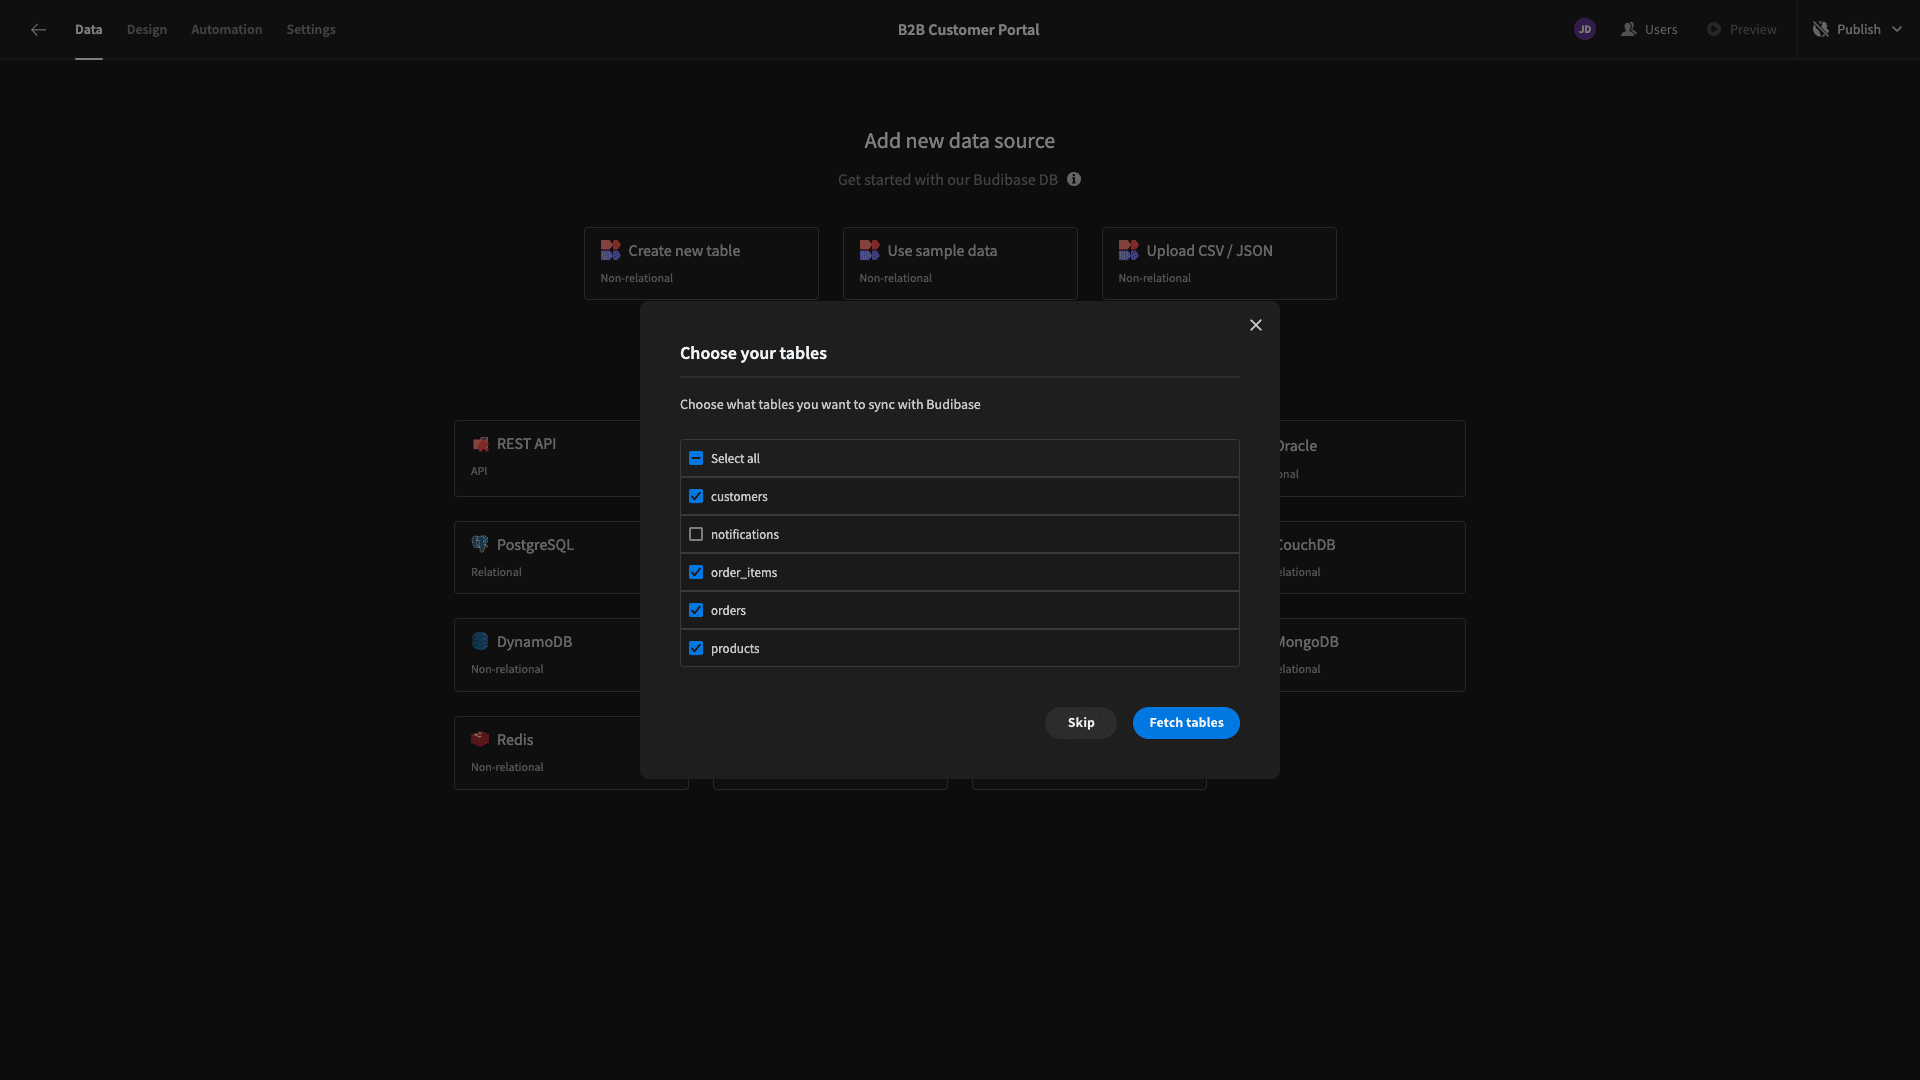
Then, we’re asked to choose which of our database’s constituent tables we’d like to fetch, making them queryable within Budibase.
We’re fetching tables called customers, order_items, orders, and products. We’ll examine each of these in more detail in a second - as well as providing queries to create them in your own database.
Here’s how our customers table will look in Budibase’s Data section. We can already alter its schema or stored values using our spreadsheet-like interface.
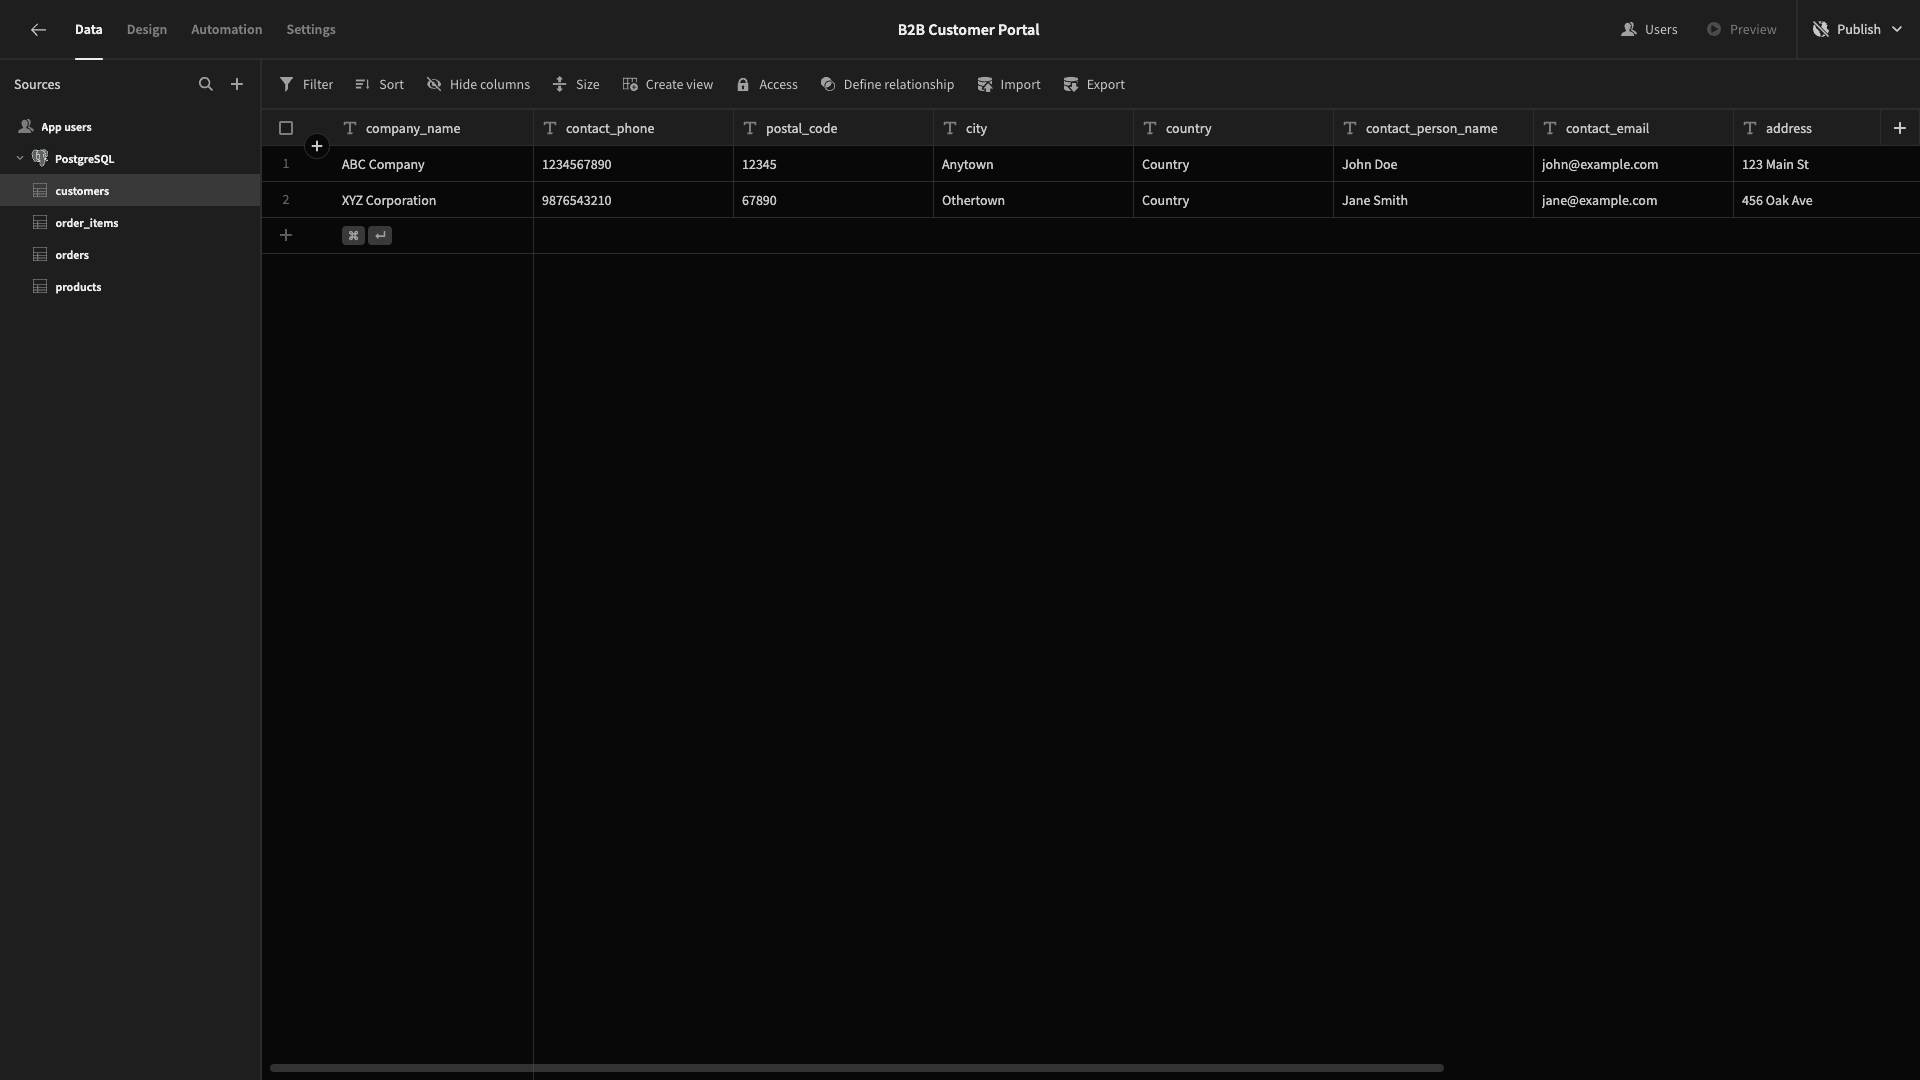
This stores attributes called company_name, contact_person_name, contact_phone, contact_email, address, postal_code, city, state, country, and customer_id.
We can create and populate this table with the following query:
 1CREATE TABLE Customers (
 2
 3  customer_id SERIAL PRIMARY KEY,
 4
 5  company_name VARCHAR(255),
 6
 7  contact_person_name VARCHAR(255),
 8
 9  contact_email VARCHAR(255),
10
11  contact_phone VARCHAR(20),
12
13  address VARCHAR(255),
14
15  city VARCHAR(100),
16
17  state VARCHAR(100),
18
19  country VARCHAR(100),
20
21  postal_code VARCHAR(20)
22
23);
24
25INSERT INTO Customers (company_name, contact_person_name, contact_email, contact_phone, address, city, state, country, postal_code)
26
27VALUES
28
29  ('ABC Company', 'John Doe', 'john@example.com', '1234567890', '123 Main St', 'Anytown', 'State', 'Country', '12345'),
30
31  ('XYZ Corporation', 'Jane Smith', 'jane@example.com', '9876543210', '456 Oak Ave', 'Othertown', 'State', 'Country', '67890');
Next, we have a table called products. This stores attributes called product_name, price, description, category, image, and product_id.
We can create it with this query.
 1CREATE TABLE Products (
 2
 3  product_id SERIAL PRIMARY KEY,
 4
 5  product_name VARCHAR(255),
 6
 7  description TEXT,
 8
 9  price DECIMAL(10, 2),
10
11  category VARCHAR(100),
12
13  image VARCHAR(255)
14
15);
16
17INSERT INTO Products (product_name, description, price, category, image)
18
19VALUES
20
21  ('Widget', 'A high-quality widget for all your needs', 29.99, 'Widgets', 'https://source.unsplash.com/600x600/?widget'),
22
23  ('Gadget', 'The latest gadget with advanced features', 49.99, 'Gadgets', 'https://source.unsplash.com/600x600/?gadget'),
24
25  ('Tool', 'Essential tool for DIY enthusiasts', 39.99, 'Tools', 'https://source.unsplash.com/600x600/?tool');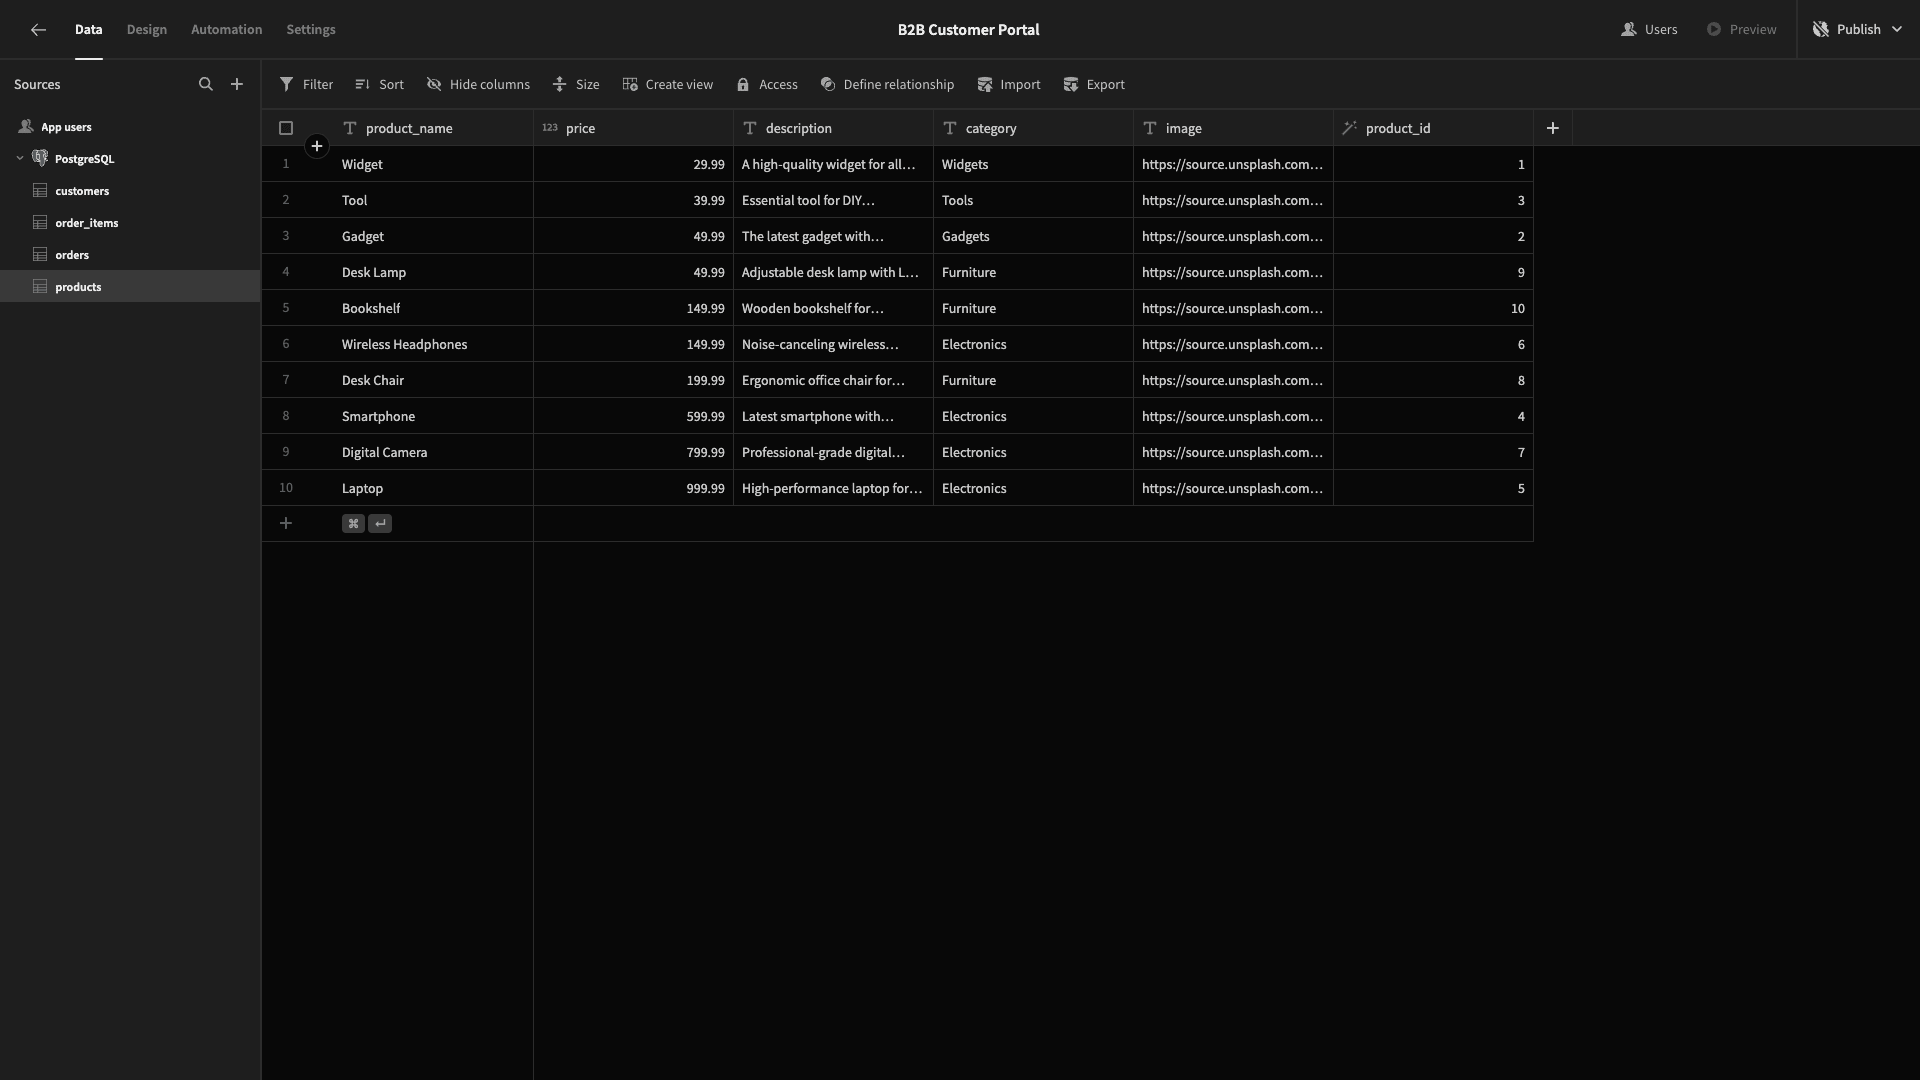
Our orders table contains columns called order_id, customer_id, order_status, total_amount, and order_Date.
We can create it using this query.
 1CREATE TABLE Orders (
 2
 3  order_id SERIAL PRIMARY KEY,
 4
 5  customer_id INT,
 6
 7  order_date DATE,
 8
 9  total_amount DECIMAL(10, 2),
10
11  order_status VARCHAR(50),
12
13  FOREIGN KEY (customer_id) REFERENCES Customers(customer_id)
14
15  -- Add other relevant columns as needed
16
17);
18
19INSERT INTO Orders (customer_id, order_date, total_amount, order_status)
20
21VALUES
22
23  (1, '2024-01-15', 99.99, 'Pending'),
24
25  (2, '2024-02-20', 149.99, 'Completed');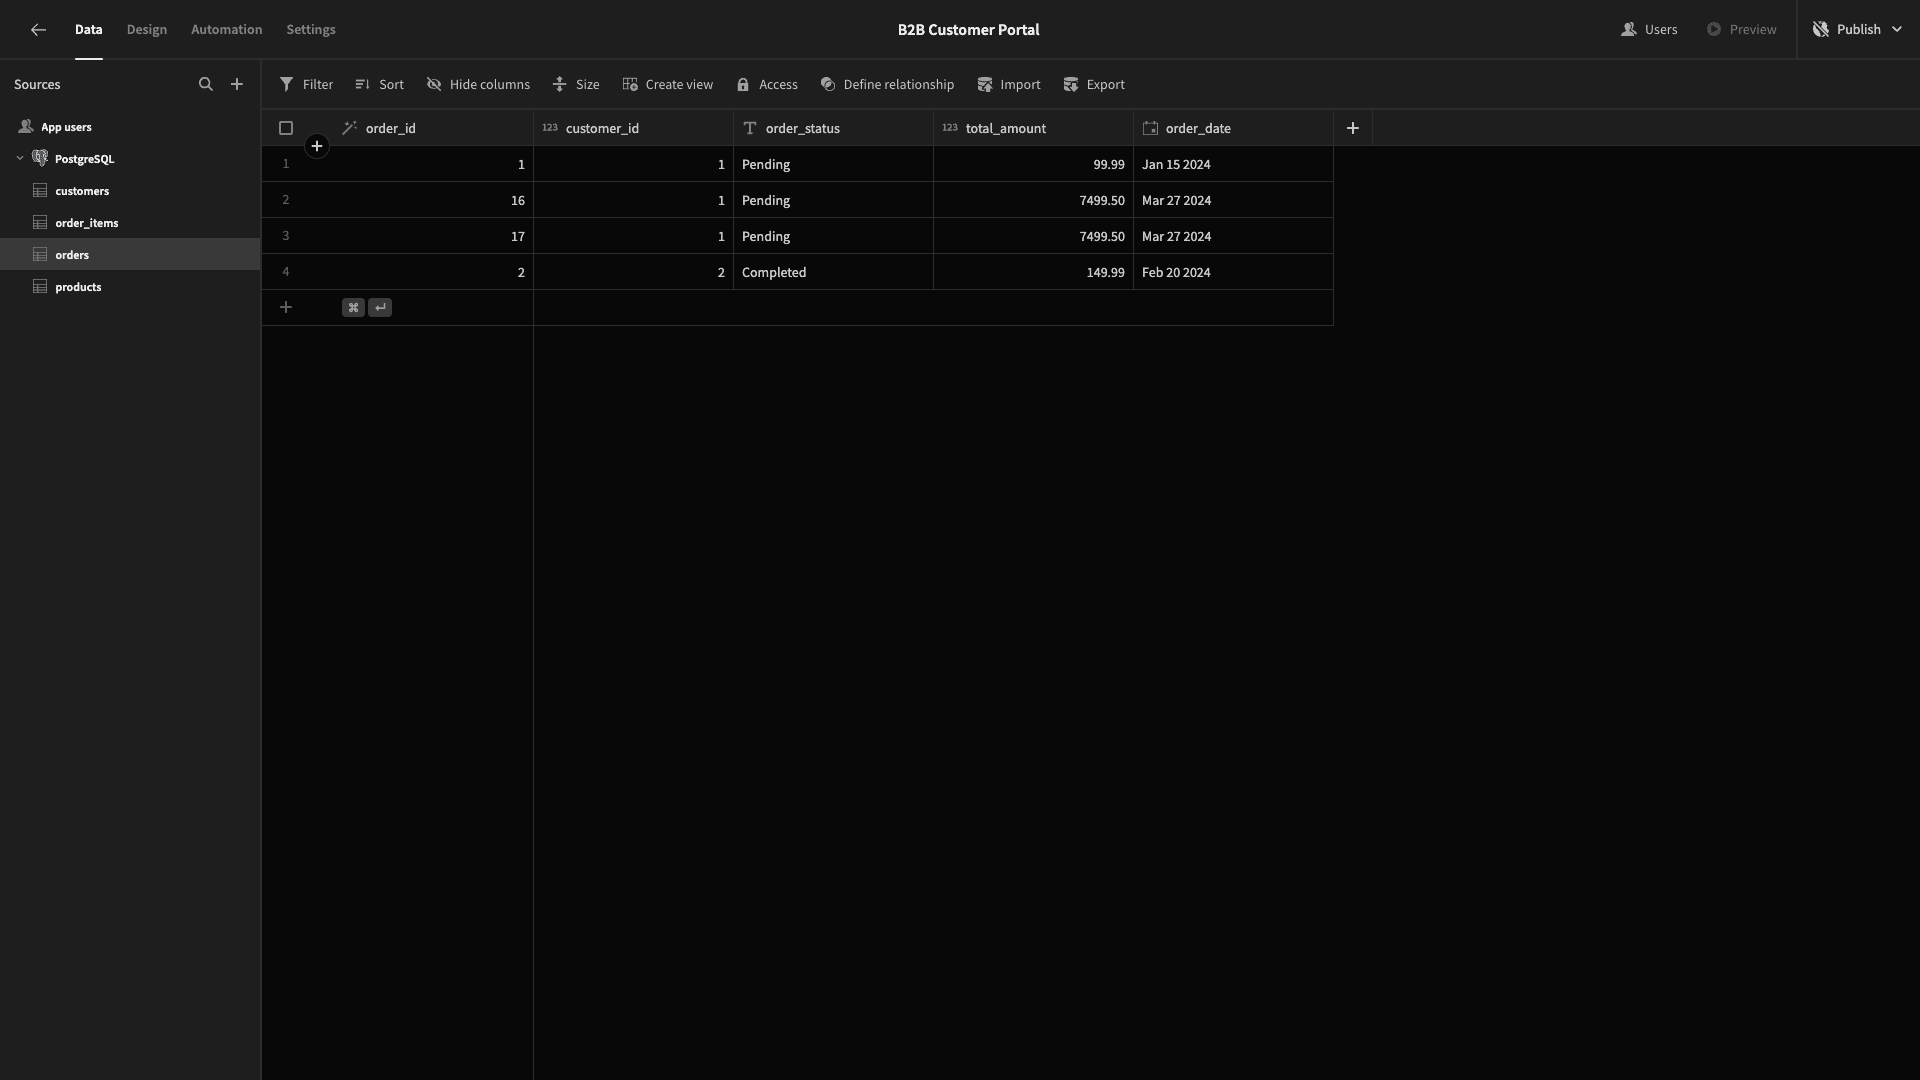
Lastly, the columns for our order_items table are order_item_id, quantity, price, total_price, order_id, and product_id.
 1CREATE TABLE Order_Items (
 2
 3  order_item_id SERIAL PRIMARY KEY,
 4
 5  order_id INT,
 6
 7  product_id INT,
 8
 9  quantity INT,
10
11  unit_price DECIMAL(10, 2),
12
13  total_price DECIMAL(10, 2),
14
15  FOREIGN KEY (order_id) REFERENCES Orders(order_id),
16
17  FOREIGN KEY (product_id) REFERENCES Products(product_id)
18
19);
20
21INSERT INTO Order_Items (order_id, product_id, quantity, unit_price, total_price)
22
23VALUES
24
25  (1, 1, 2, 29.99, 59.98),
26
27  (2, 2, 1, 49.99, 49.99),
28
29  (2, 3, 3, 39.99, 119.97);
Schema changes
Before we move on to building our B2B customer portal’s UIs, we will make a few changes to our database tables.
First of all, we want to link the customers table to Budibase’s internal Users table. That way, we can relate each customer to one of our app’s users. This will enable us to personalize the data they can access across our portal.
So, on the customers table, we’ll add a column using the plus icon. We’ll call this bb_user and select the User data type.

Then, we’ll assign ourselves to one of the rows for testing purposes.

The other tweaks we’ll make are more minor - but they’ll make our lives easier later.
There are several VARCHARs in our schema where we only want users to be able to choose from a defined list of options. These are the order_status attribute in our orders table and the category attribute in our products table.
We’re going to update these so that they have the Options data type. We can then input the possible options for each.
For status, our options will be Pending and Completed.
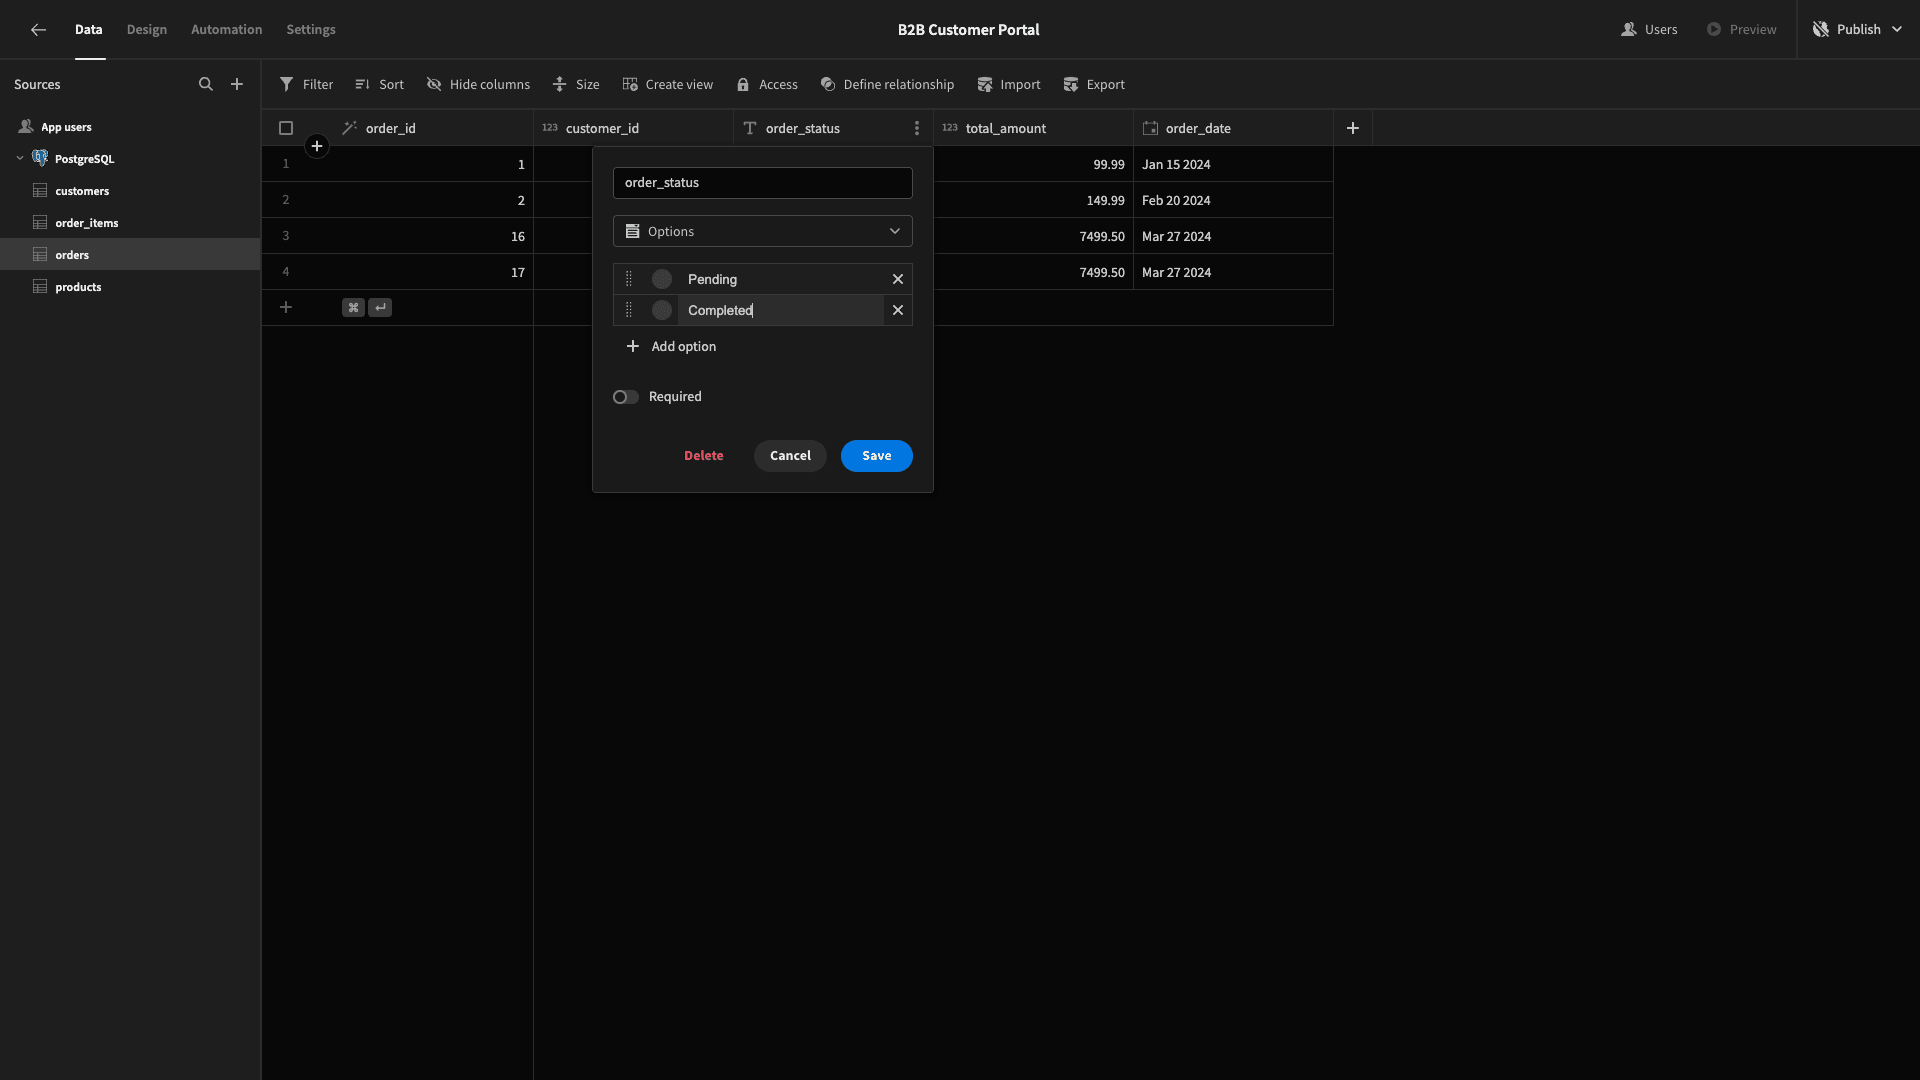
And for category, we’ll use each unique value that’s already in our table - so, Furniture, Electronics, Gadgets, Tools, and Widgets.

Defining relationships
The last thing we need to do is configure the relationships between our tables. There are attributes throughout our data tables that correspond to the ID attributes in other tables.
We can hit Define Relationships to configure these joins.
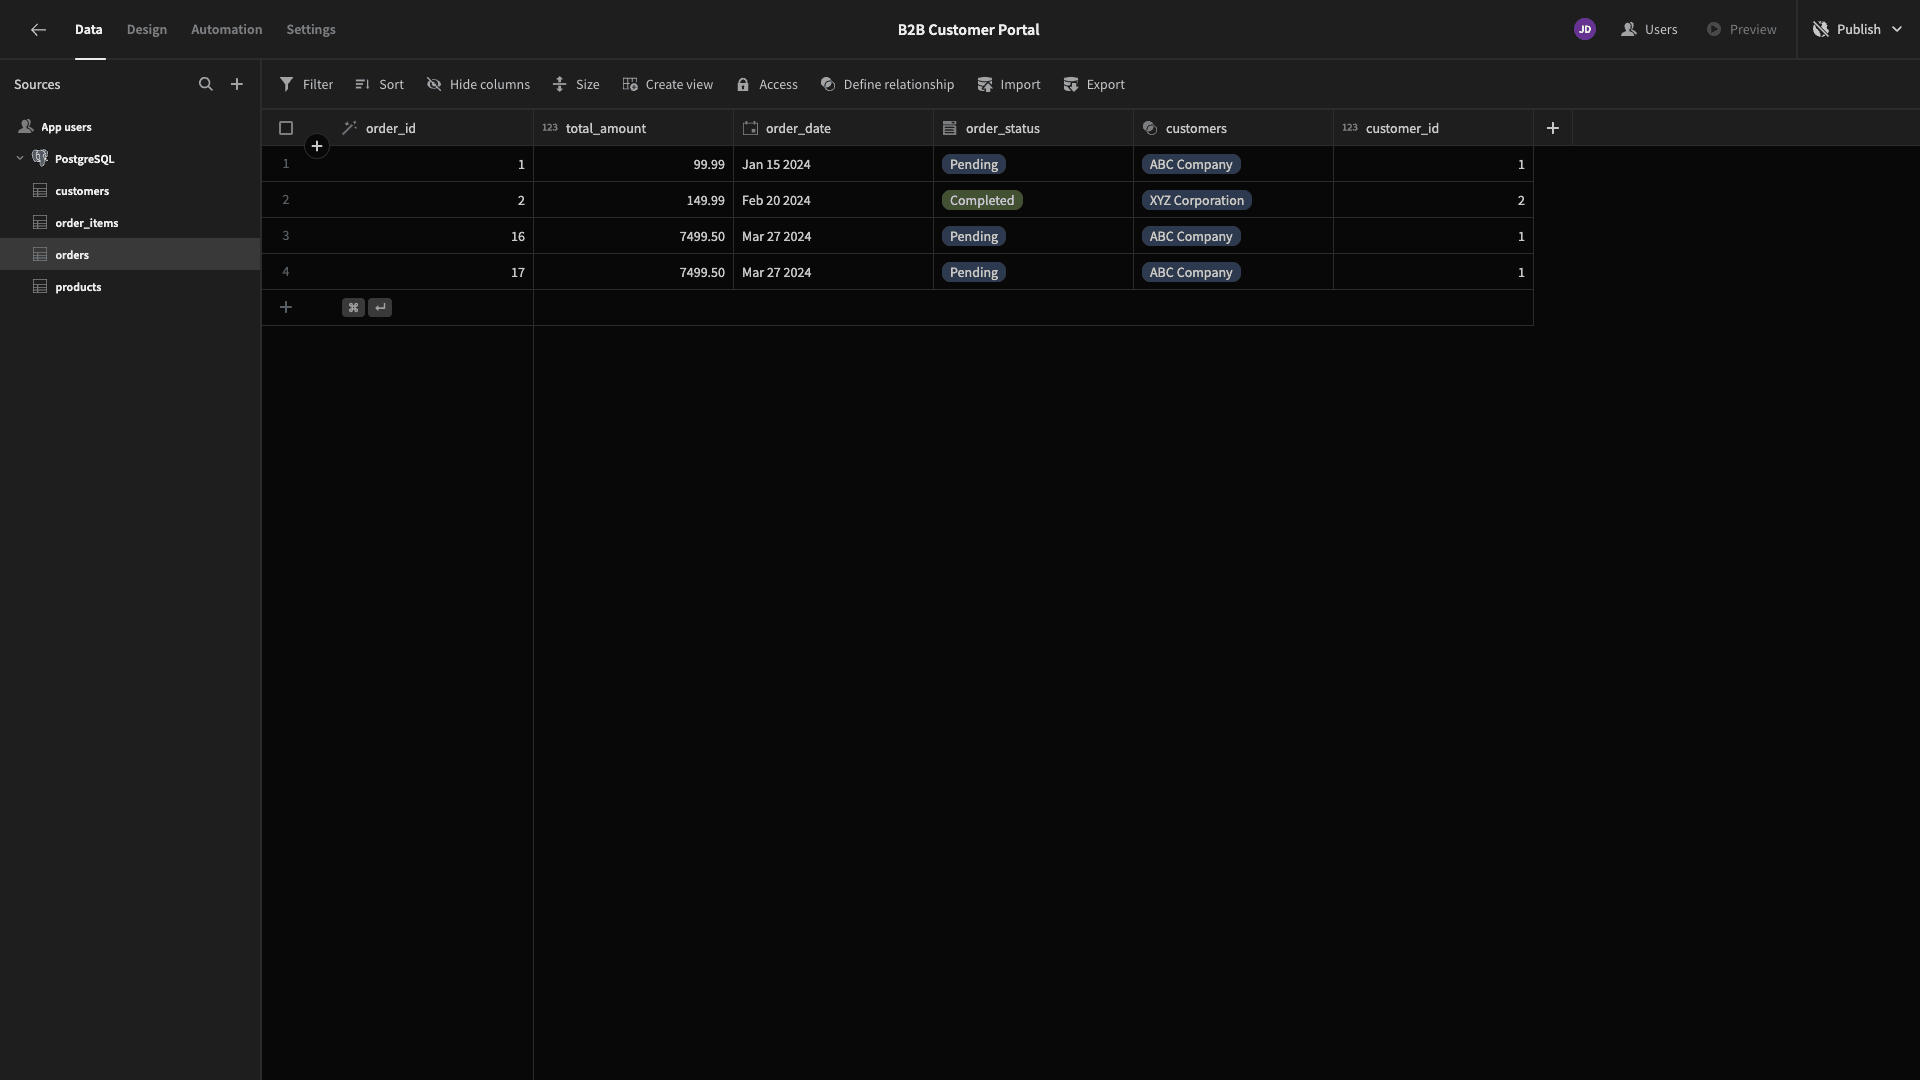
So first, we’ll link one row on the orders table to many rows on the customers table, using the customer_id attribute in each.
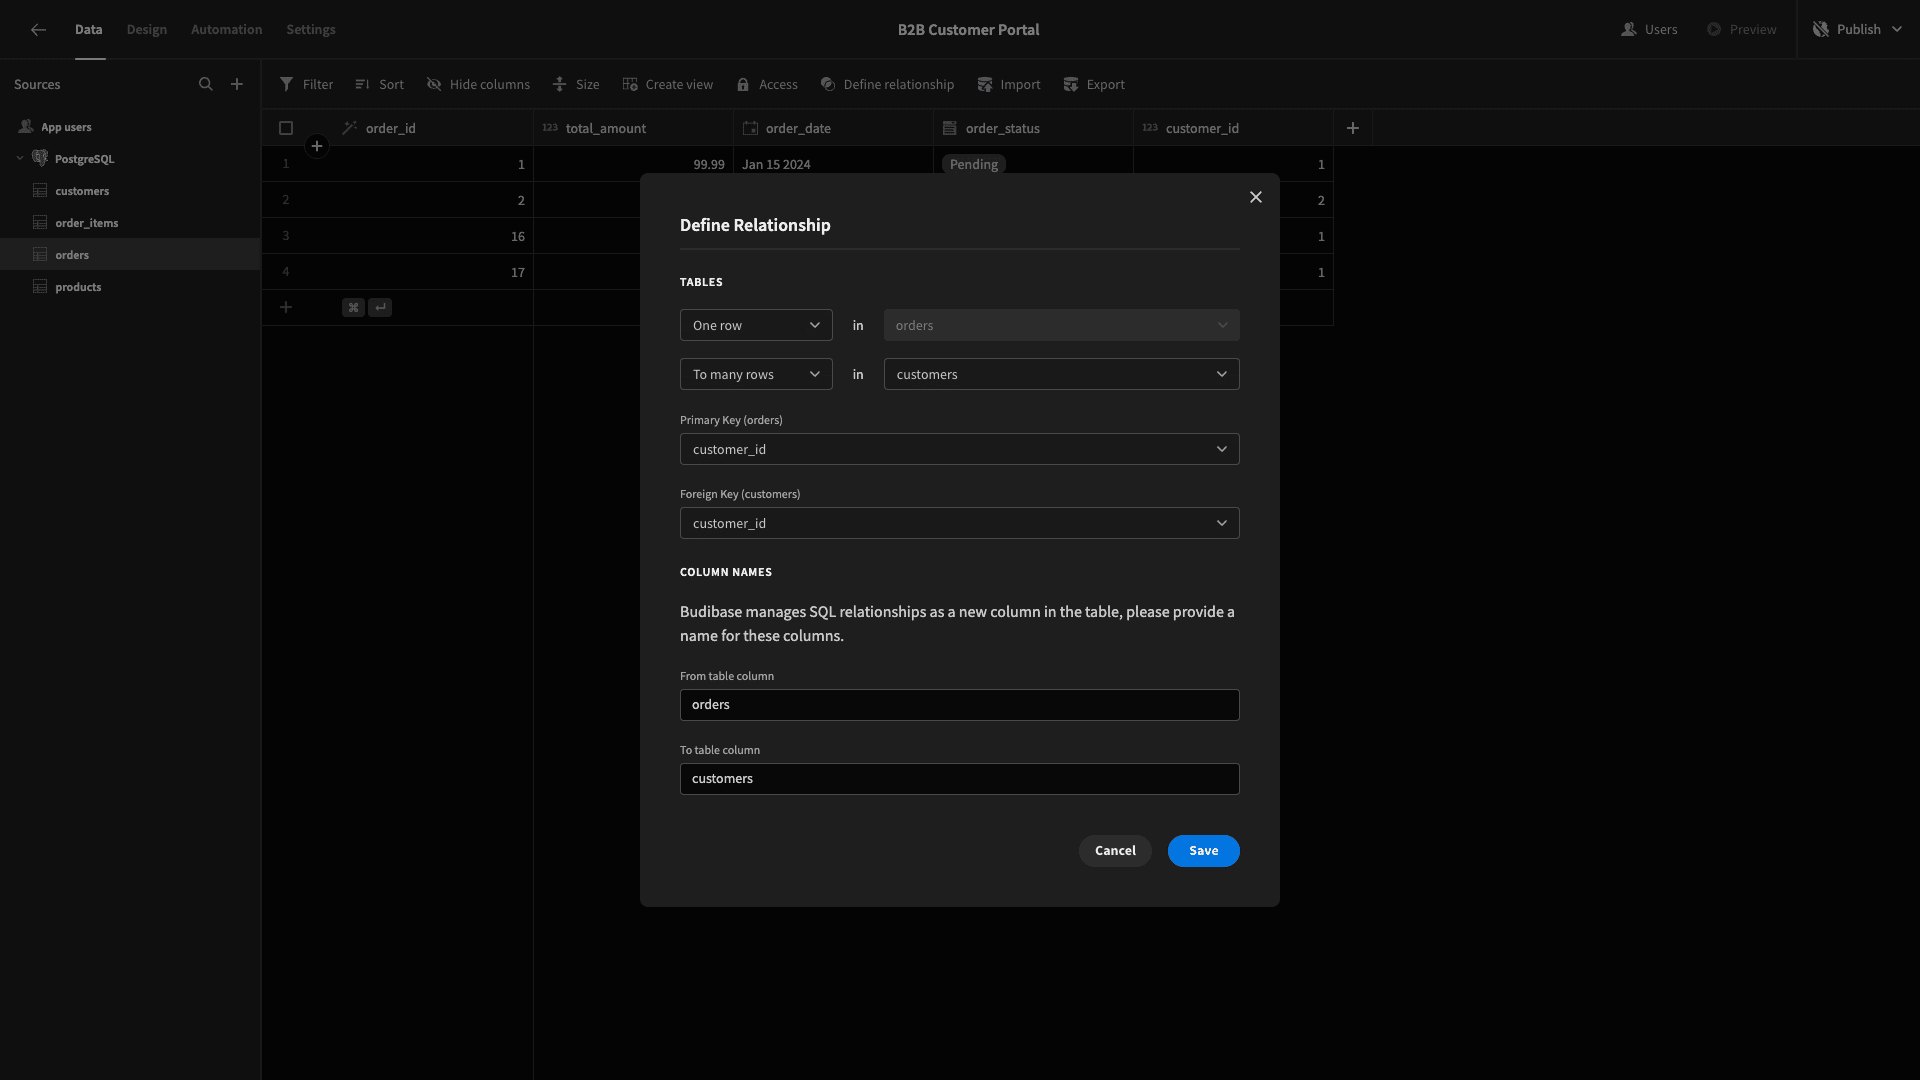
Now, we can see the relevant customers row displayed within our orders table.
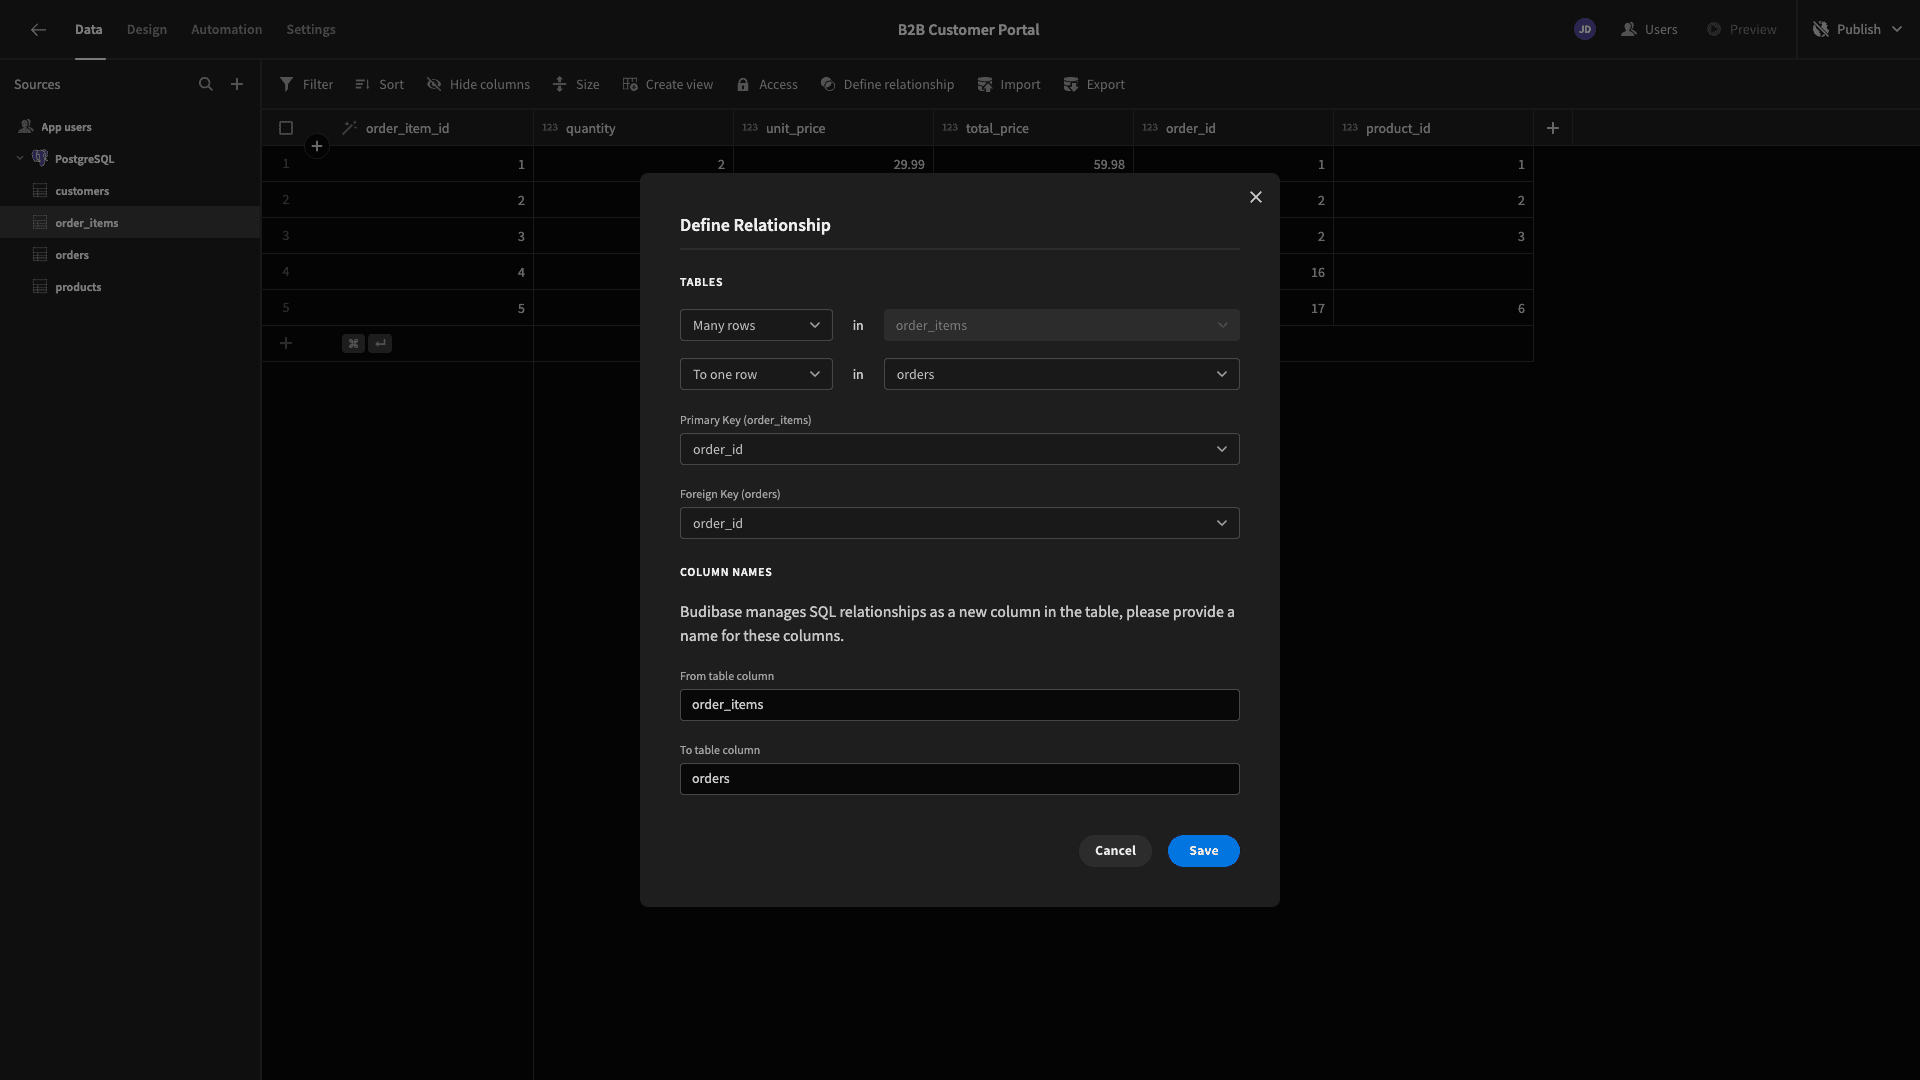
Next, we’ll link many rows in our order_items table to one row in our orders table using the order_id attribute.
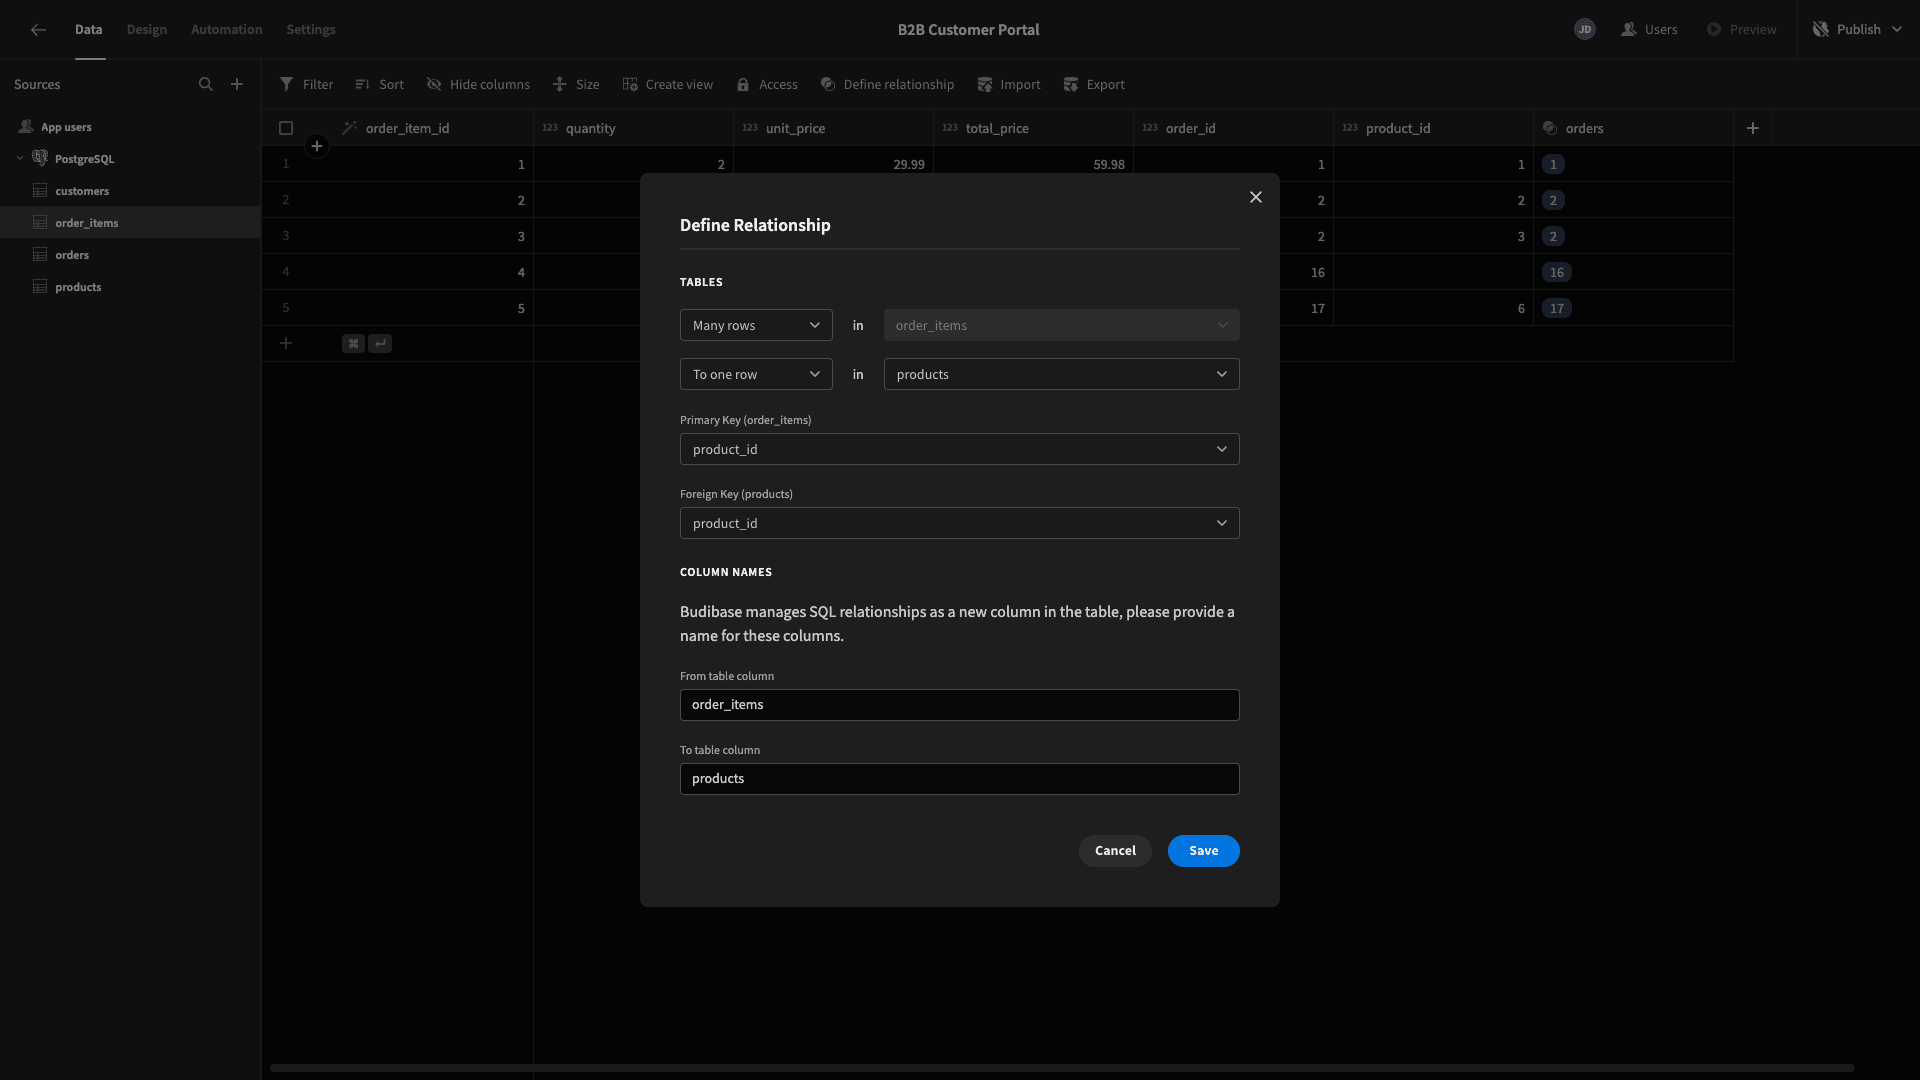
Lastly, we’ll like many order_items rows to one products row using the product_id attribute.
And that’s our data model ready to go.
2. Building a product catalogue
We can start building our UIs.
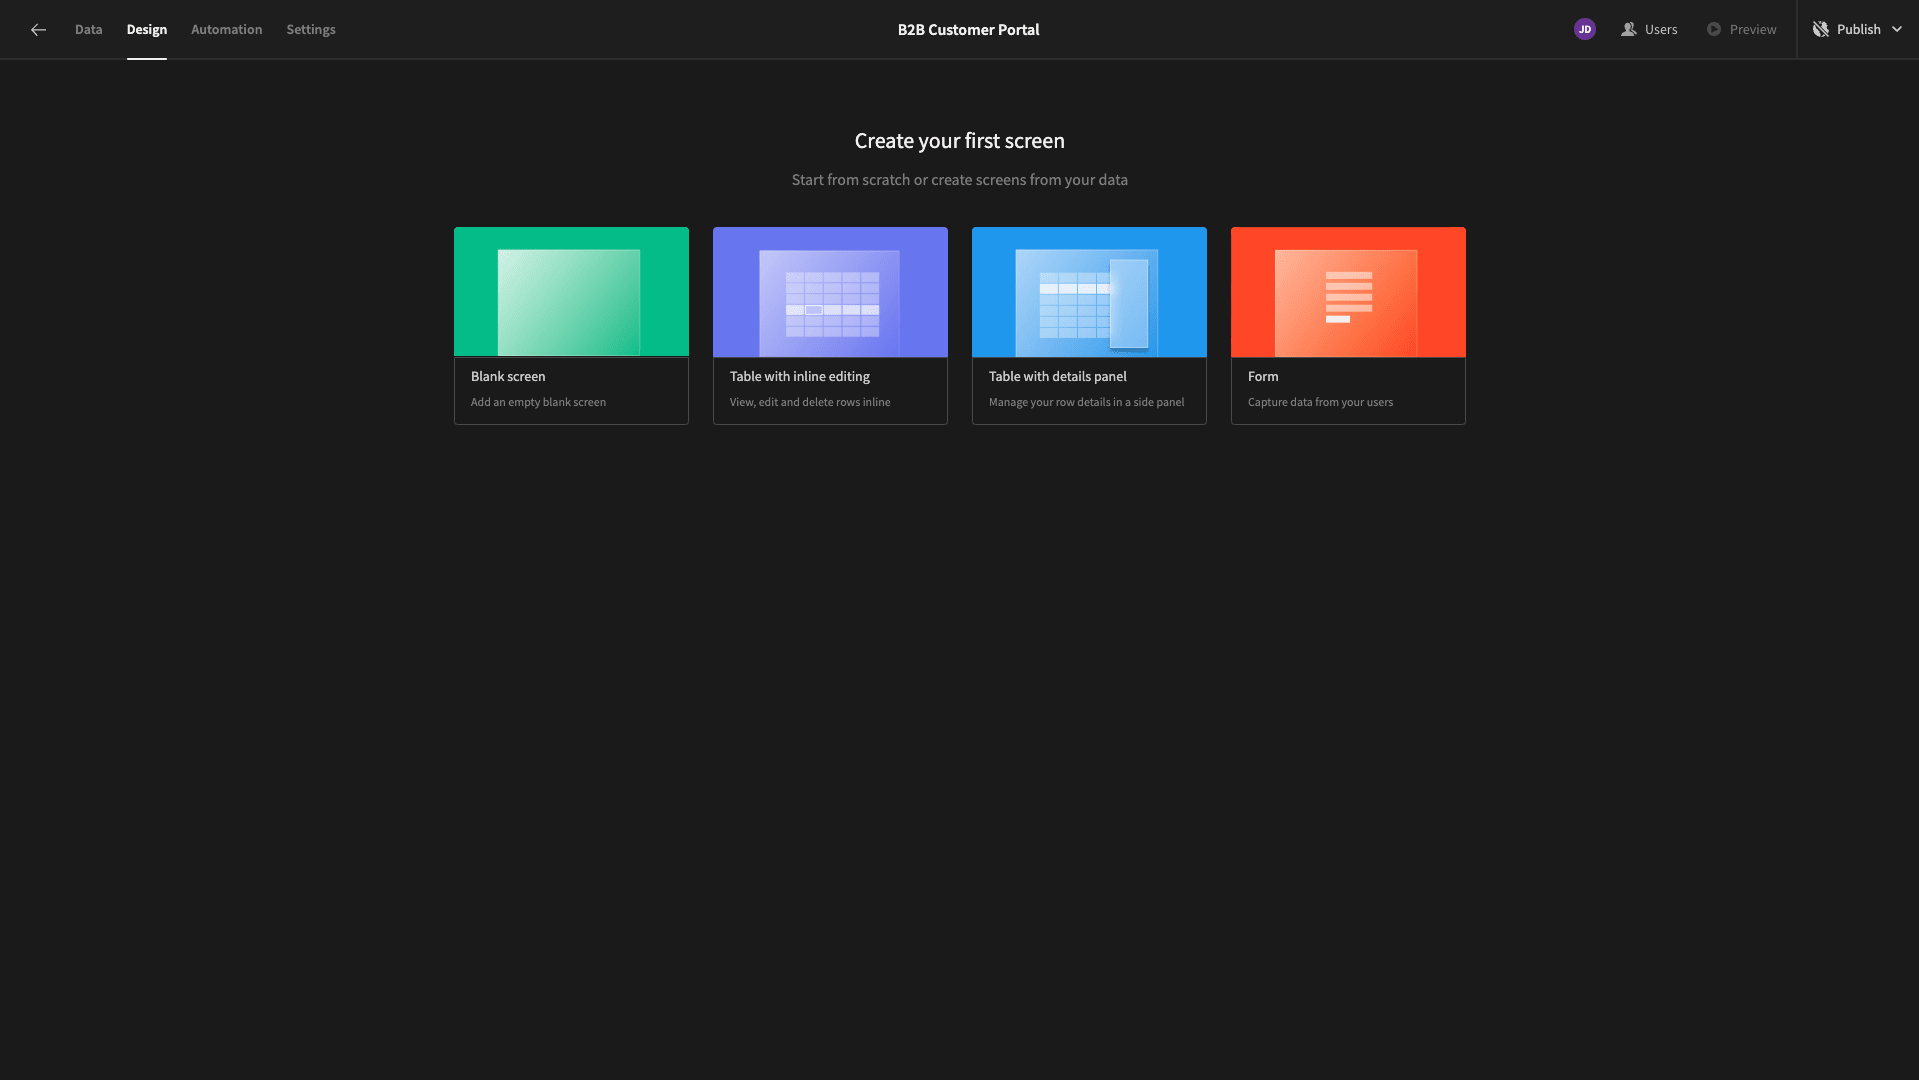
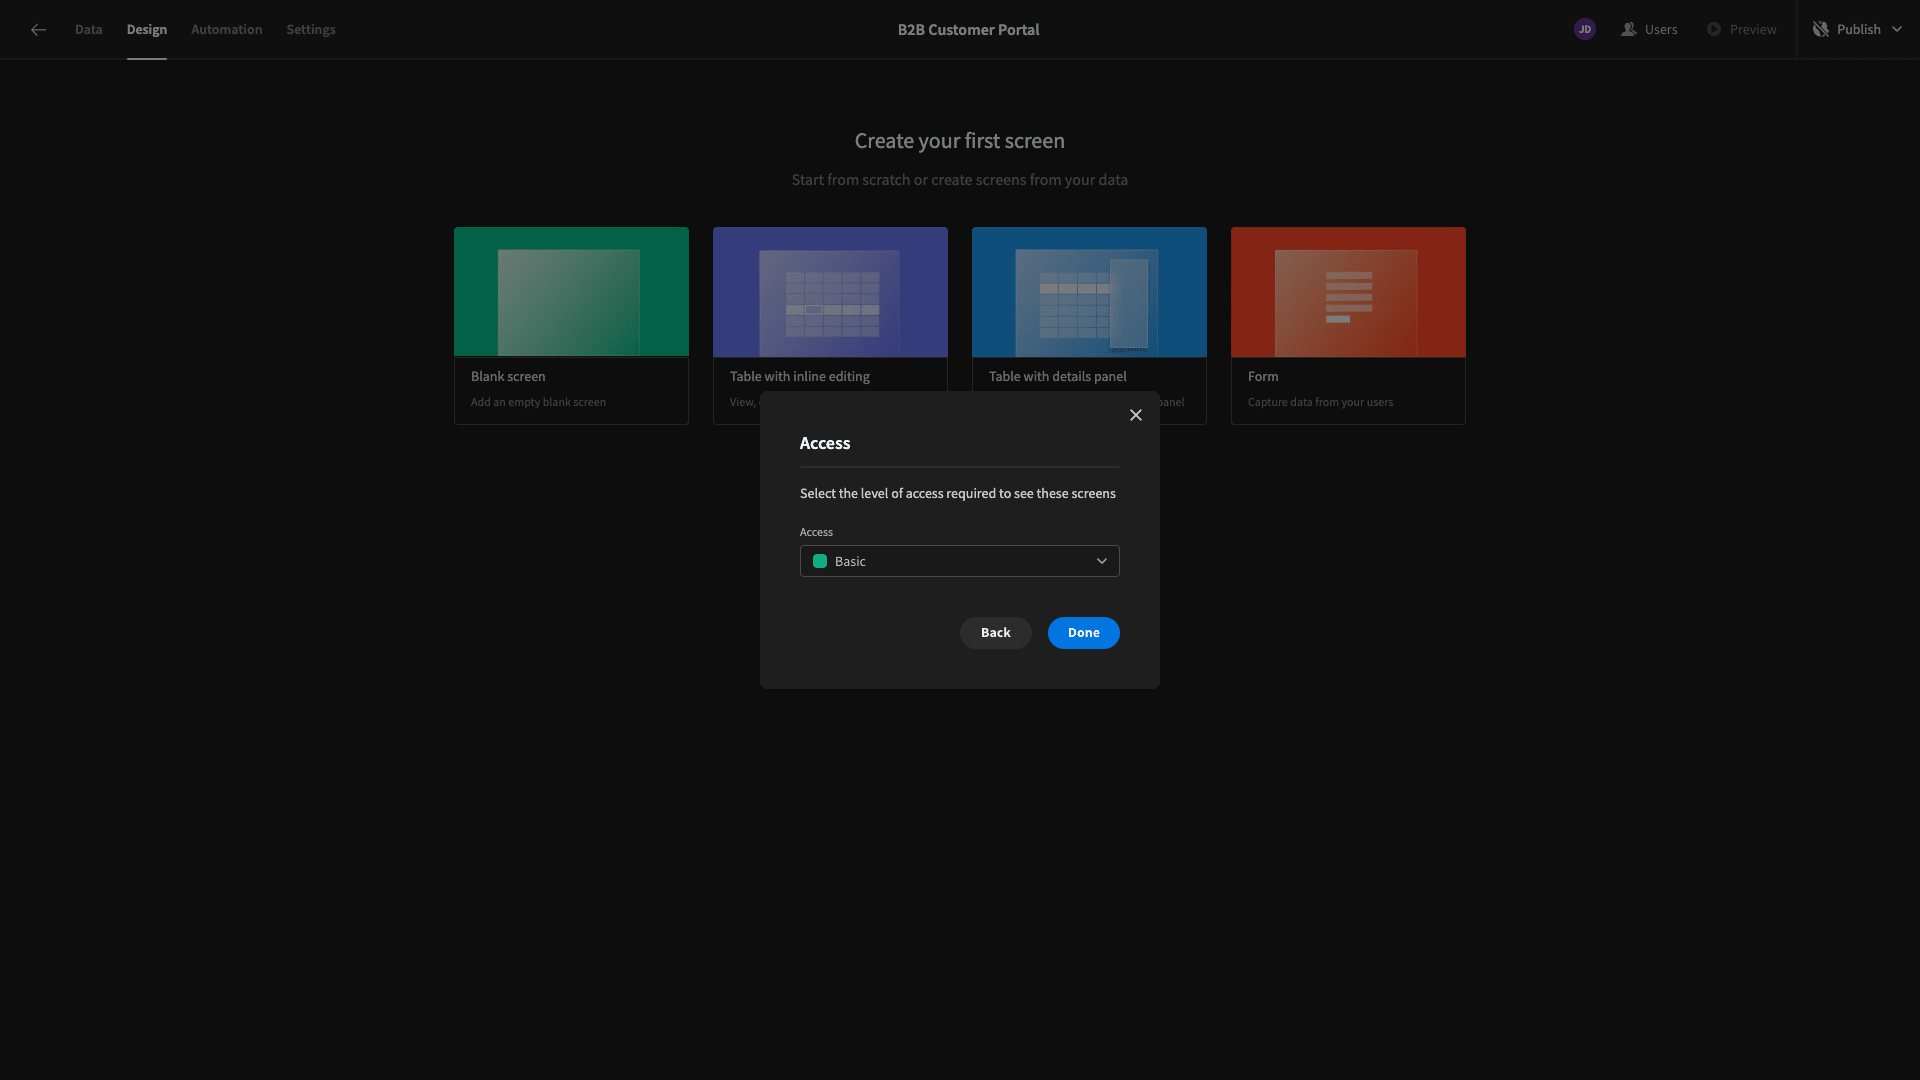
Head to Budibase’s Design section, and we’ll be offered several options for creating our first screen. We can use one of several autogenerated layouts, but this time, we’re going to start with a blank screen.
We’re prompted to give our screen a URL slug. We’ll call ours /catalogue.

Then, we’re asked to choose a minimum role that will be required to access this screen. We’re leaving this set to the default option of Basic.
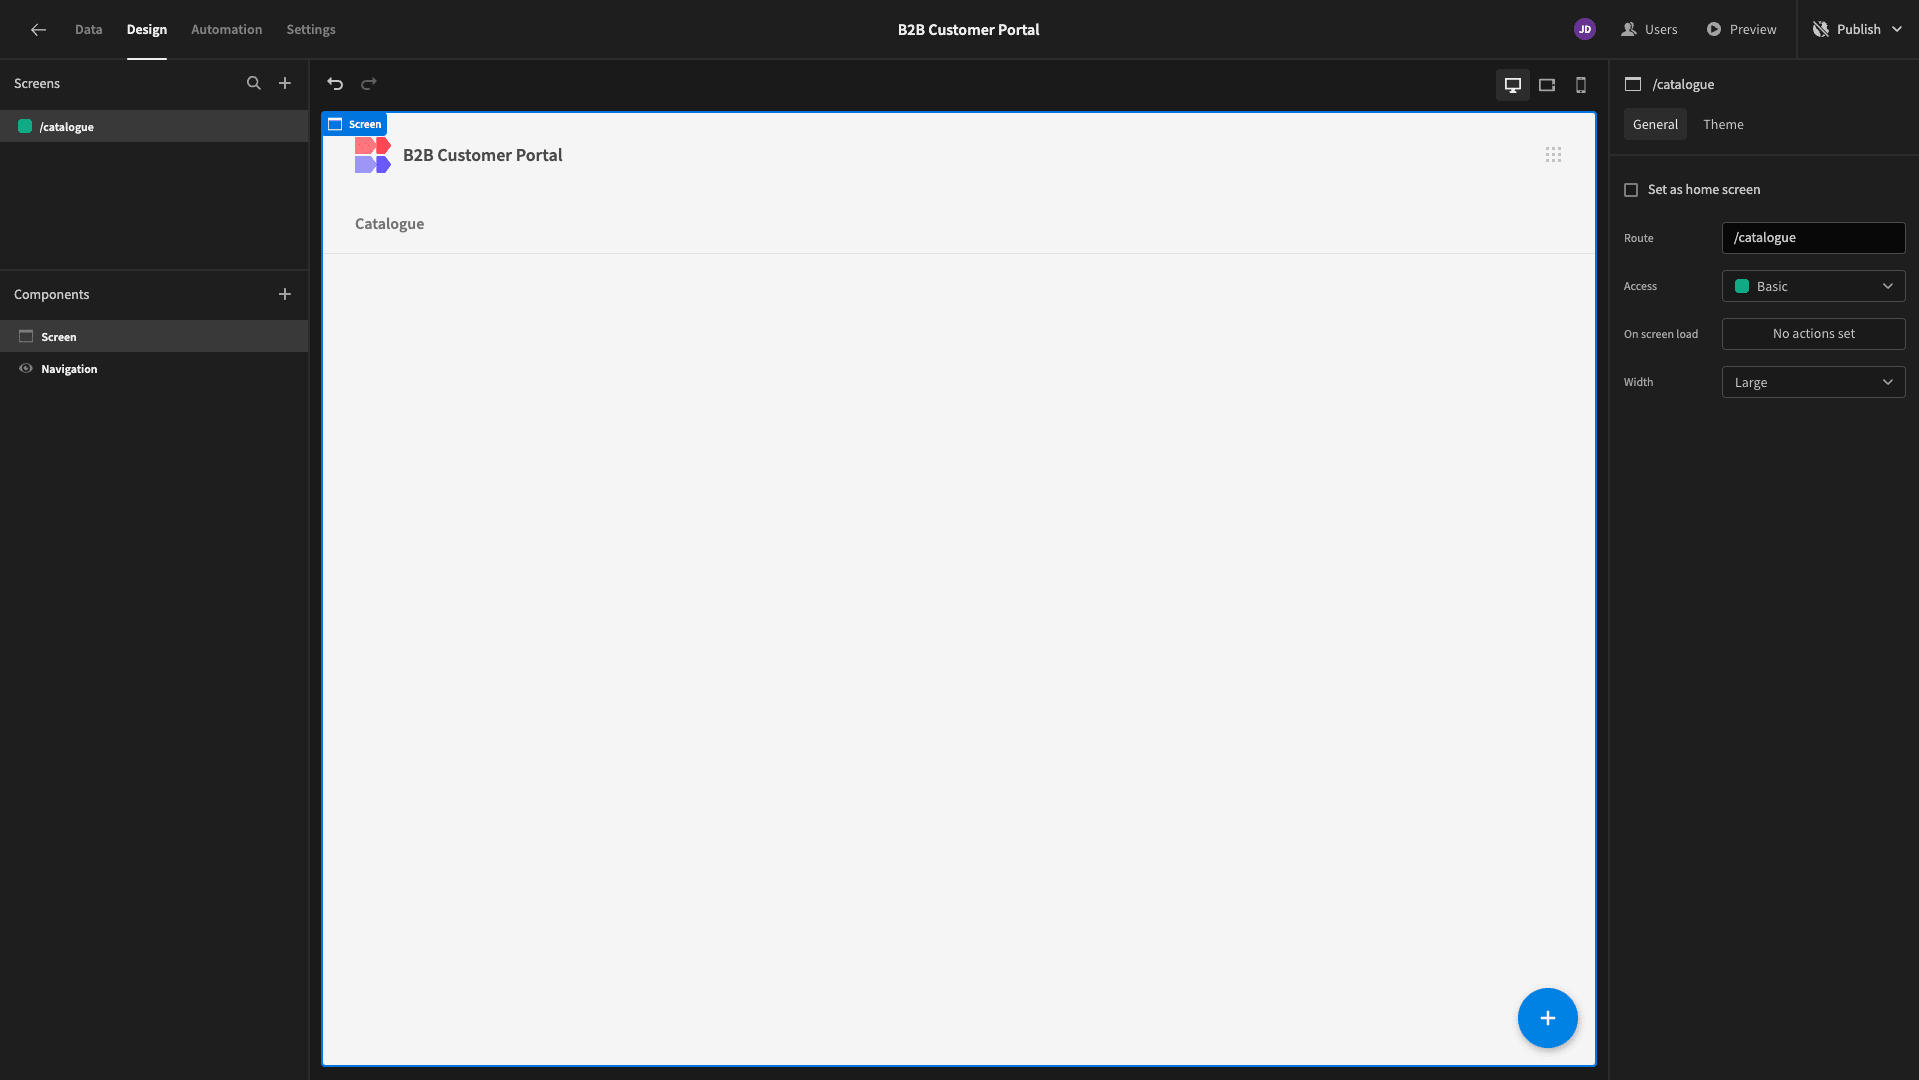
Here’s our blank screen.
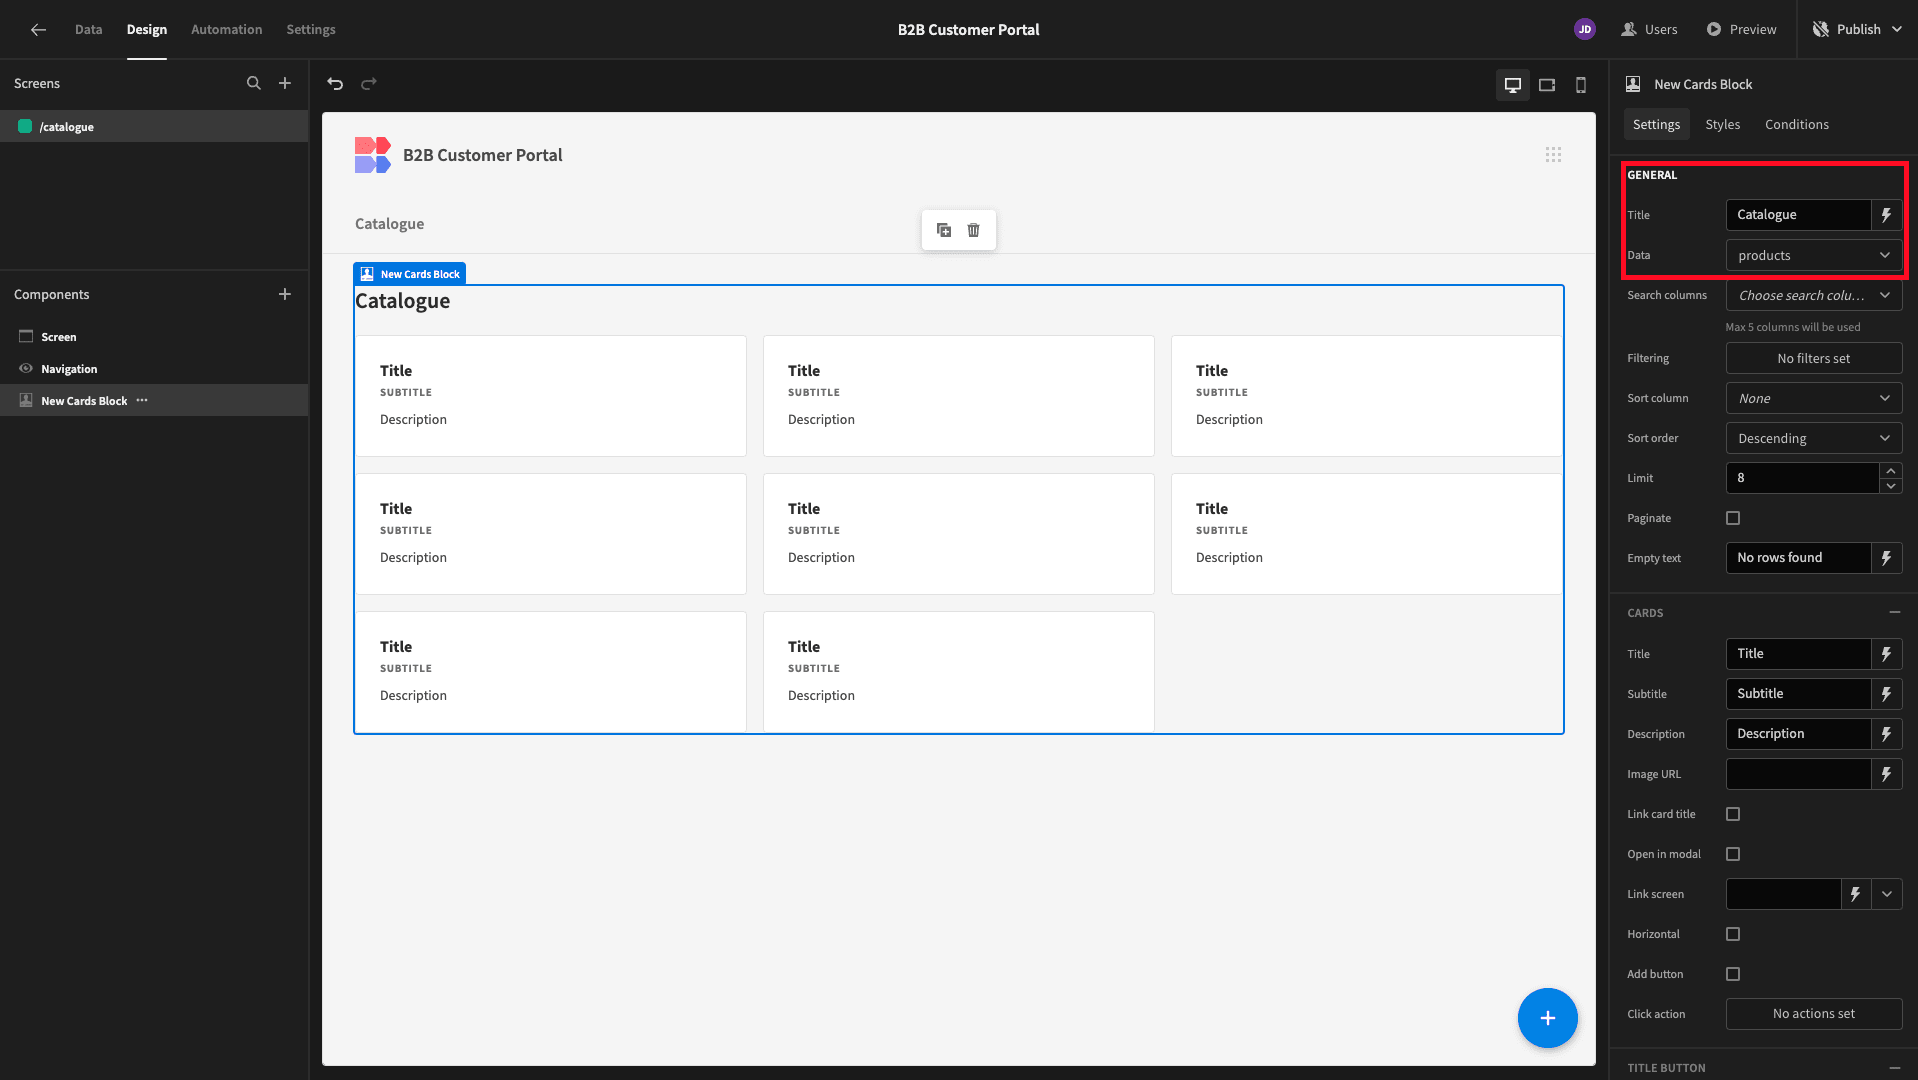
We’ll use the plus icon on the left to add a component called a Cards Block. This is a preconfigured set of elements that iterate over a connected data source and display configurable cards for each row.
We’ve pointed ours at the products table and given it a descriptive title.
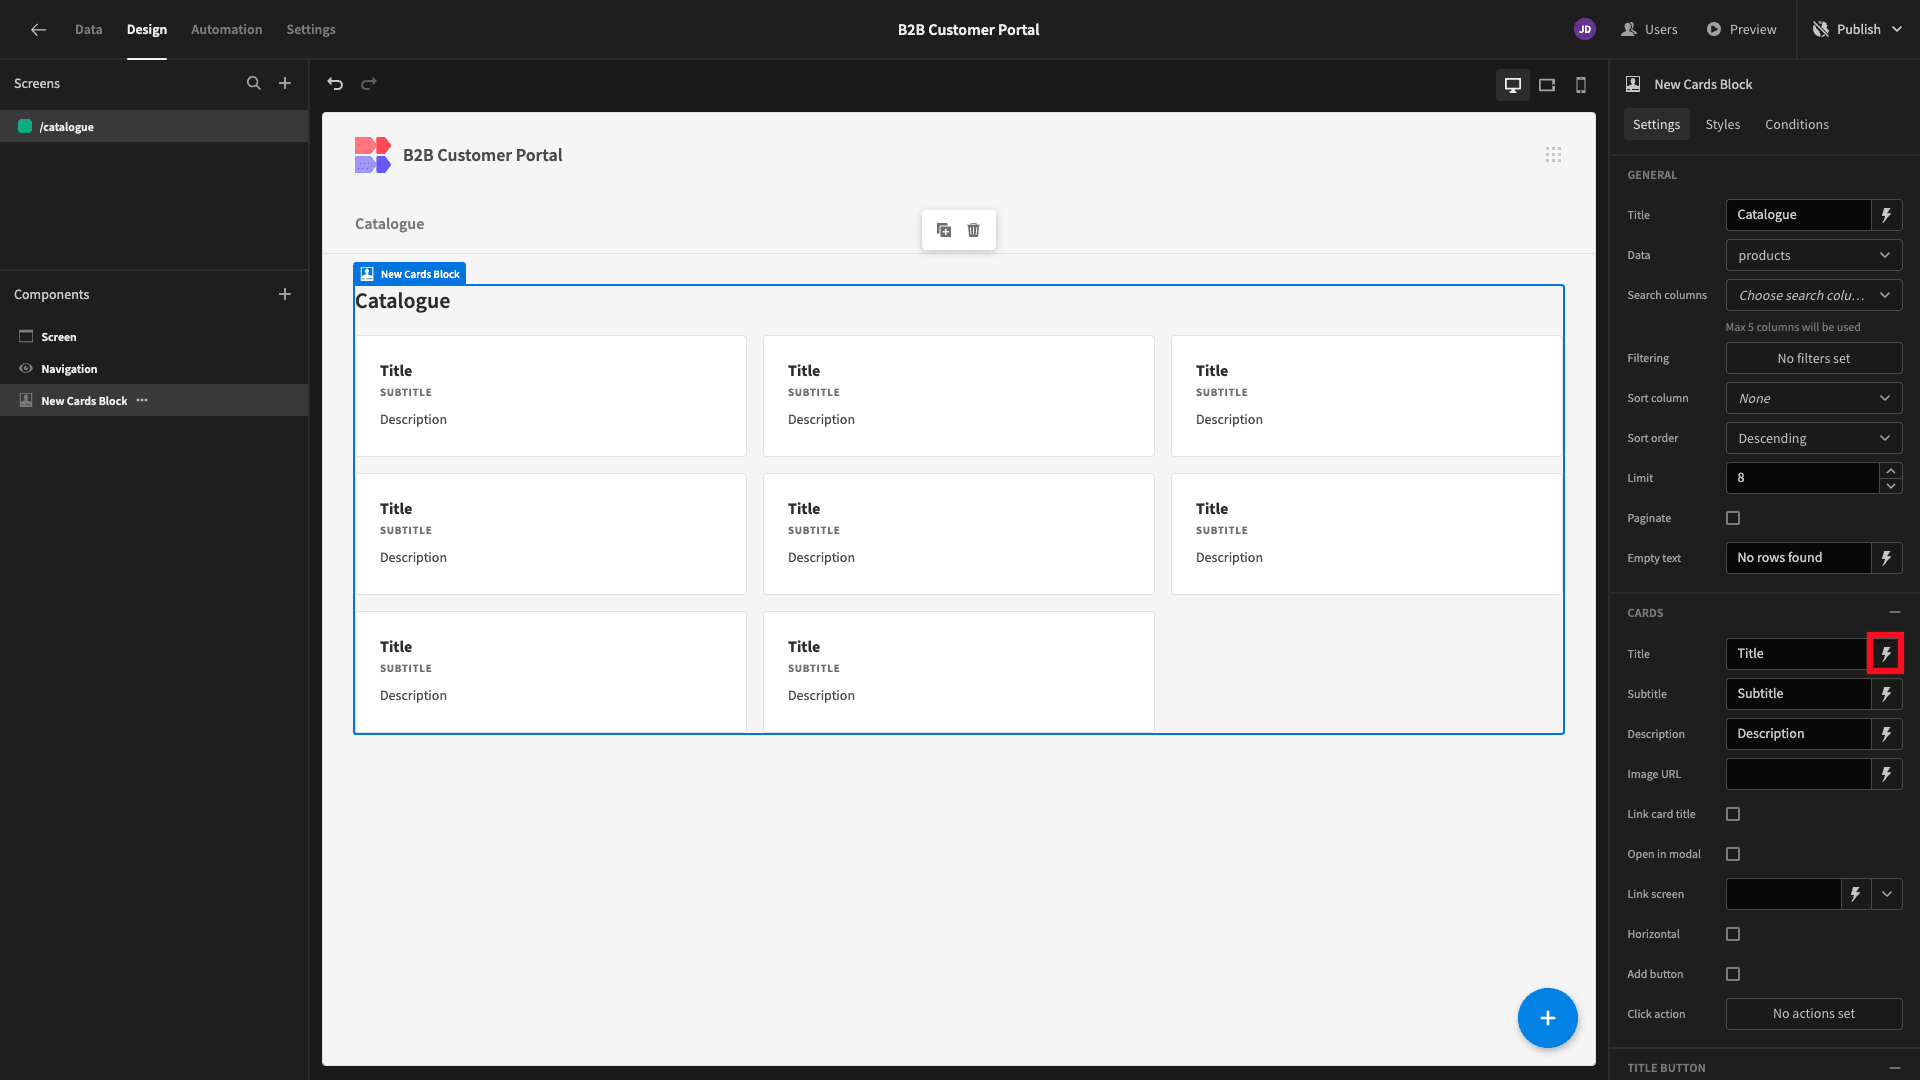
Next, we want to configure the information that each card will display. Each one accepts a title, subtitle, description, and image URL. We’ll bind these to relevant values from our products table.
Hit the lightning bolt next to the Card Title field to open up the bindings drawer.
Here, we can see all of the clusters of data that our Cards Block is exposed to. We’re choosing Products Card Block to access all of the fields for the respective products rows for each card.
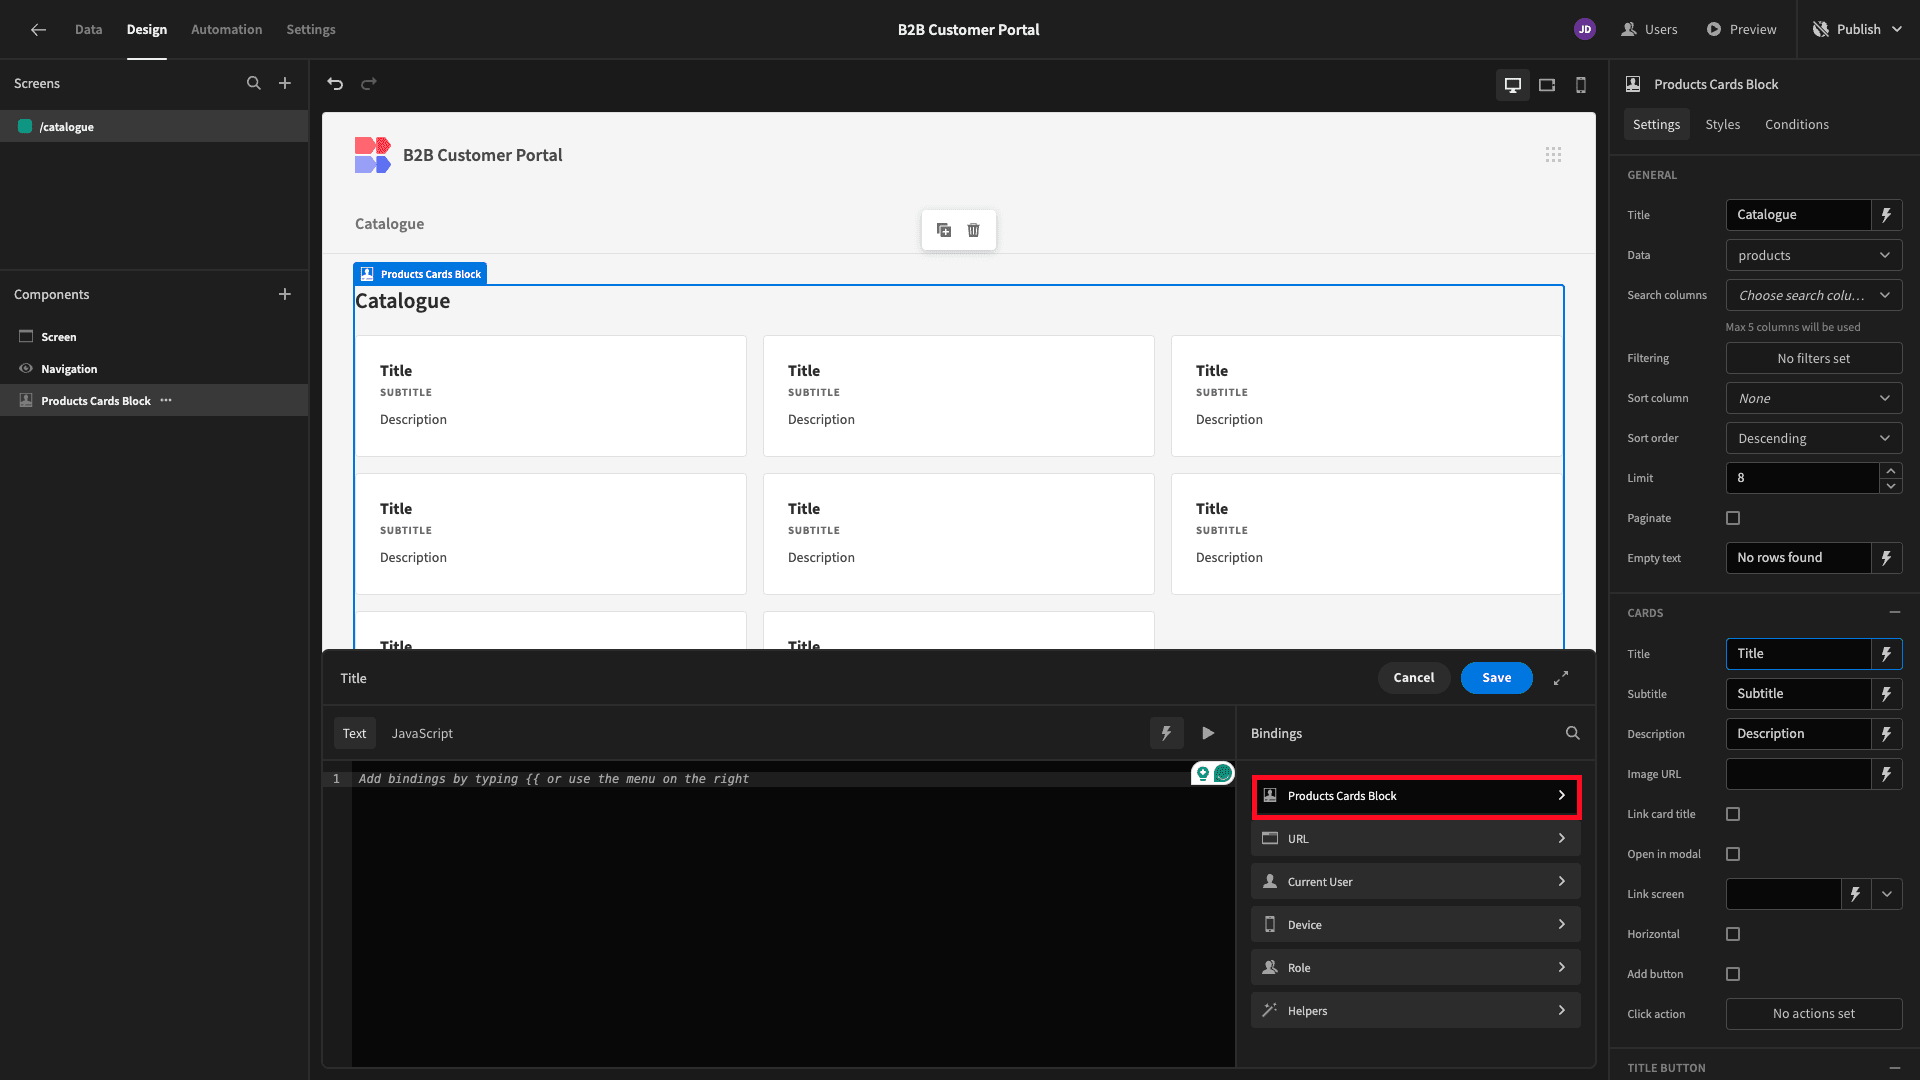
And then the product_name attribute.
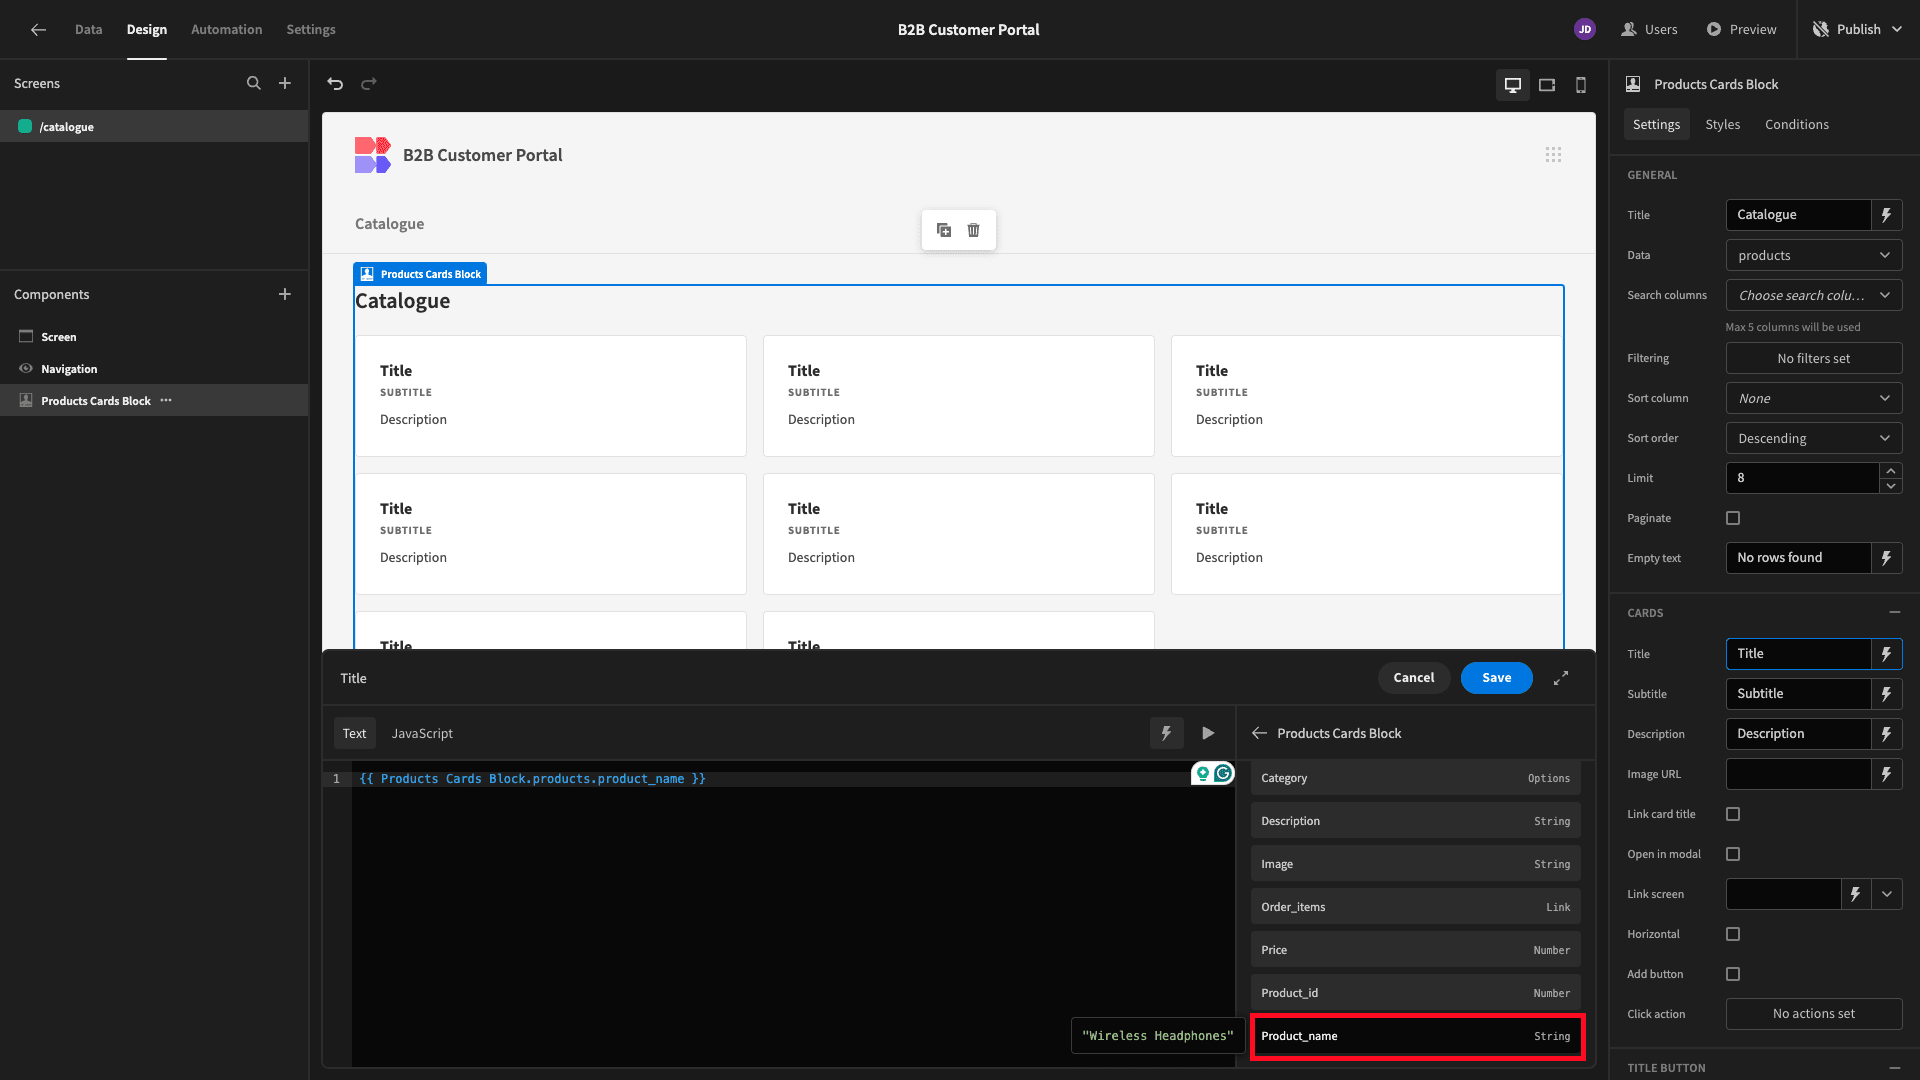
Here’s how this will look.

We’ll repeat this process to bind our subtitle to the category attribute, our description to description, and image URL to the image field.
This should look like this.
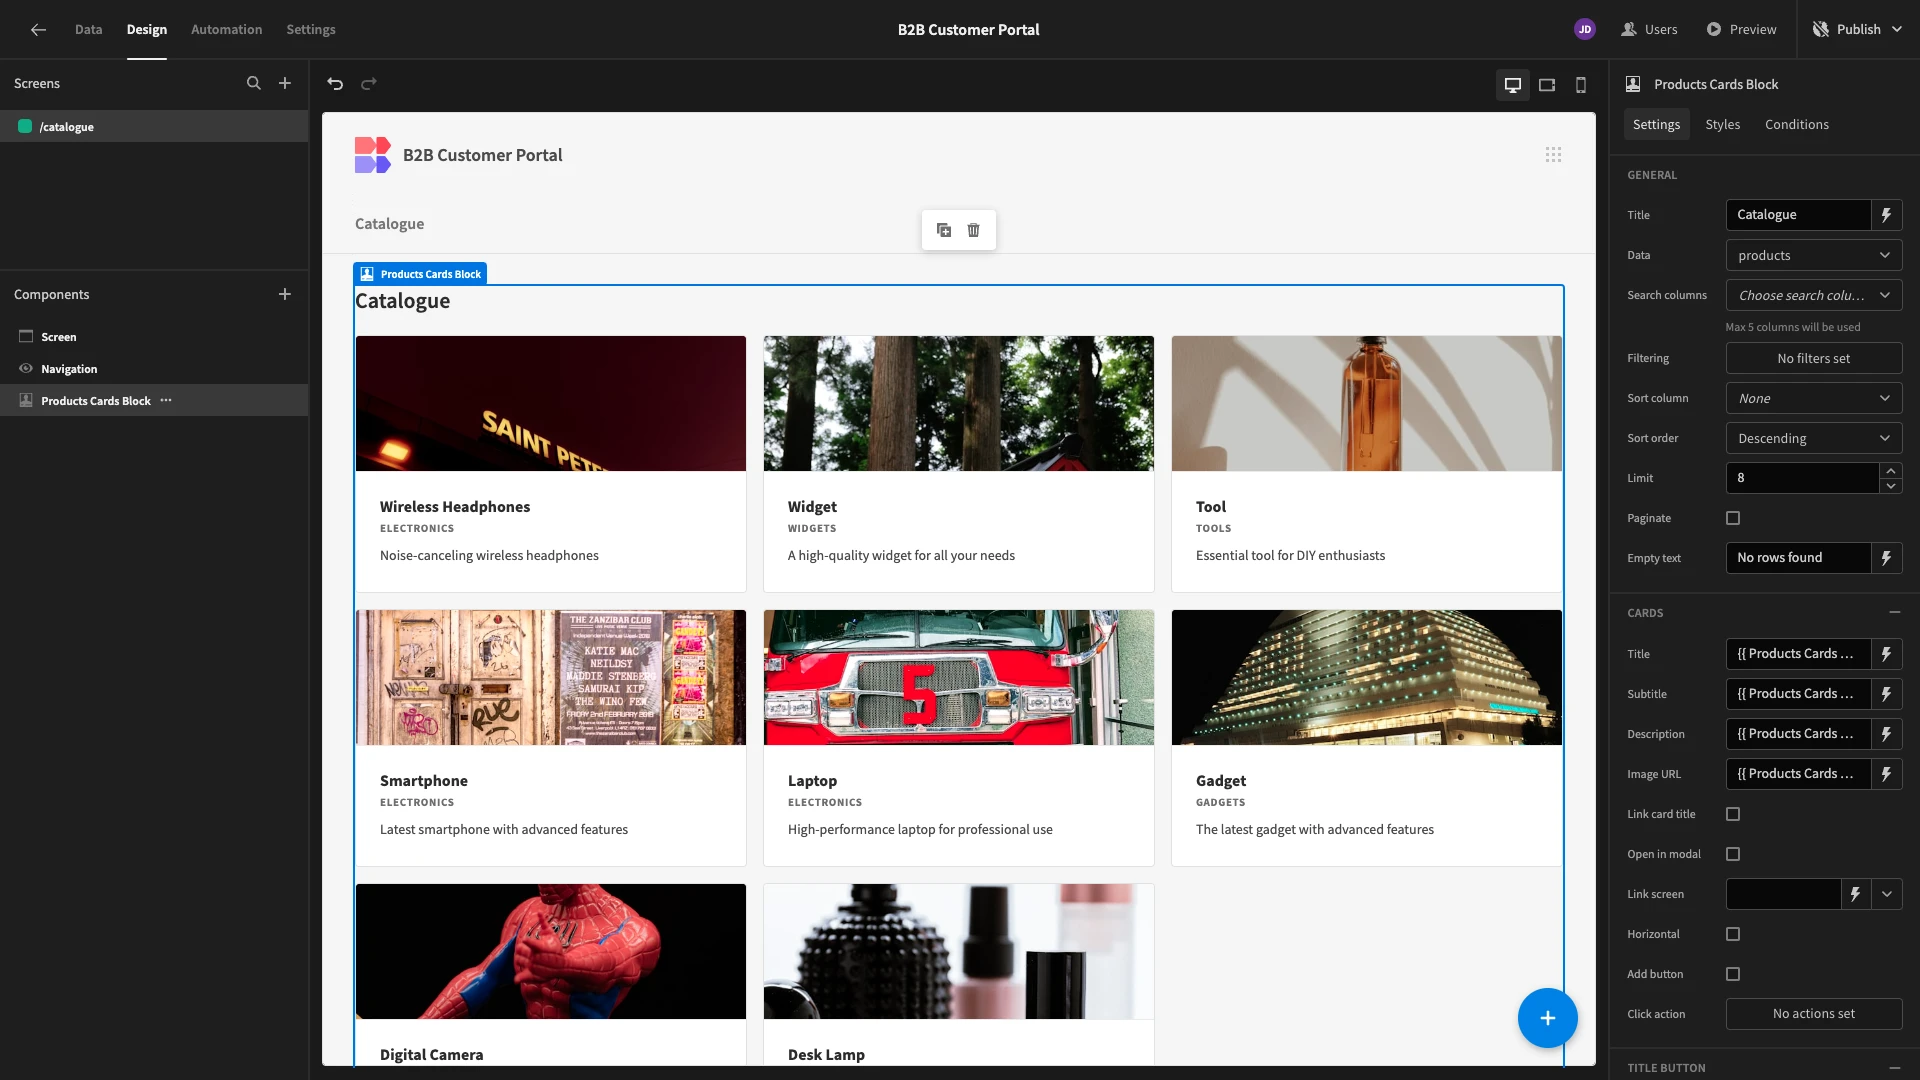
Then, we’ll select the Add Button option and set our Button Text to Quick Order.

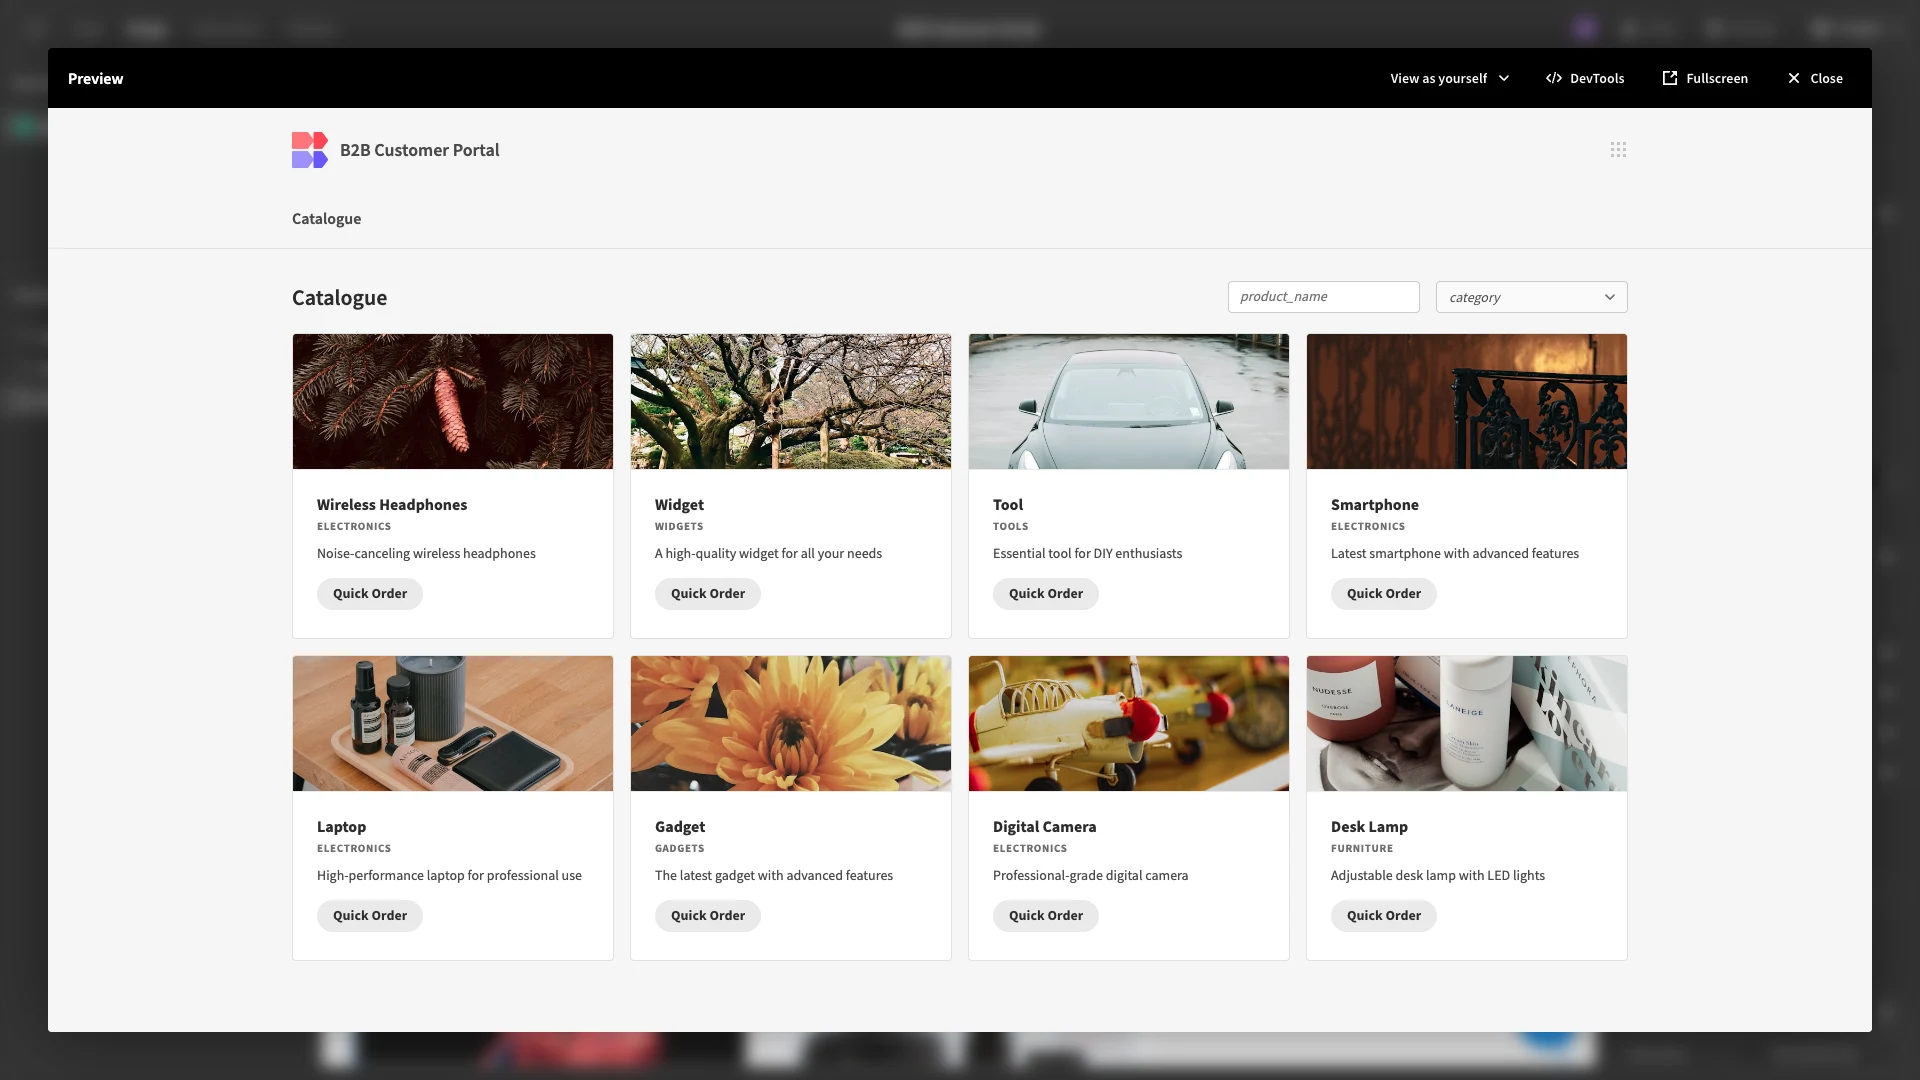
Finally, we’ll add product_name and category as searchable columns.

That’s our catalogue UI basically done, at least from a design perspective. Here’s what it looks like in our app preview.
3. Adding an order form
Next, we’ll add a form to enable contractors to quickly order any of our products from the catalogue. This will open in a modal when a user clicks on any of our card buttons.
Before we build the form itself, we need to add a little bit of logic to store the information of the appropriate product.
So, on our Cards Block, we’ll open the button actions drawer.
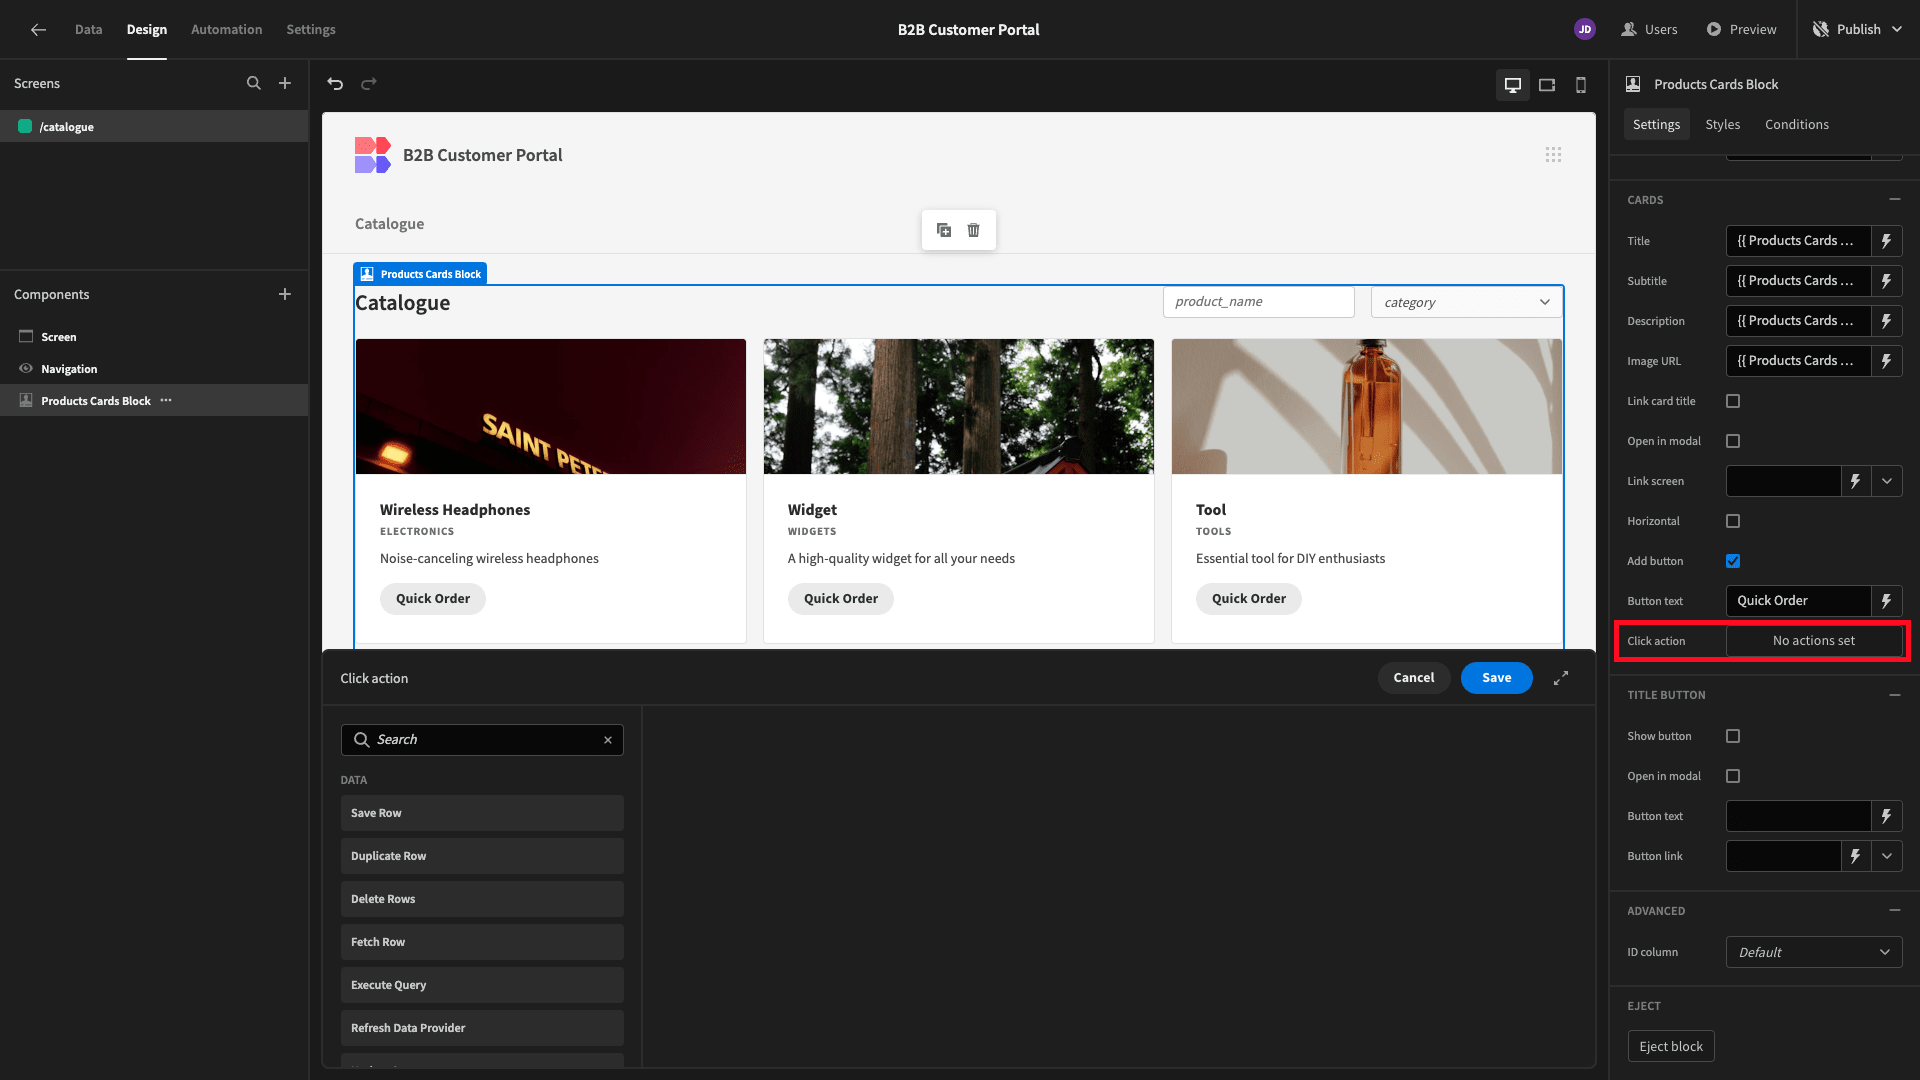
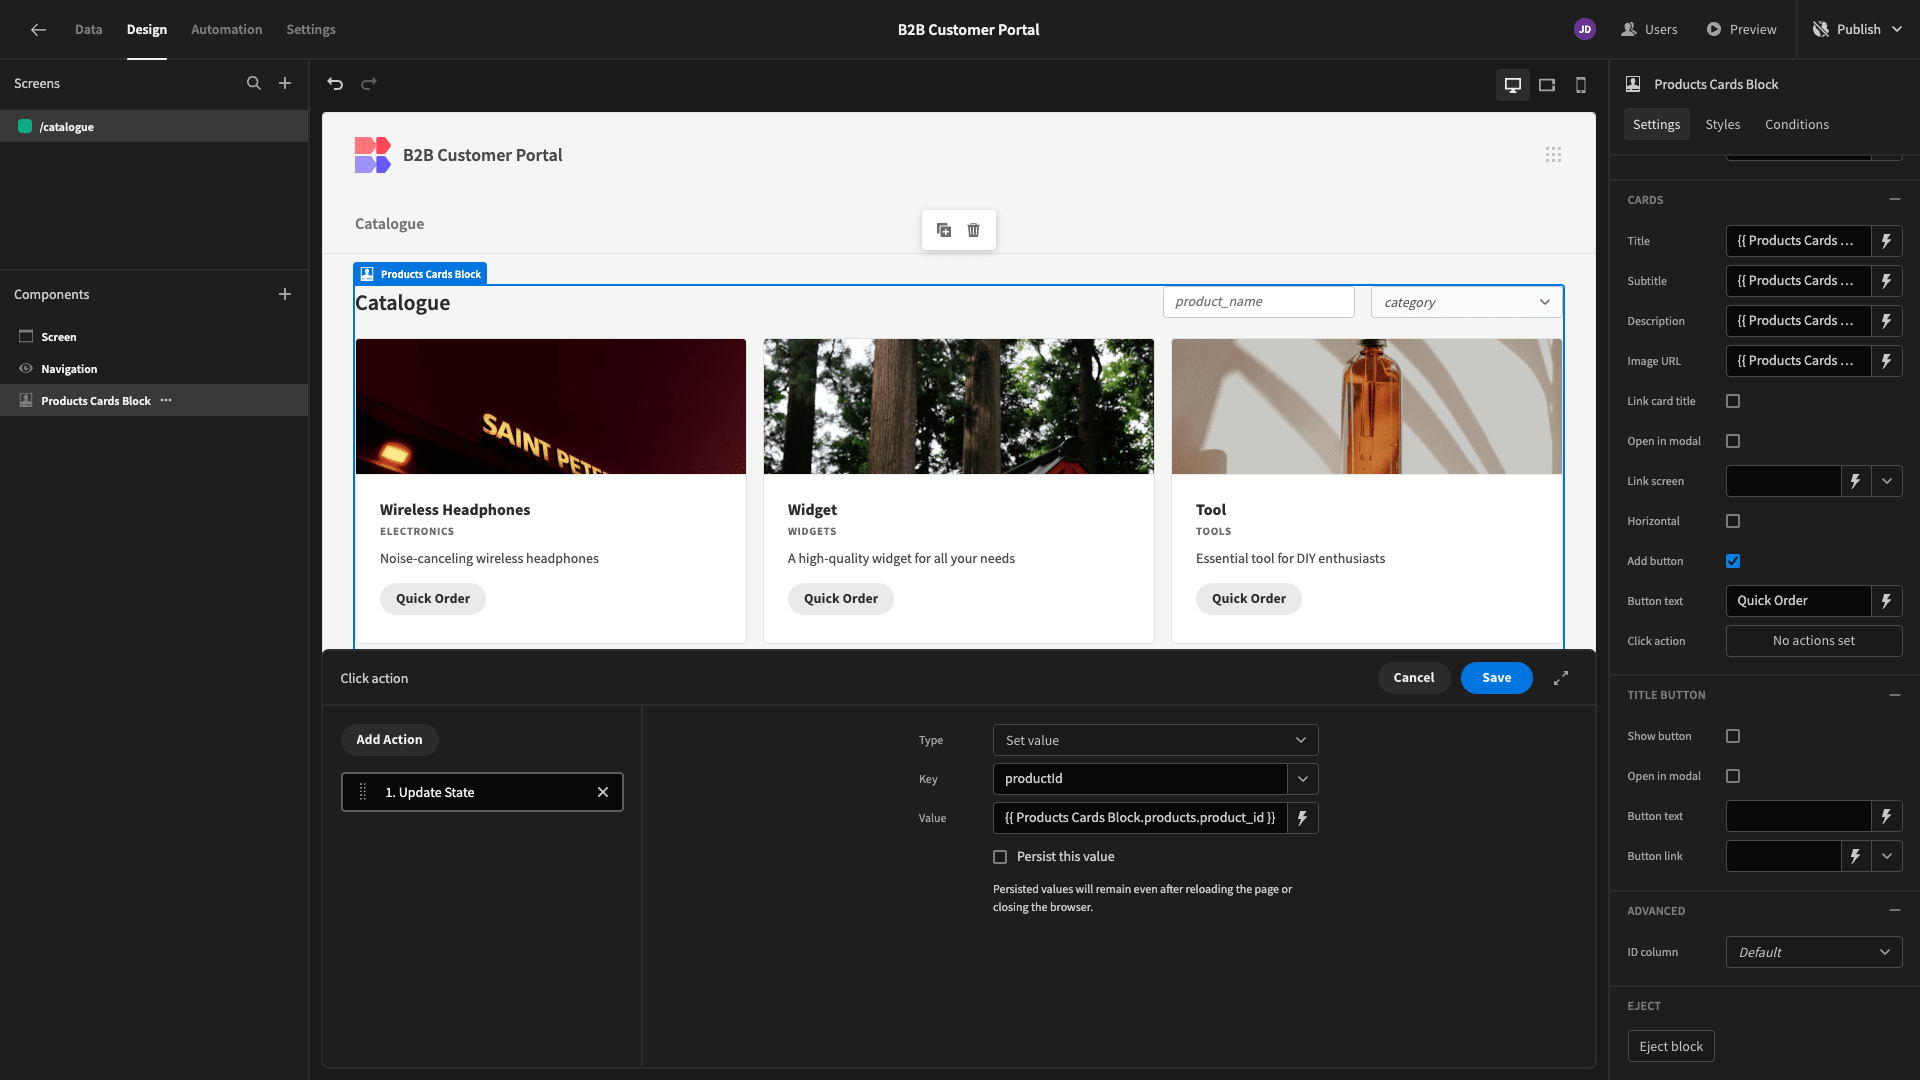
Here, we’ll add an action called Update State. This stores a key/value pair that we can use elsewhere as a bindable value. We’re setting our key to productId and binding the value to the relevant row’s product_id attribute.
Next, we’ll add a new screen. This time, we’re choosing the Form Layout.
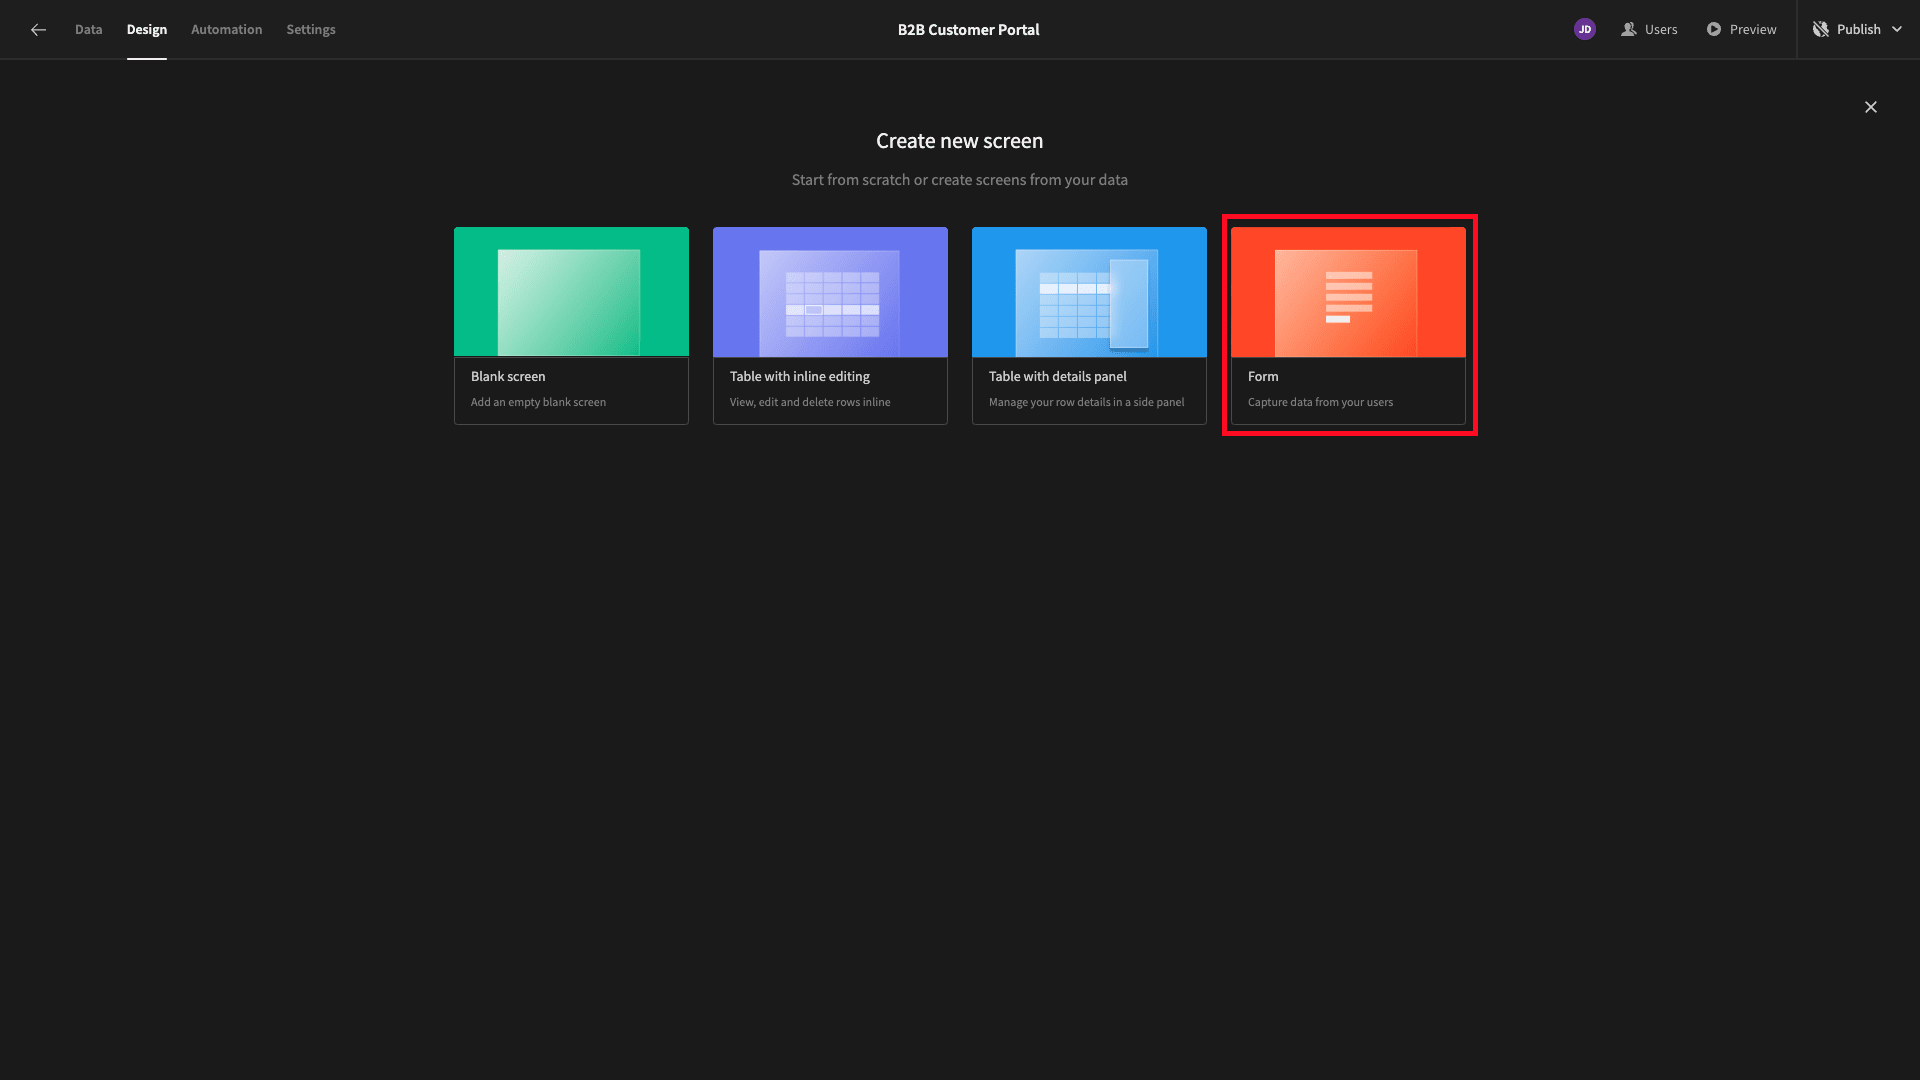
This autogenerates a working form UI based on whichever data table we select.
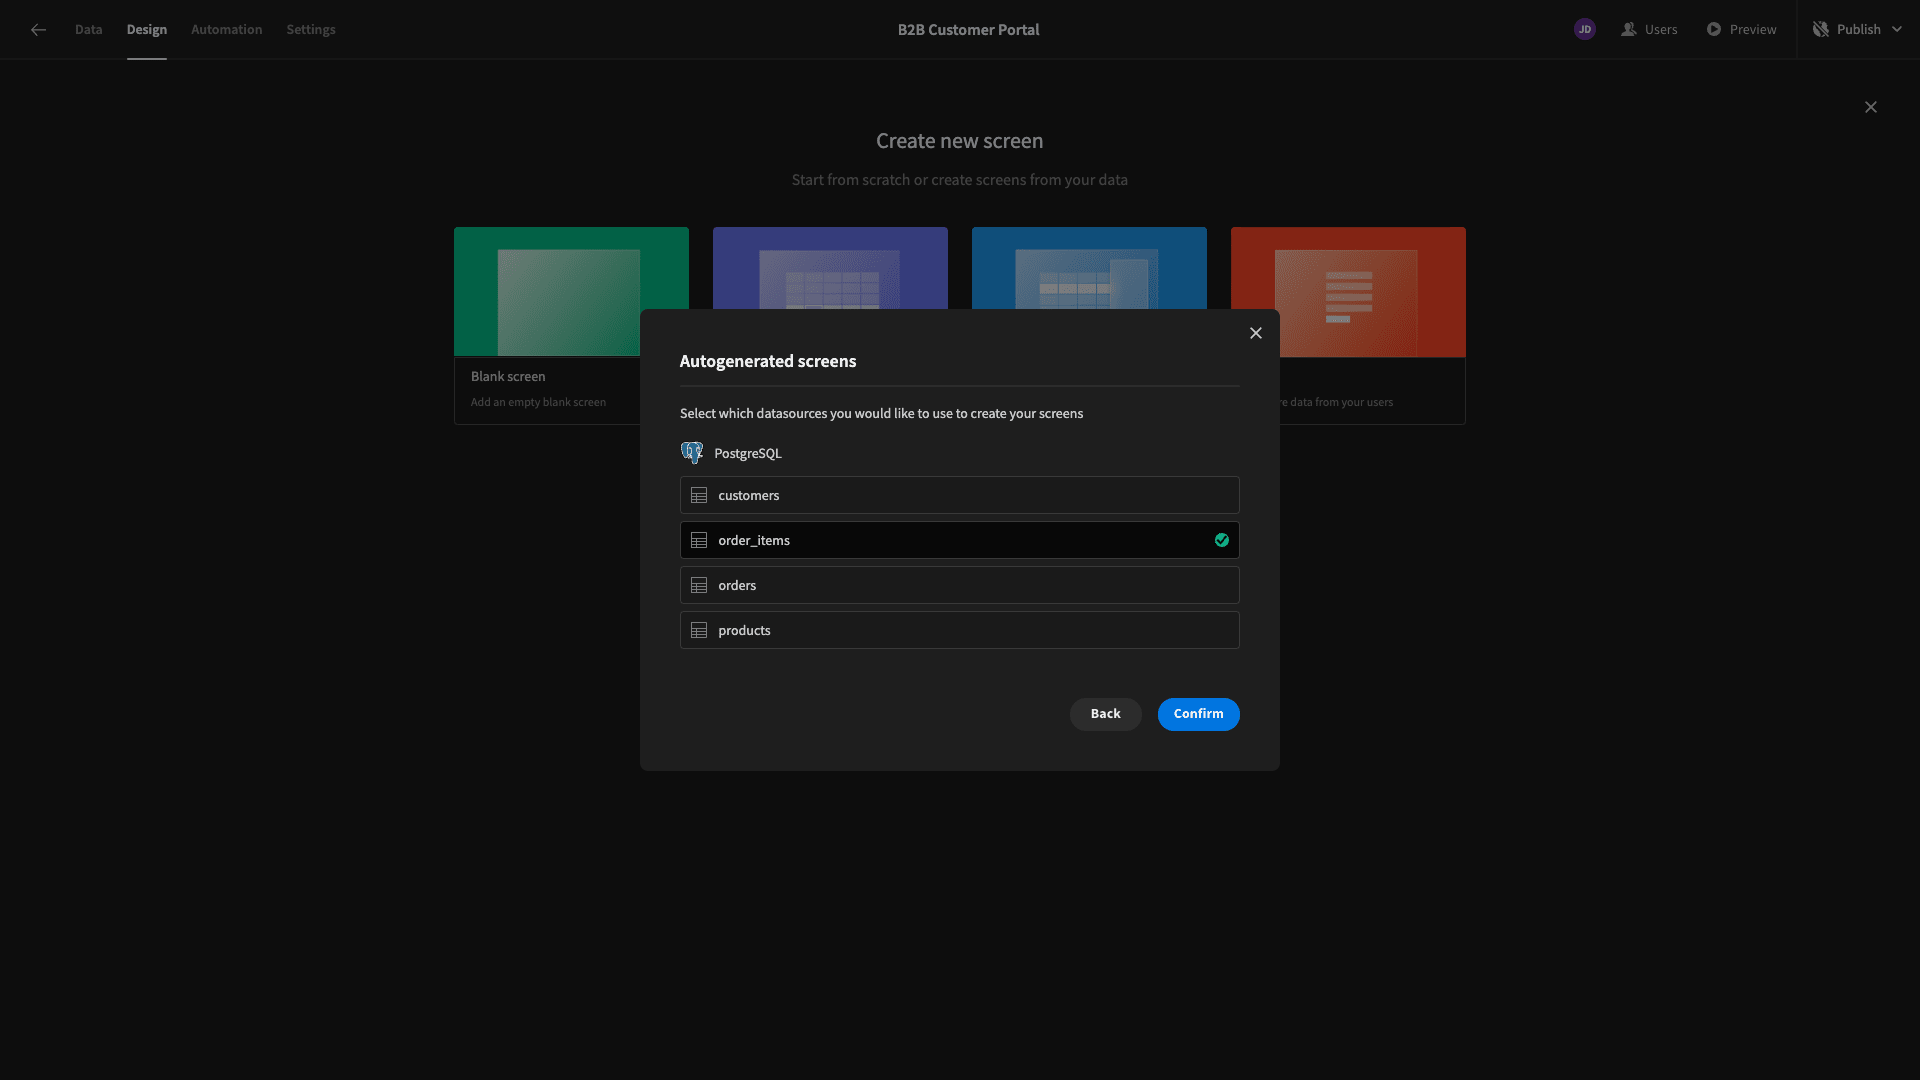
We’re choosing the order_items table.
We then need to choose which kind of form we need. We want to create a row, so we’ll select this option.
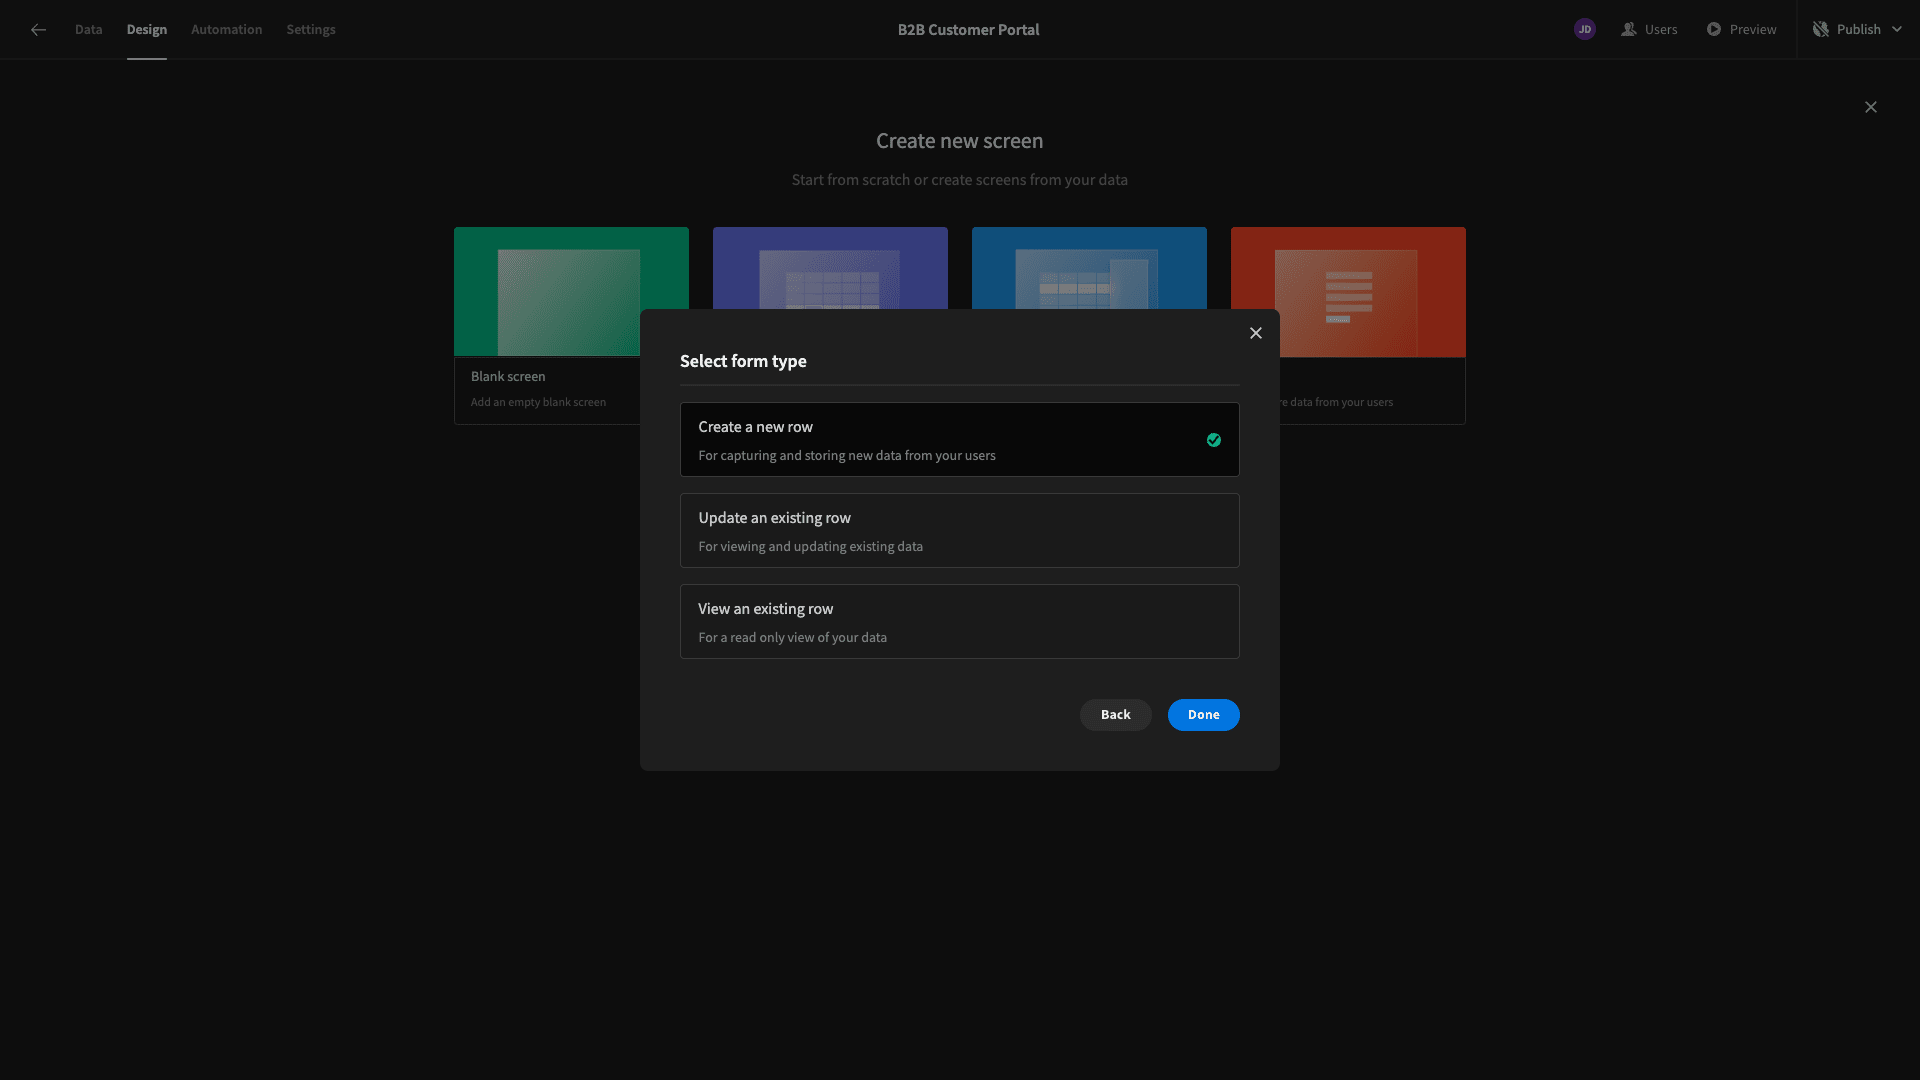
We’ll also be asked to choose an access role, but we’re leaving this set to Basic again.
Here’s how our form looks out of the box.
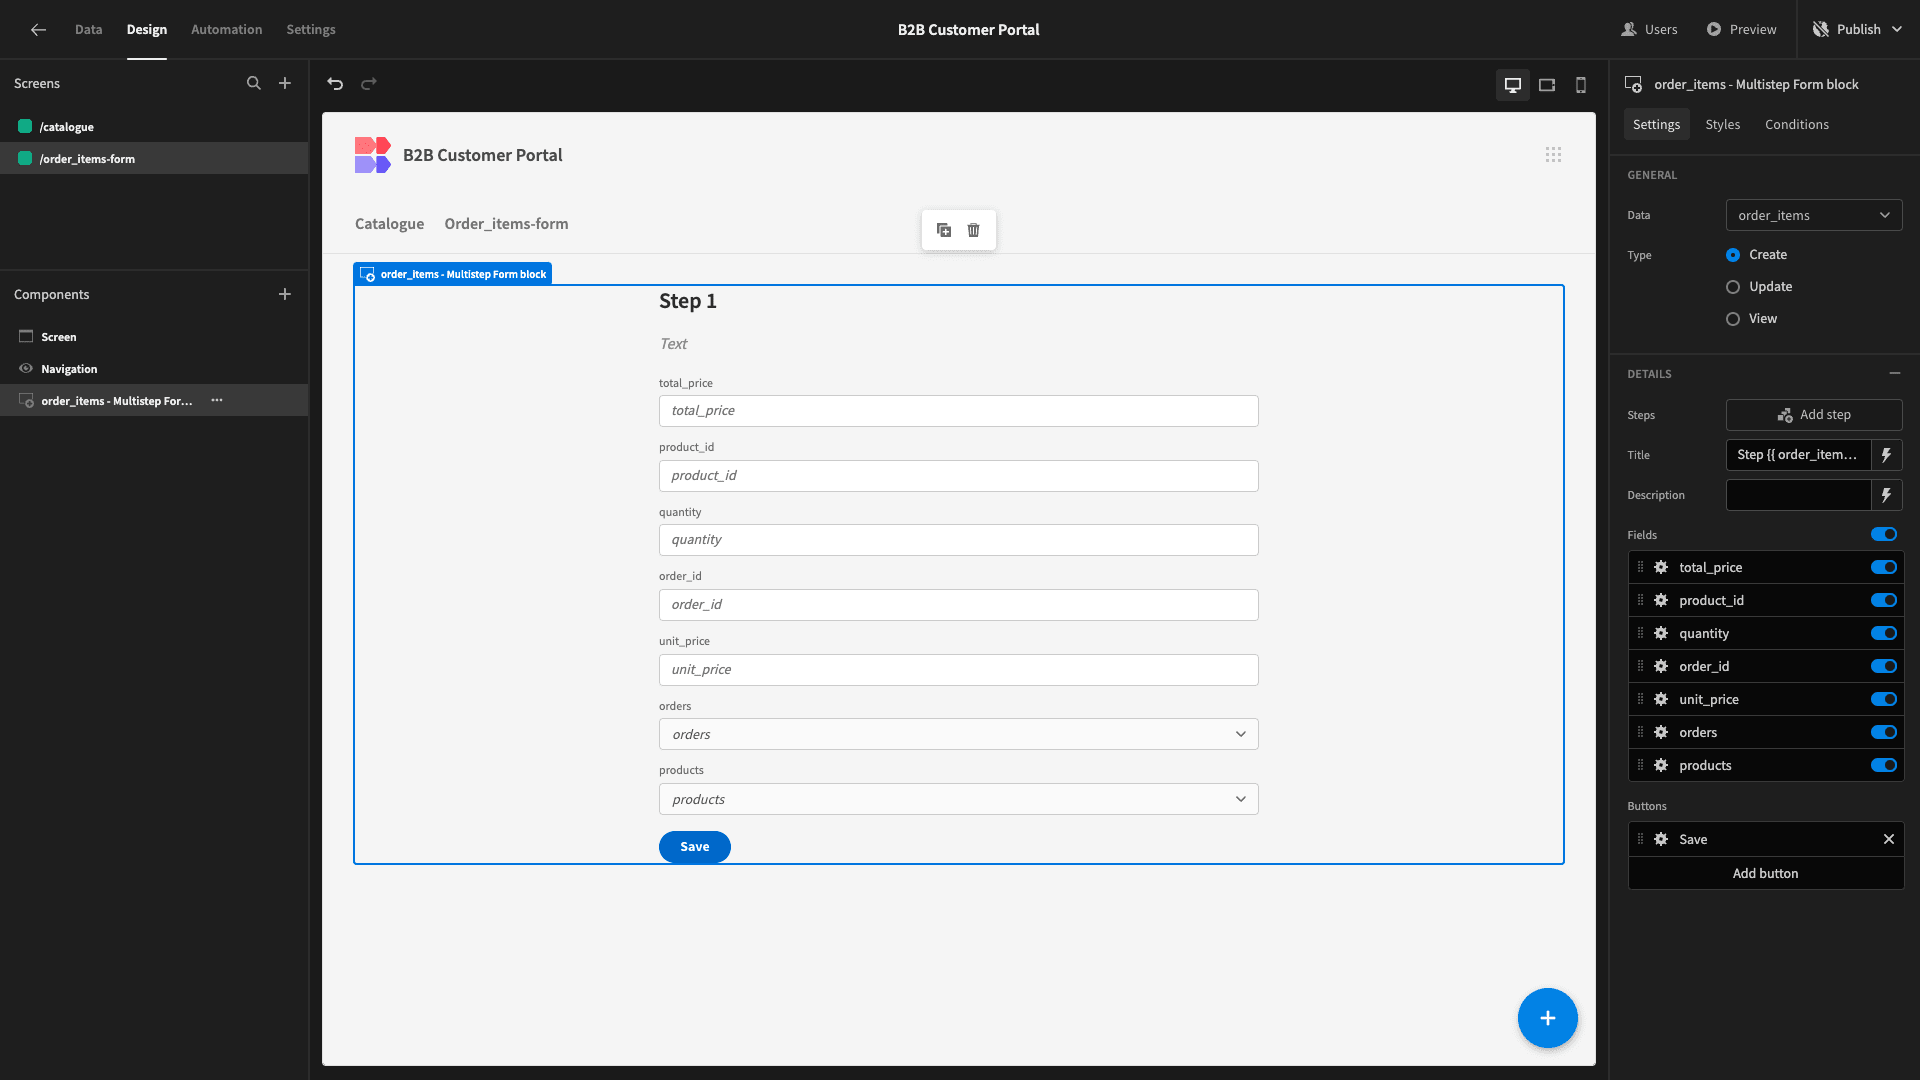
We’re going to make some pretty extensive changes to this. In fact, we’re going to need to create rows in two separate tables - both order_items and orders. We’ll also need to access information from the orders and products tables to populate all our values.
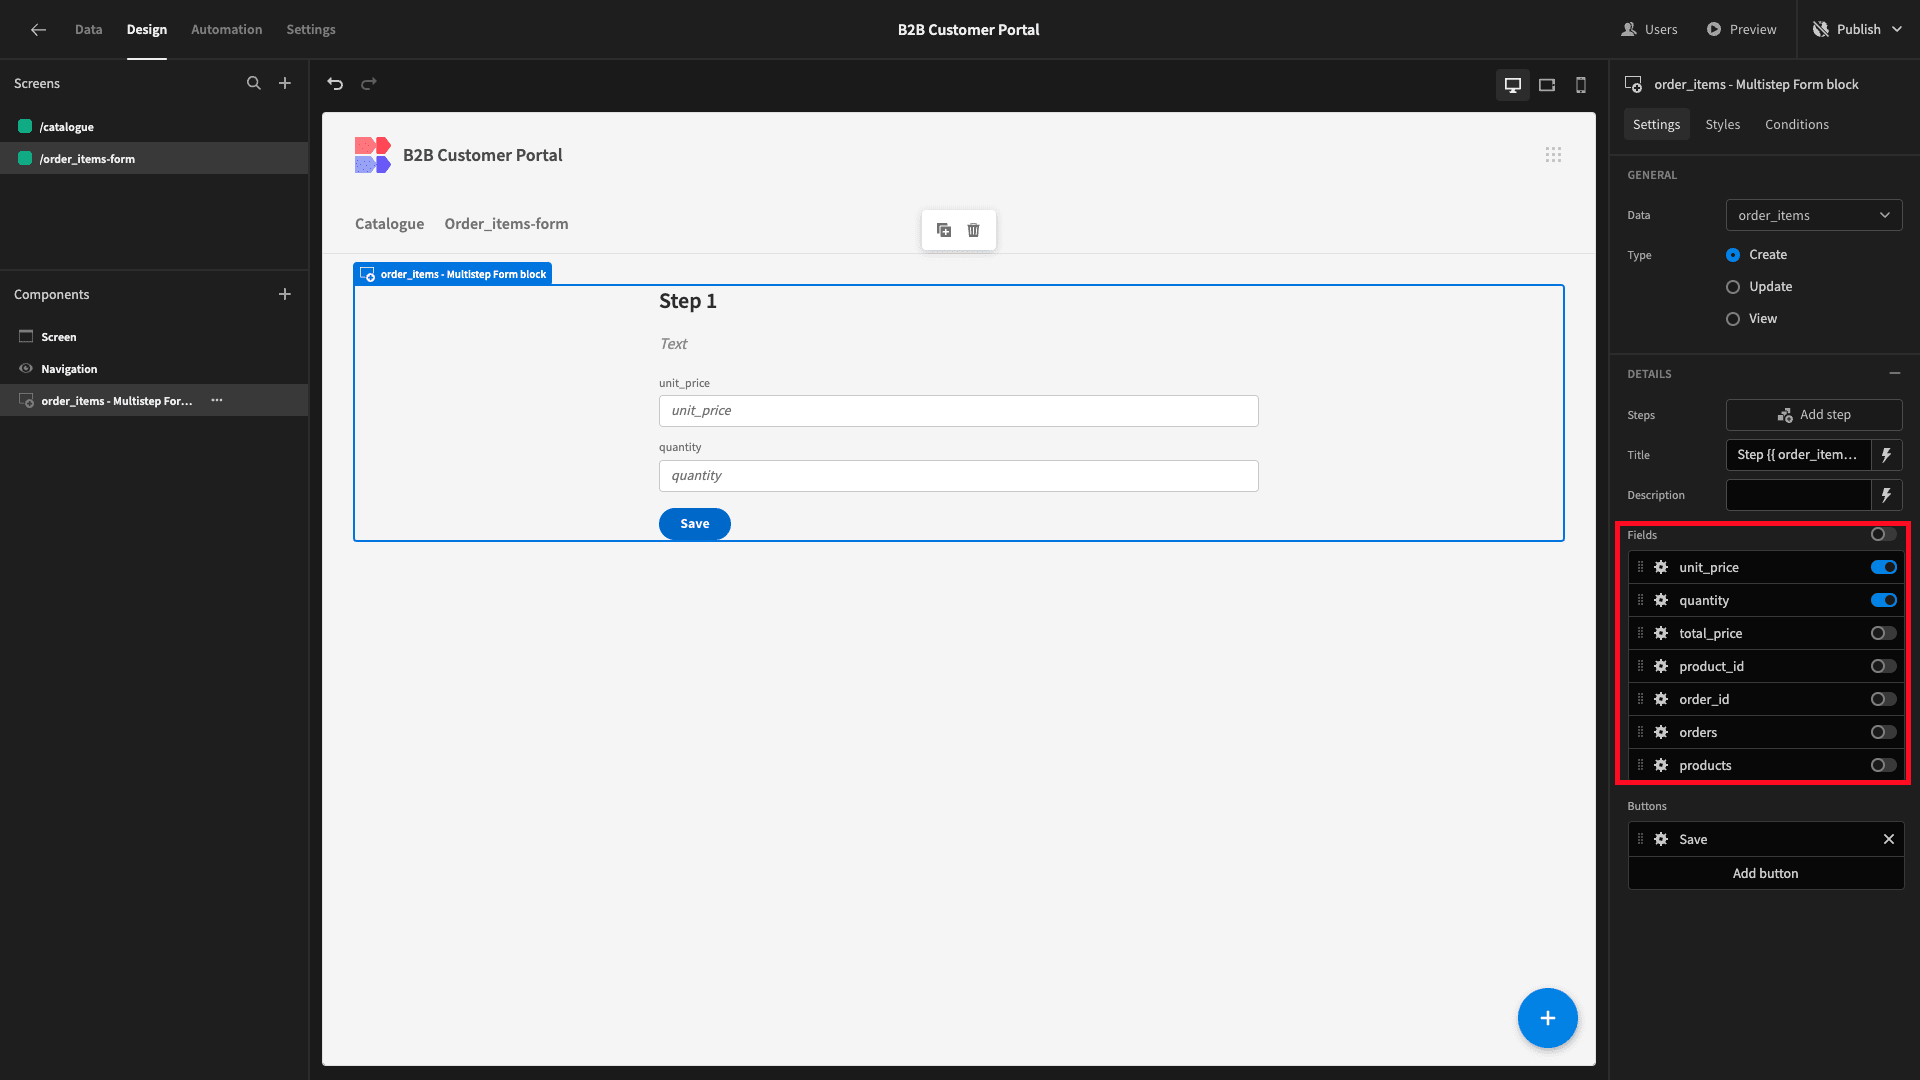
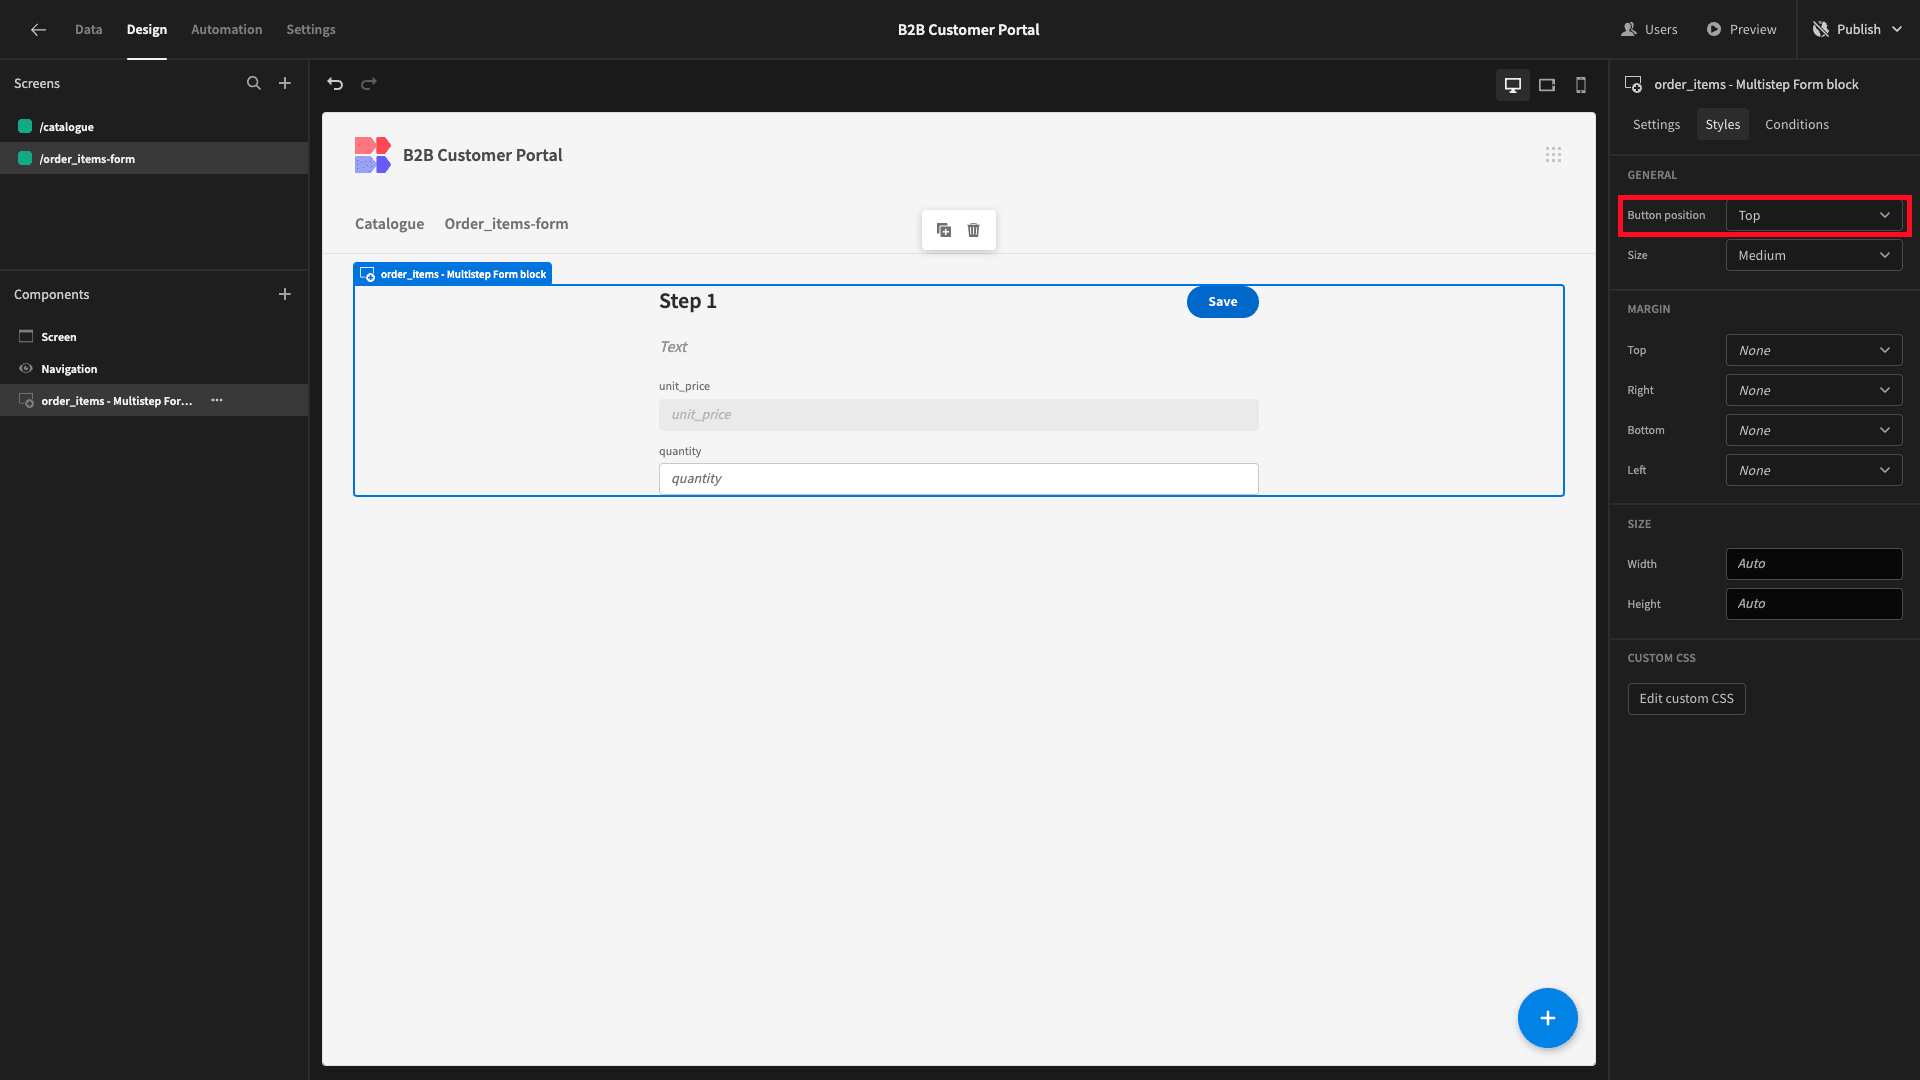
We’ll start by configuring the fields we want to display. We’re only going to accept user inputs for a single field - quantity. Everything else will be populated automatically.
We can start by deselecting all of our form fields except for quantity and unit_price.
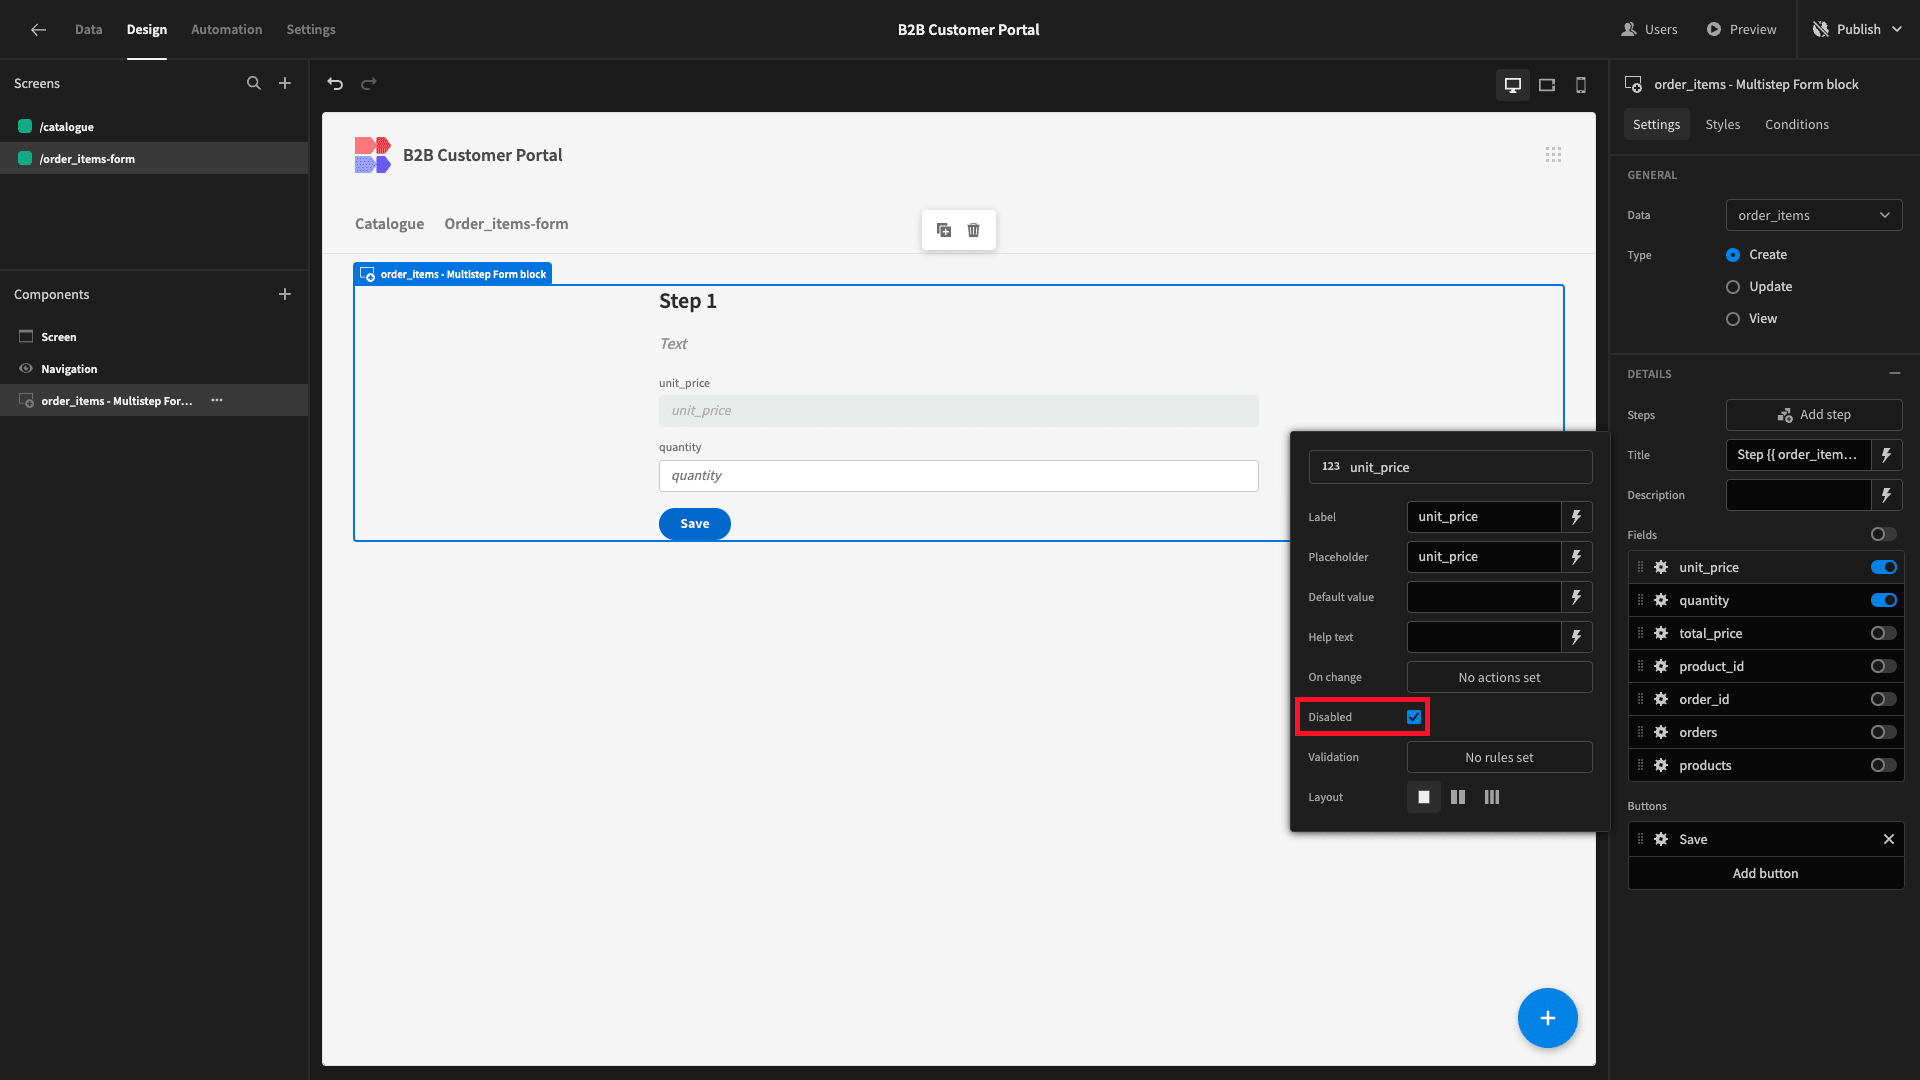
We’ll also select the Disabled option on the unit_price field.
Under Styles, we’ll set our Button Position to Top.
Before we go any further, we need to be able to access relevant data from the products and customers table. We can do this by adding two Data Provider components.
These accept a data source and expose other components on the screen to the stored information as bindable values.
We’ll create one for the products table and one for customers.

These won’t be visible to end users.
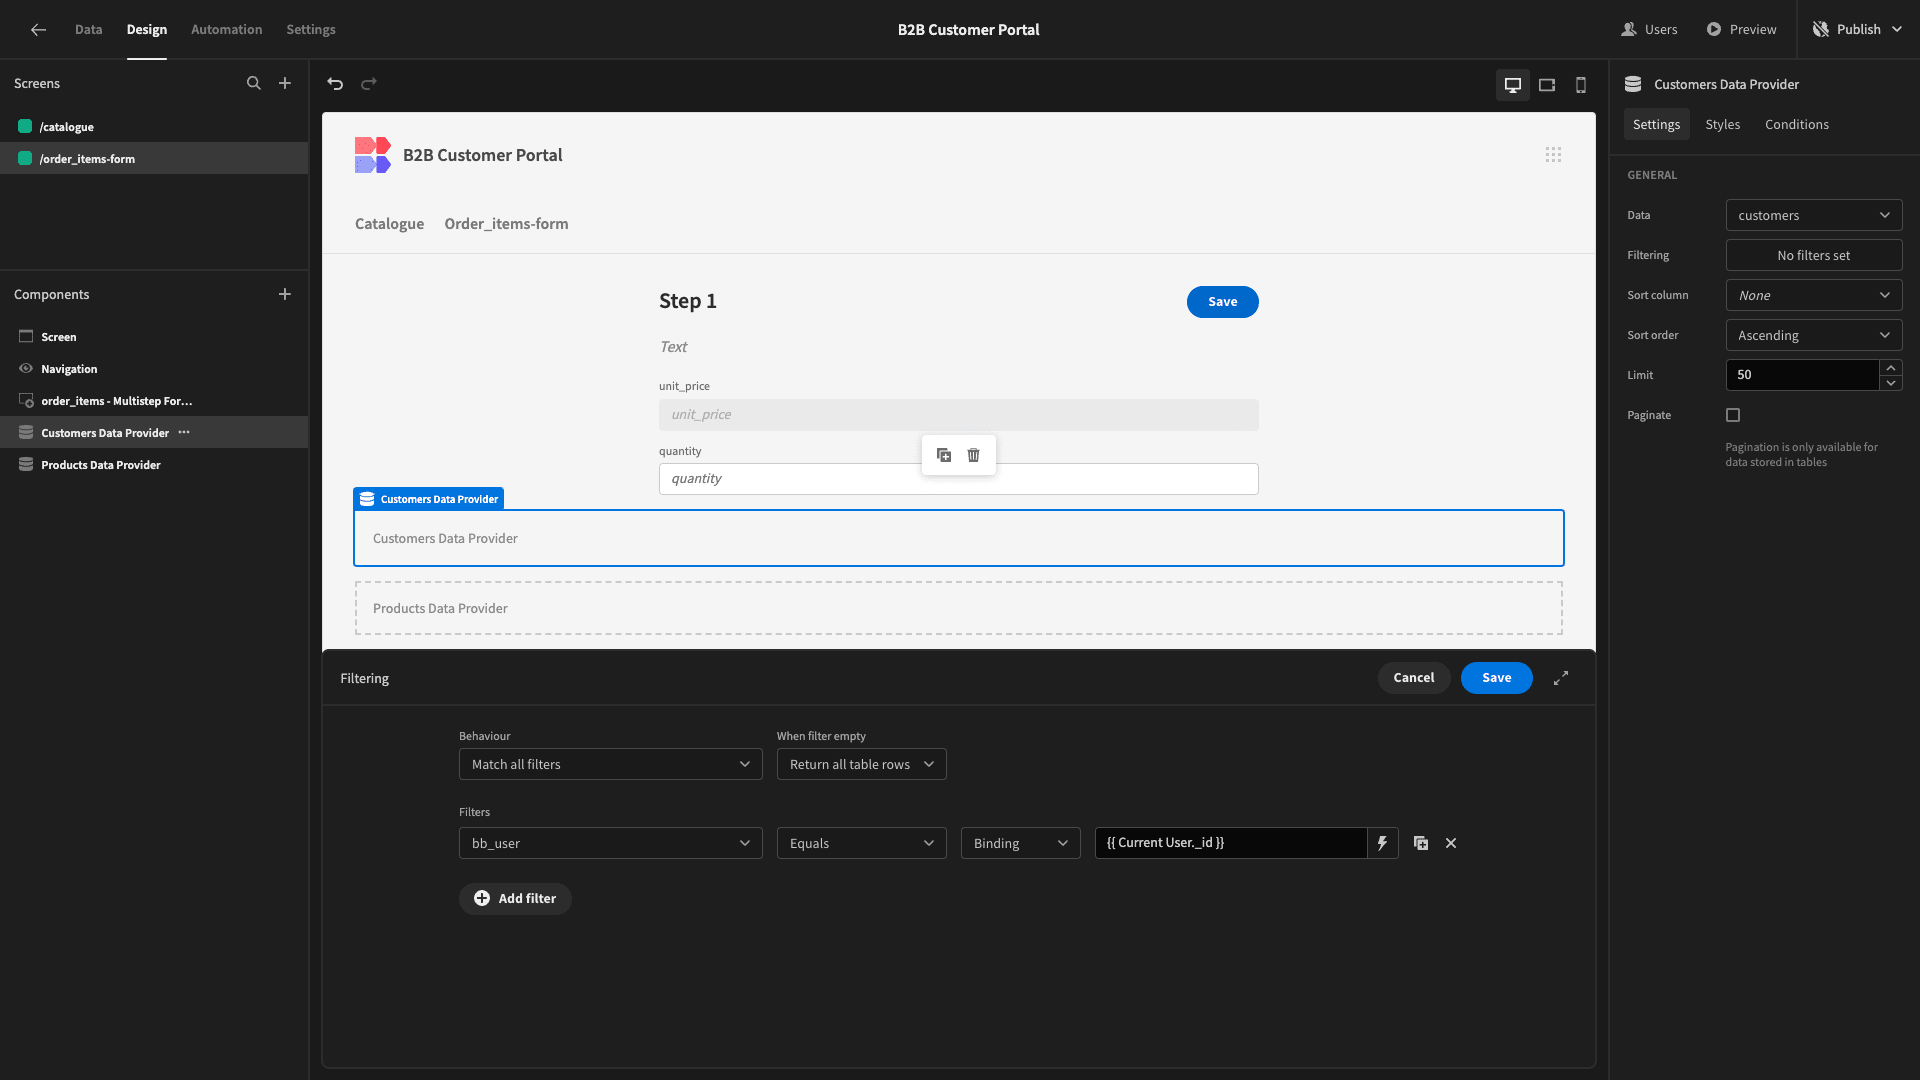
However, by default, they’ll return all of the rows from their respective data tables. For our purposes, we need to add filtering expressions to select the relevant rows.
Specifically, we want the products row that matches the item in our catalogue that a user clicked on and the customers row that relates to the current user.
We’ll open the filters drawer for our products Data Provider and add a rule based on the product_id attribute.

Then, we’ll use the bindings menu to set our comparison value to {{ State.productId }}.

We’ll follow the same process to filter our customers Data Provider to select the row where bb_user equals {{ Current User._id }}.
Now, we can carry on creating our order form UI.
We’re going to start by giving our form a more appropriate title. Specifically, we want this to read ‘Quick Order - ‘ followed by the name of the product.
We’ll open our bindings menu. Then, we’ll start by inputting our string and then selecting Products Data Provider.
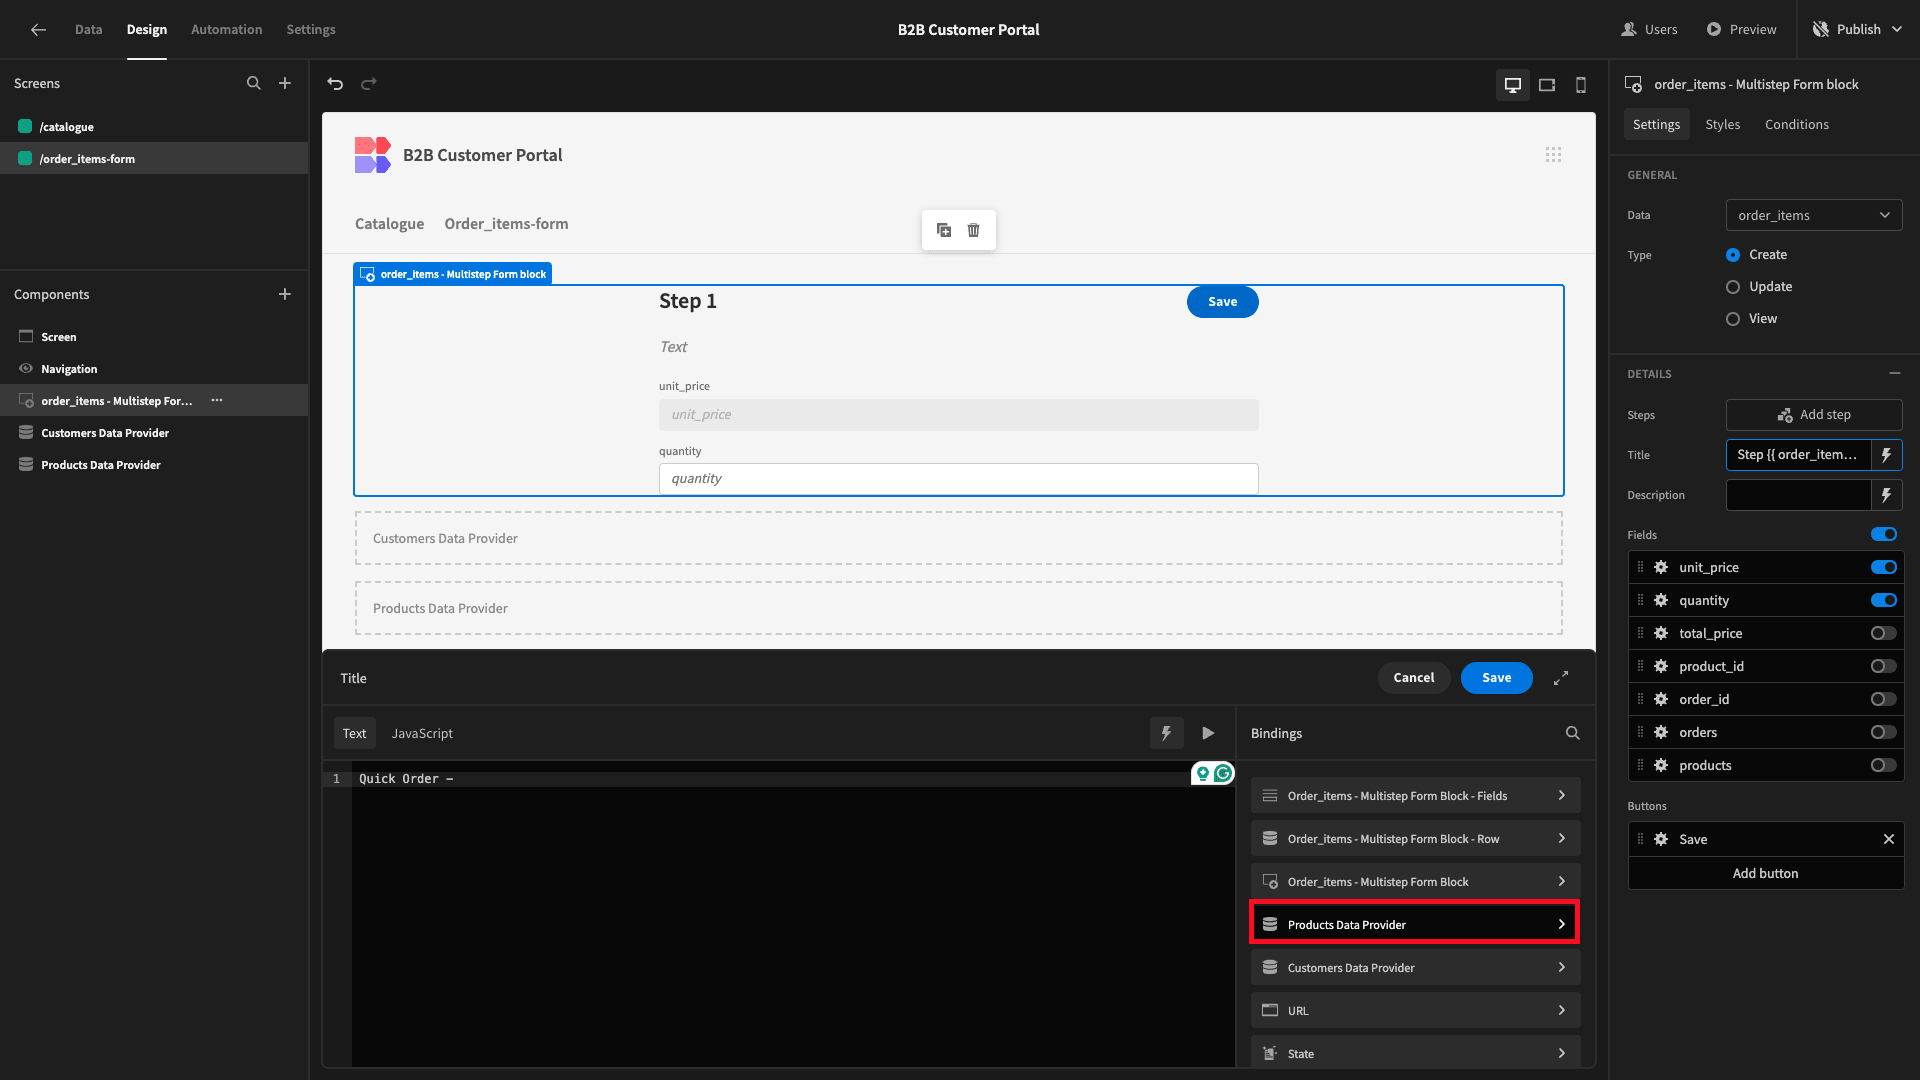
To access specific values from our data providers, we need to specify the row index and the attribute name.
Since both of our data providers should only return a single row, the index will always be 0. So, to access the relevant products row, we can use {{ Products Data Provider.Rows.0.product_name }}.
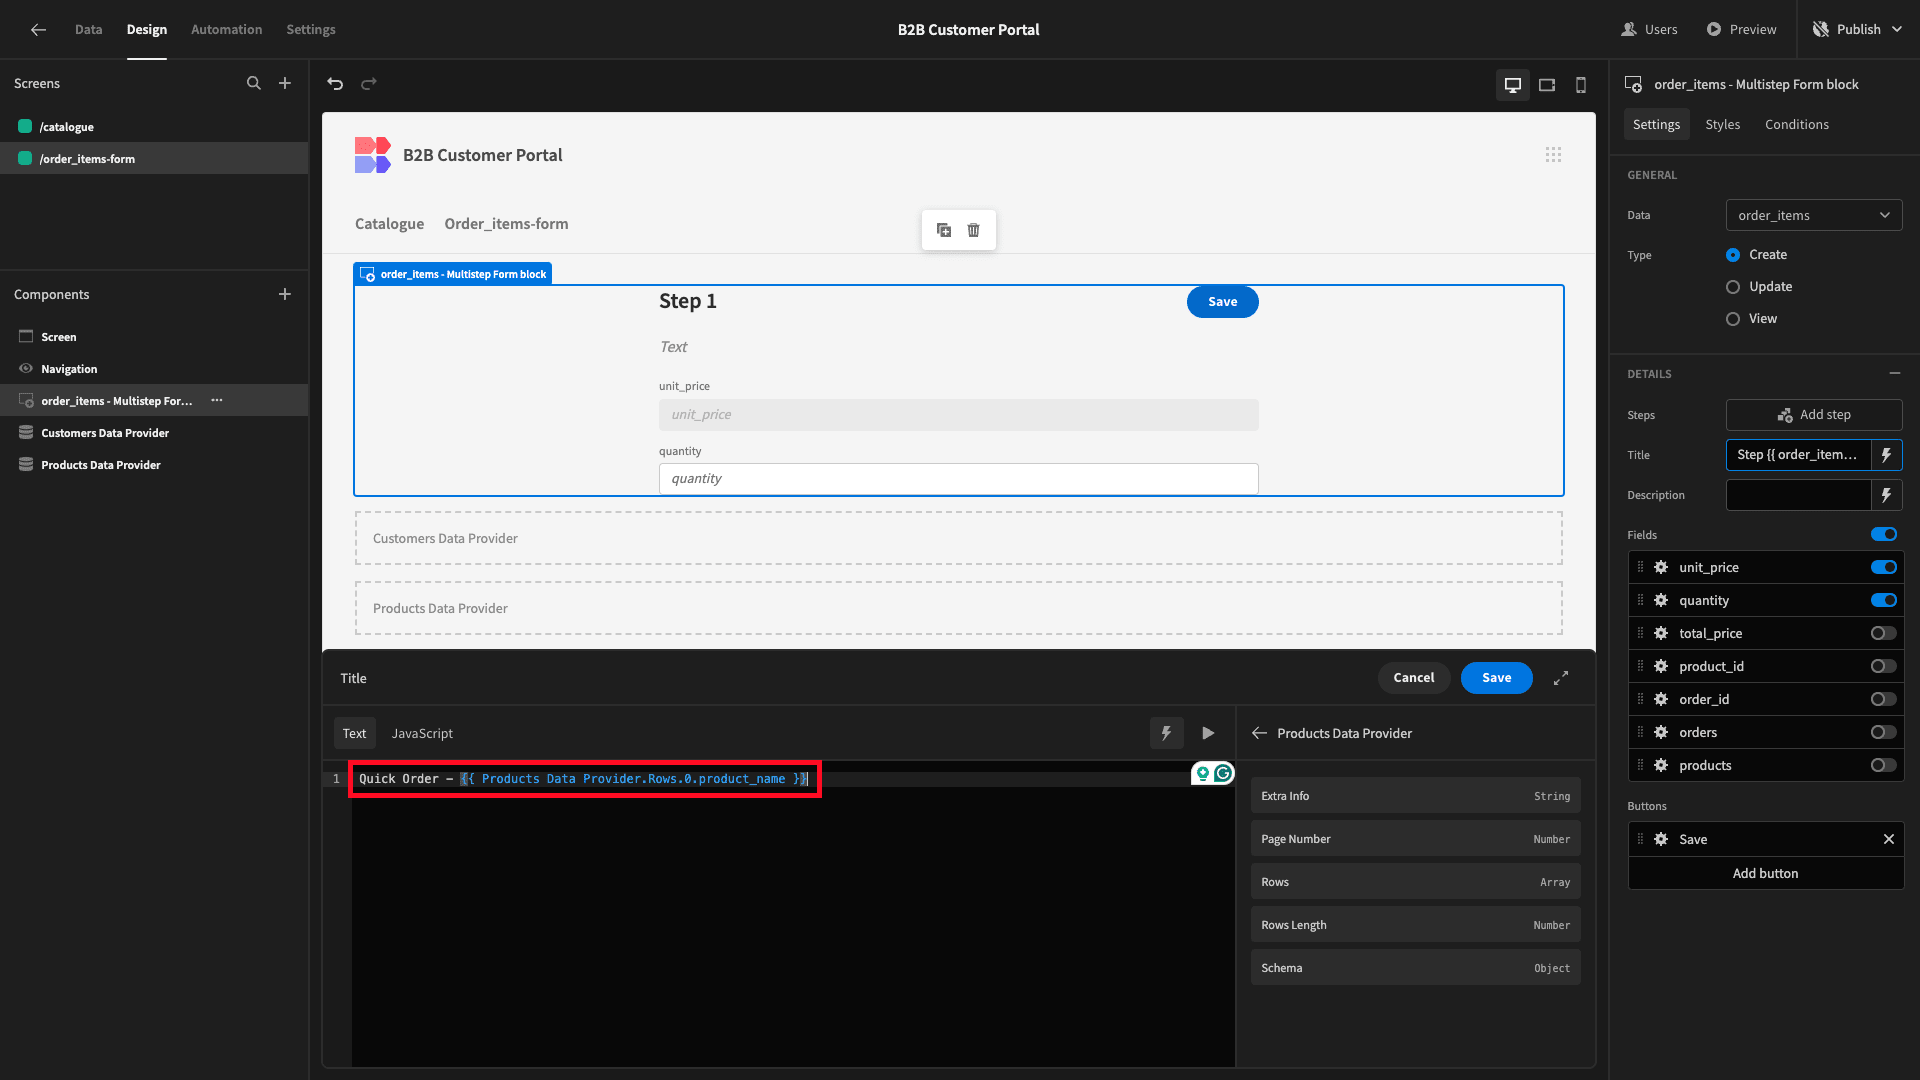
Here’s how this looks.
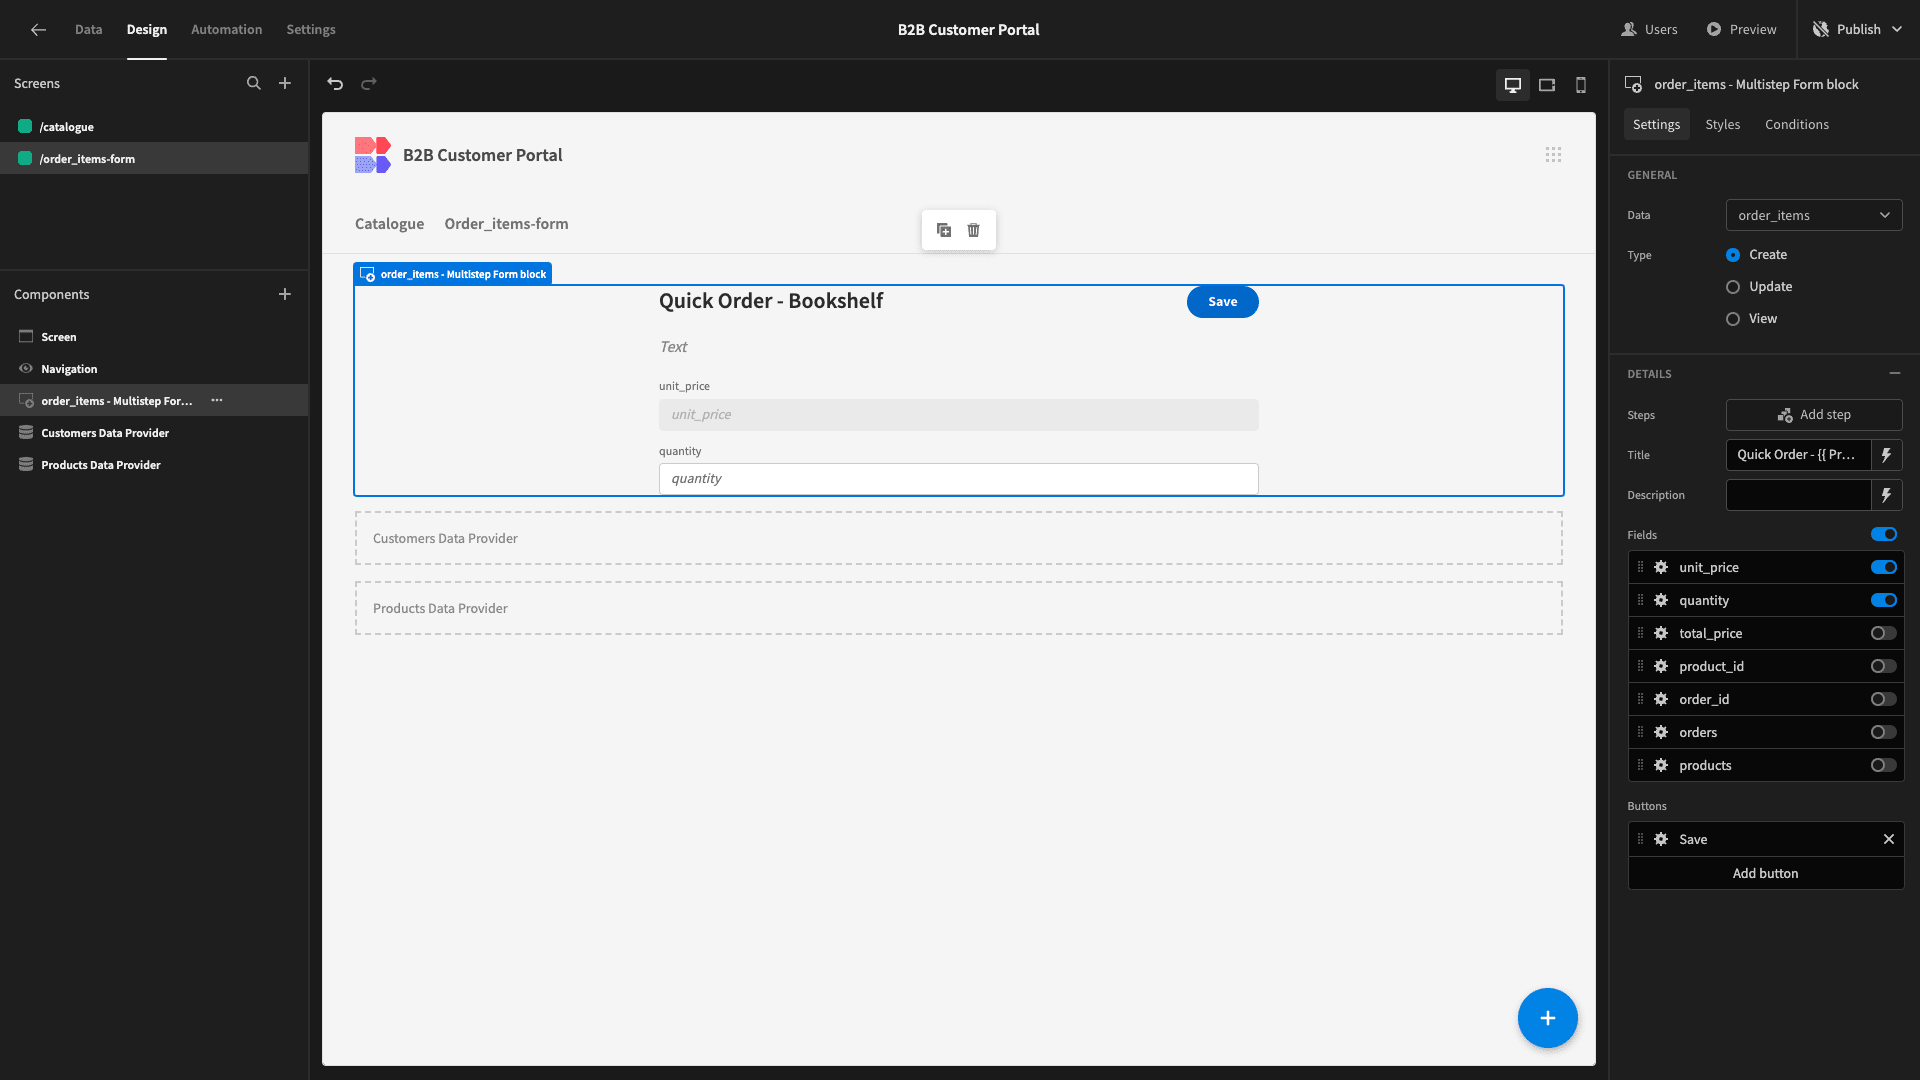
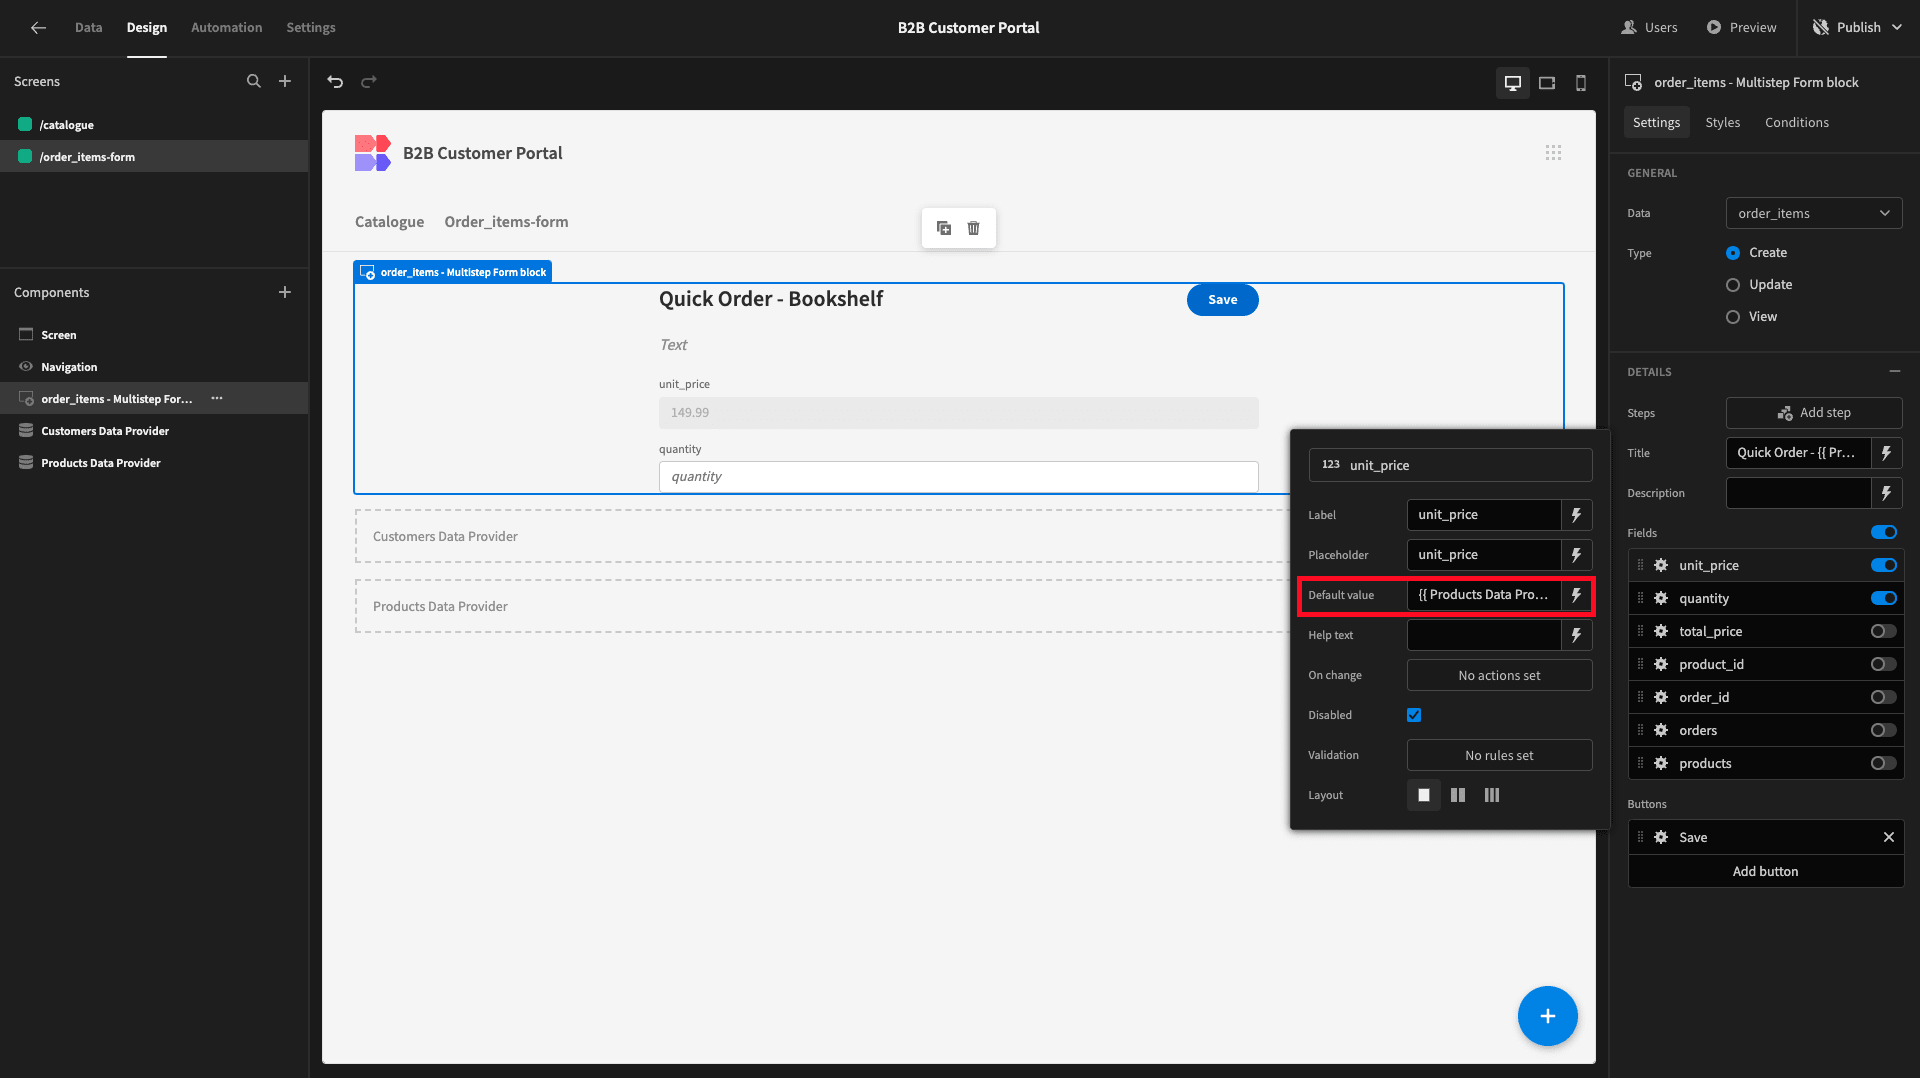
Next, we’ll repeat the same process to set the Default Value for our unit_price field to the price attribute from our products table.
We want to use our Description field to dynamically show the total cost of our order based on the quantity that the user has specified.
We’ll open the Bindings Drawer for our Description, but this time, we’re selecting JavaScript so we can add some more complex logic.
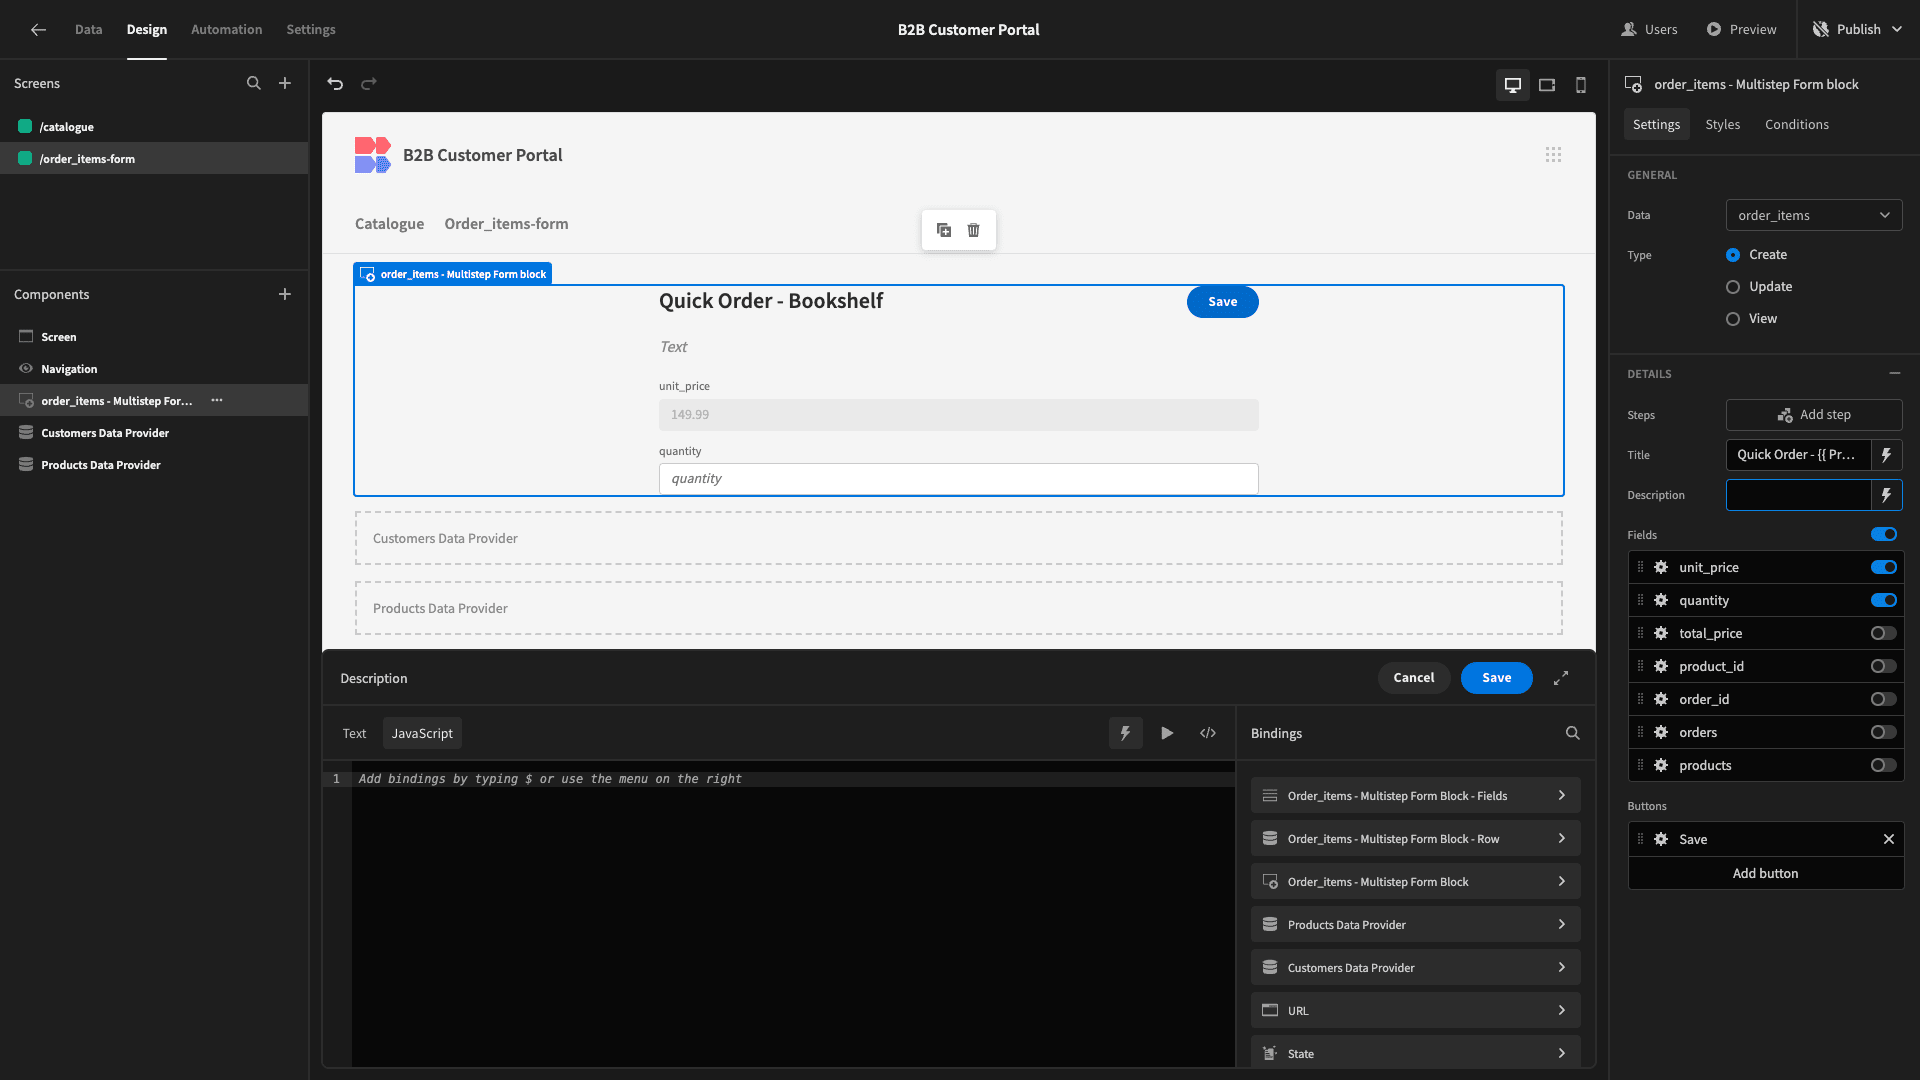
If the quantity field is blank, our total cost will be $0. Otherwise, it will be the product of our quantity and unit_price fields. We also want to display this within a string.
So, the code we’re using is:
1var orderTotal = 0;
2
3if ($("order_items - Multistep Form block.Fields.quantity") != null){
4
5 orderTotal = $("order_items - Multistep Form block.Fields.quantity") * $("Products Data Provider.Rows.0.price")
6
7}
8
9return "Order Total: $" + orderTotal.toFixed(2);
We can see that this works with Budibase’s live evaluation functionality.
Before we go any further, we’ll also improve the UX of our form by replacing the default Label and Placeholder texts for our form fields with more human-readable copy.
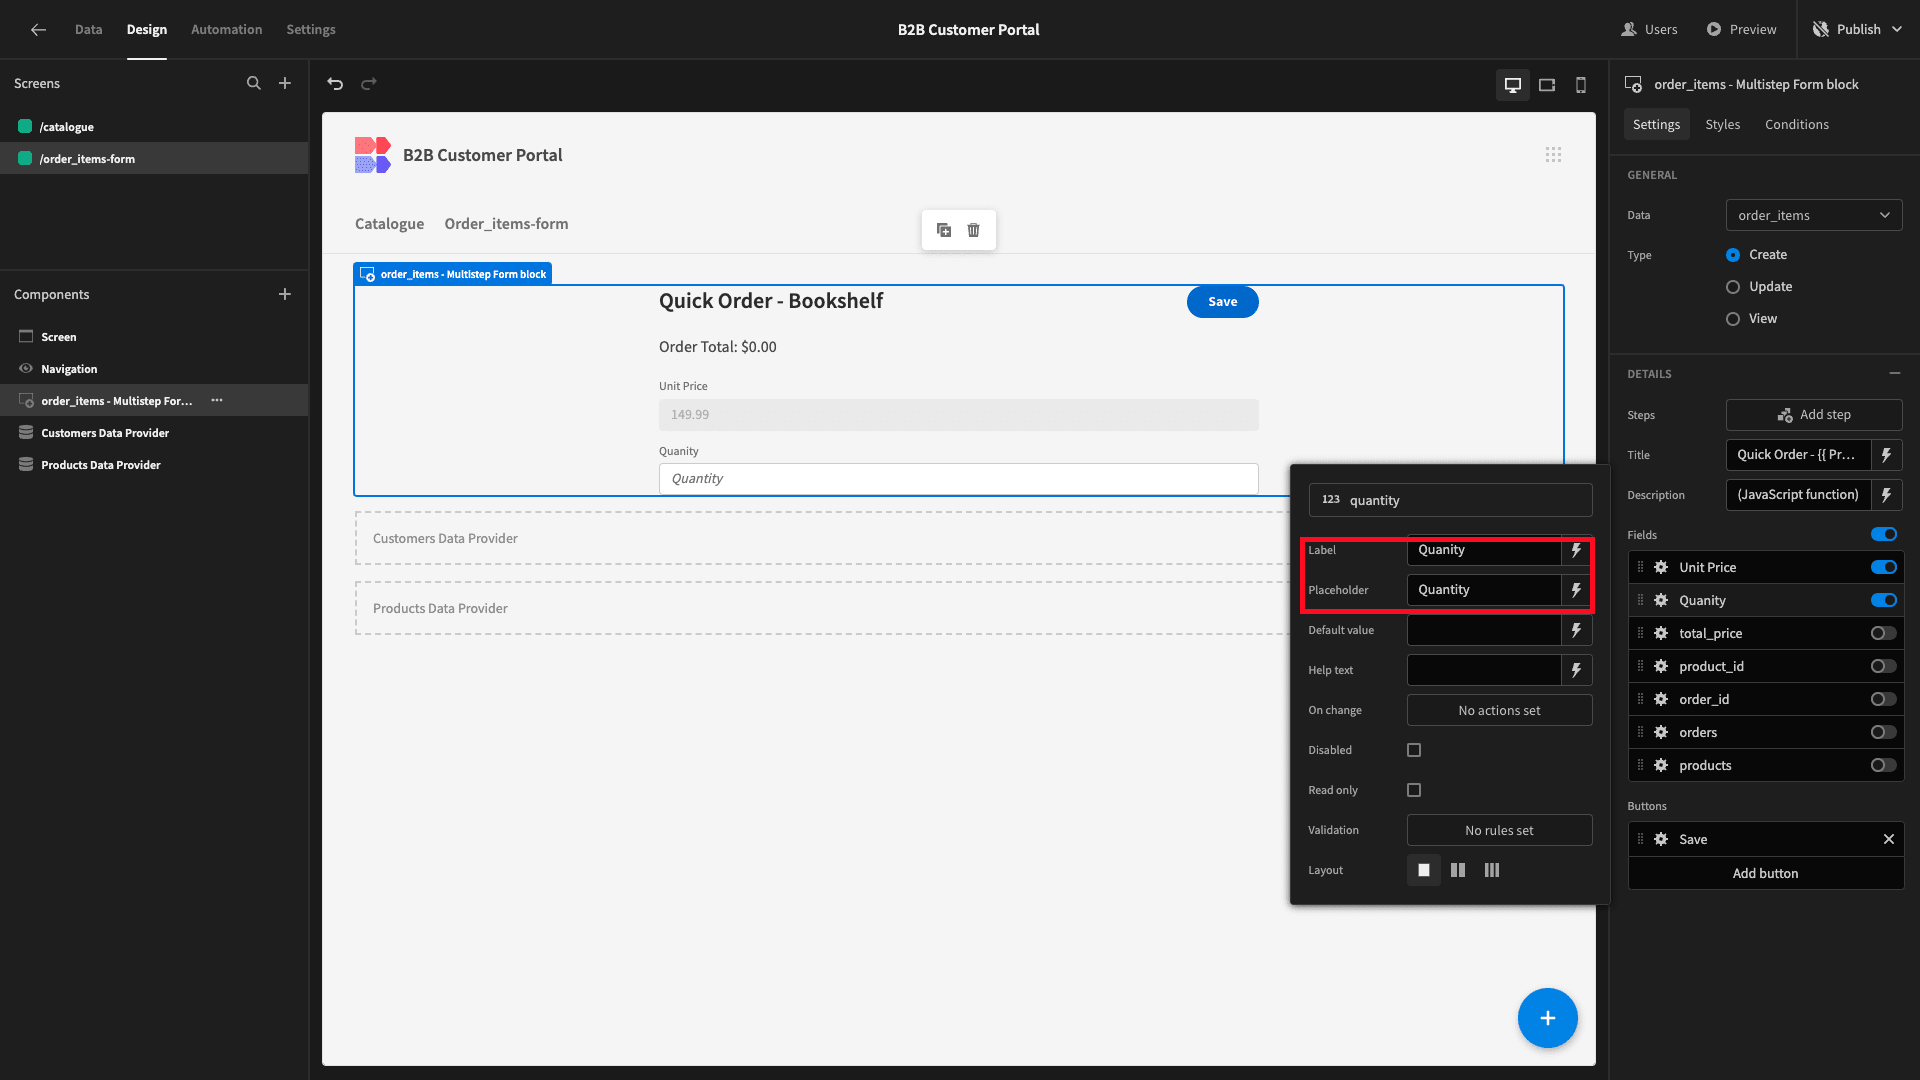
Lastly, we need to make some adjustments to what will happen when a user hits Save.
Currently, this will save a row to our order_items table based on the values included in our form fields.
We need to make changes to do three things:
- Create a row in the orders table and populate the relevant values.
- Populate the values in our order_items table that aren’t included in our form.
- Close our modal screen.
Here’s what the current button actions look like.
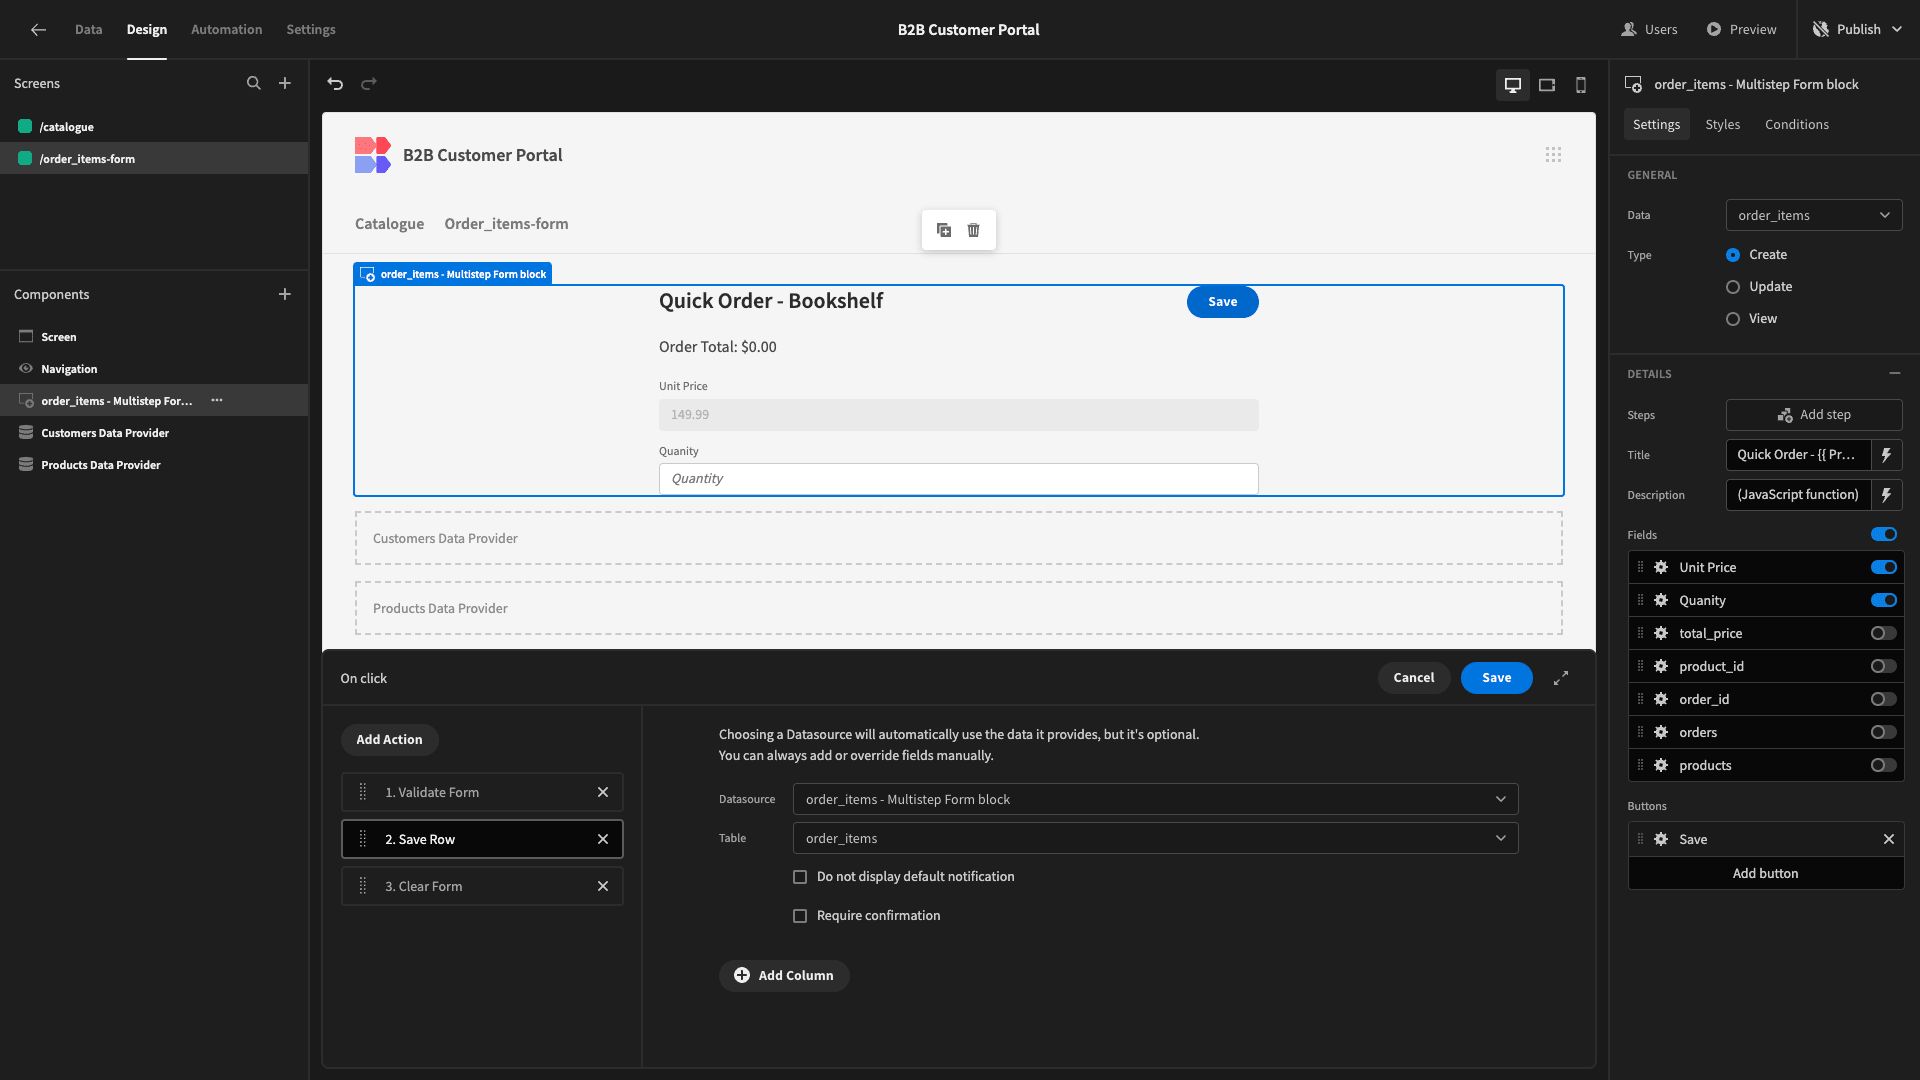
We need to add another Save Row action and place this second in the chain.
We’ll set our Data Source to our form and our Table to orders.

Then, we’ll hit Add Columns and choose order_date, order_status, customer_id, and total_amount.
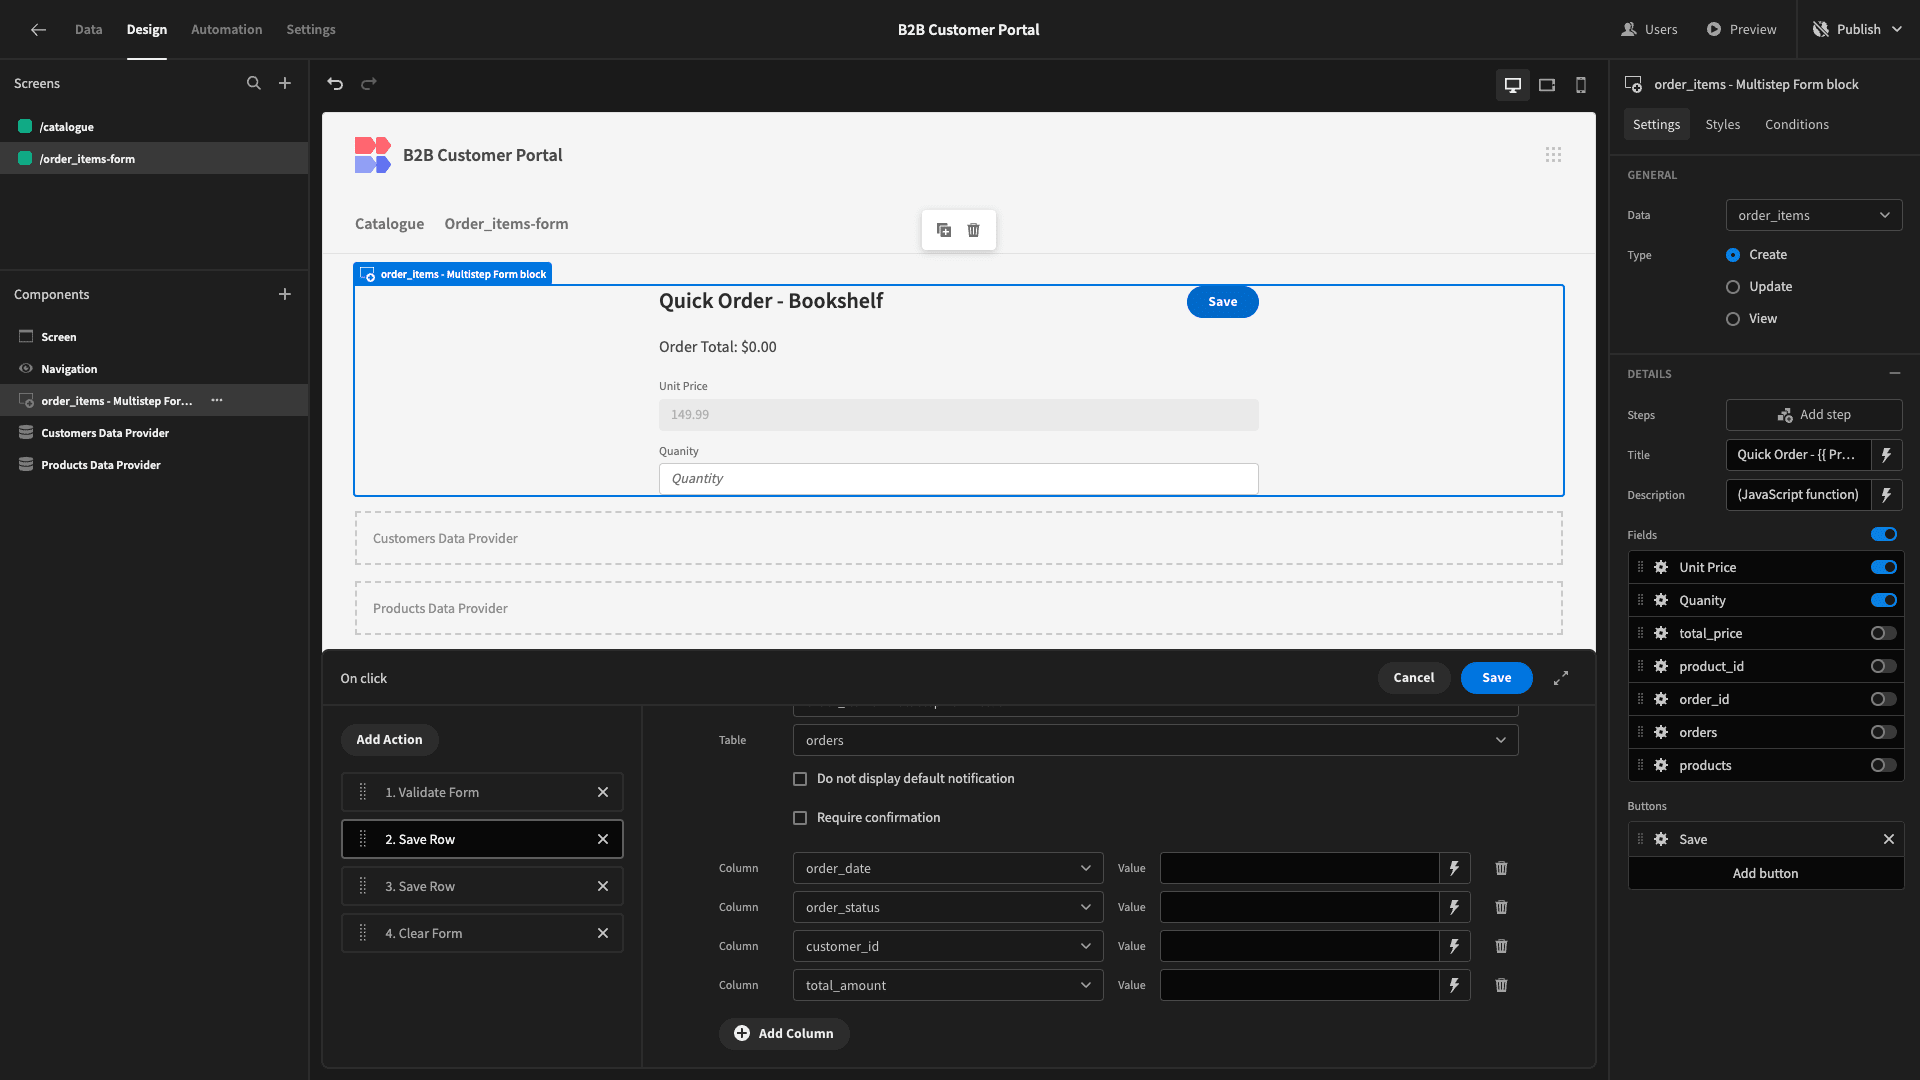
As ever, we can use bindings to set values for these. We’ll set order_date to the following JavaScript expression.
1var date = new Date();
2
3return date
We’ll set order_status to Pending and bind customer_id to {{ Customers Data Provider.Rows.0.customer_id }}.
Lastly, we’ll use the following JavaScript expression to calculate our total_amount.
1return $("Products Data Provider.Rows.0.price") * $("order_items - Multistep Form block.Fields.quantity")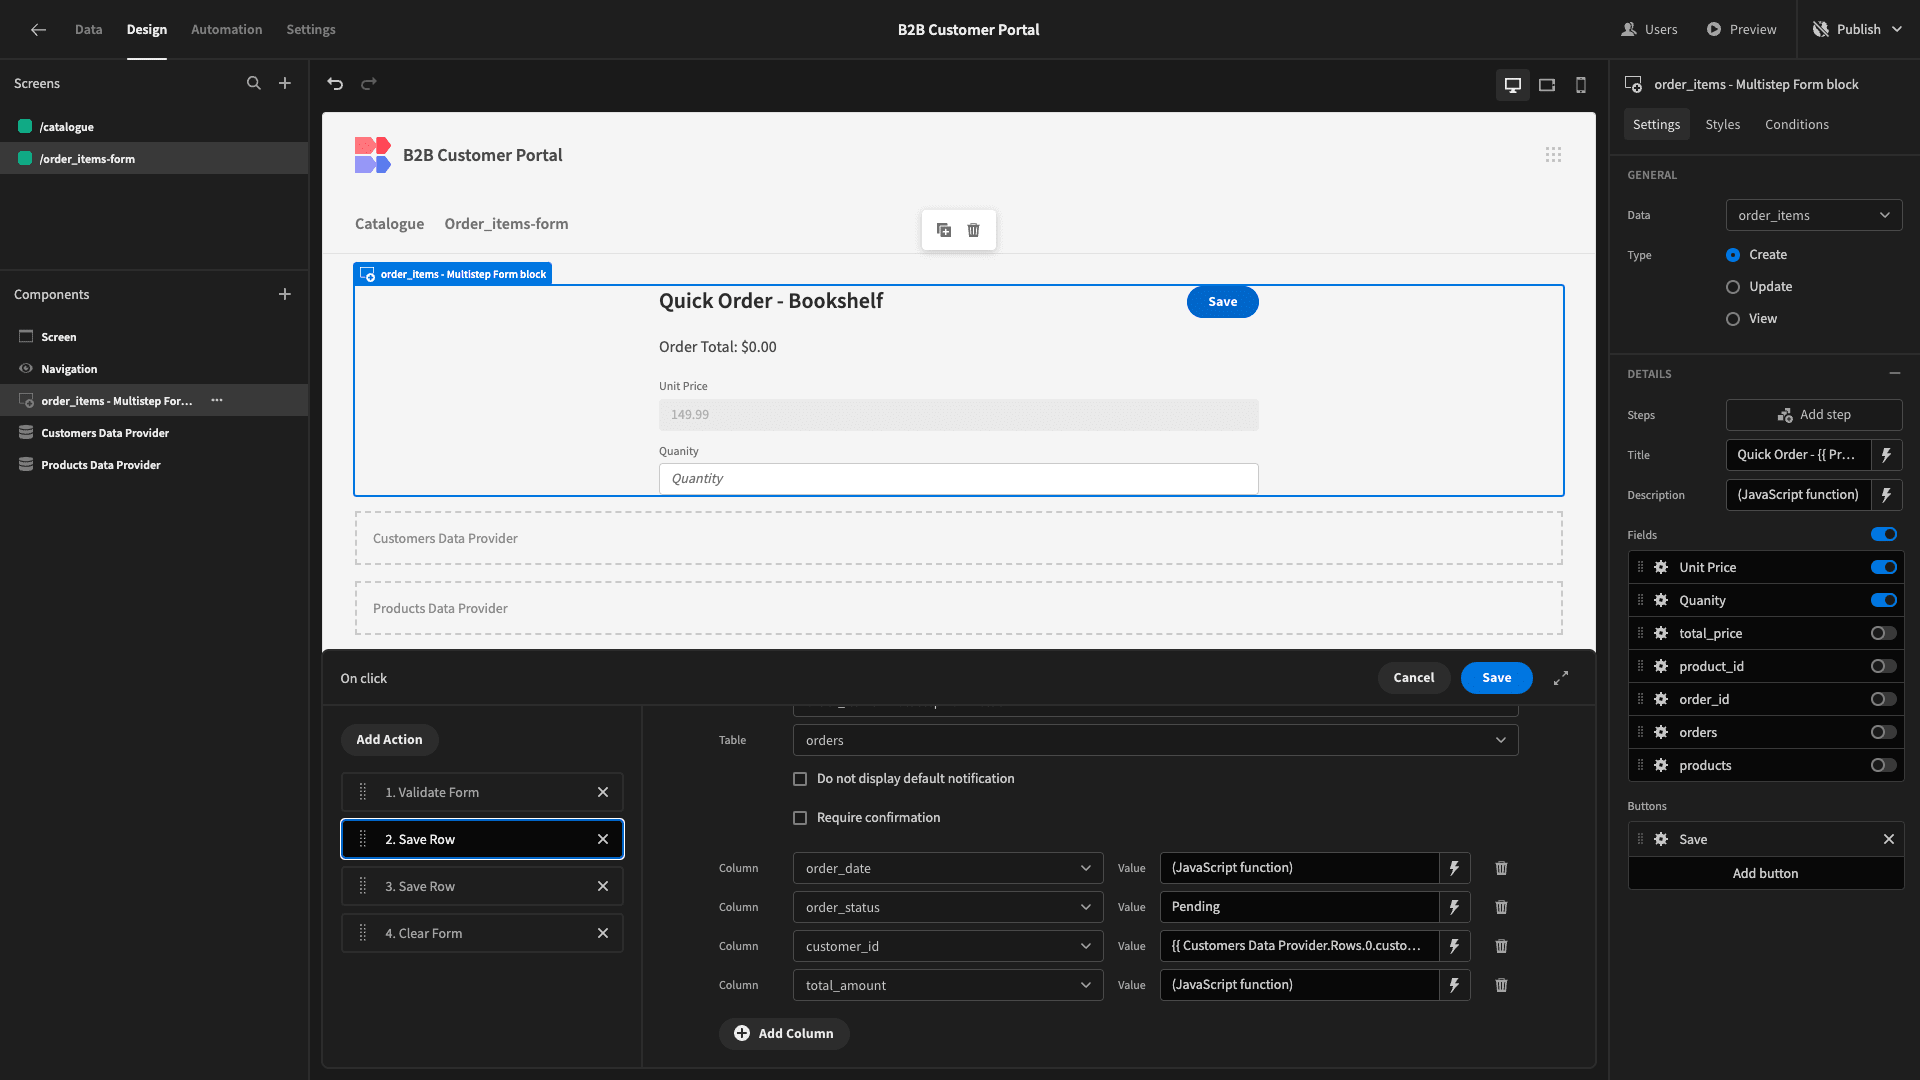
Next, we’ll select the Save Row action for our order_items table. Here, we’ll add columns for product_id, total_price, unit_price, and order_id.
We’ll set product_id to {{ State.productId }} and use the same JavaScript expression as before for total_price. Our unit_price is the price attribute from our products table.

For our order_id attribute, we need to access the relevant value from the orders row we created in the previous action.
So, within the bindings menu, we’ll select Action.
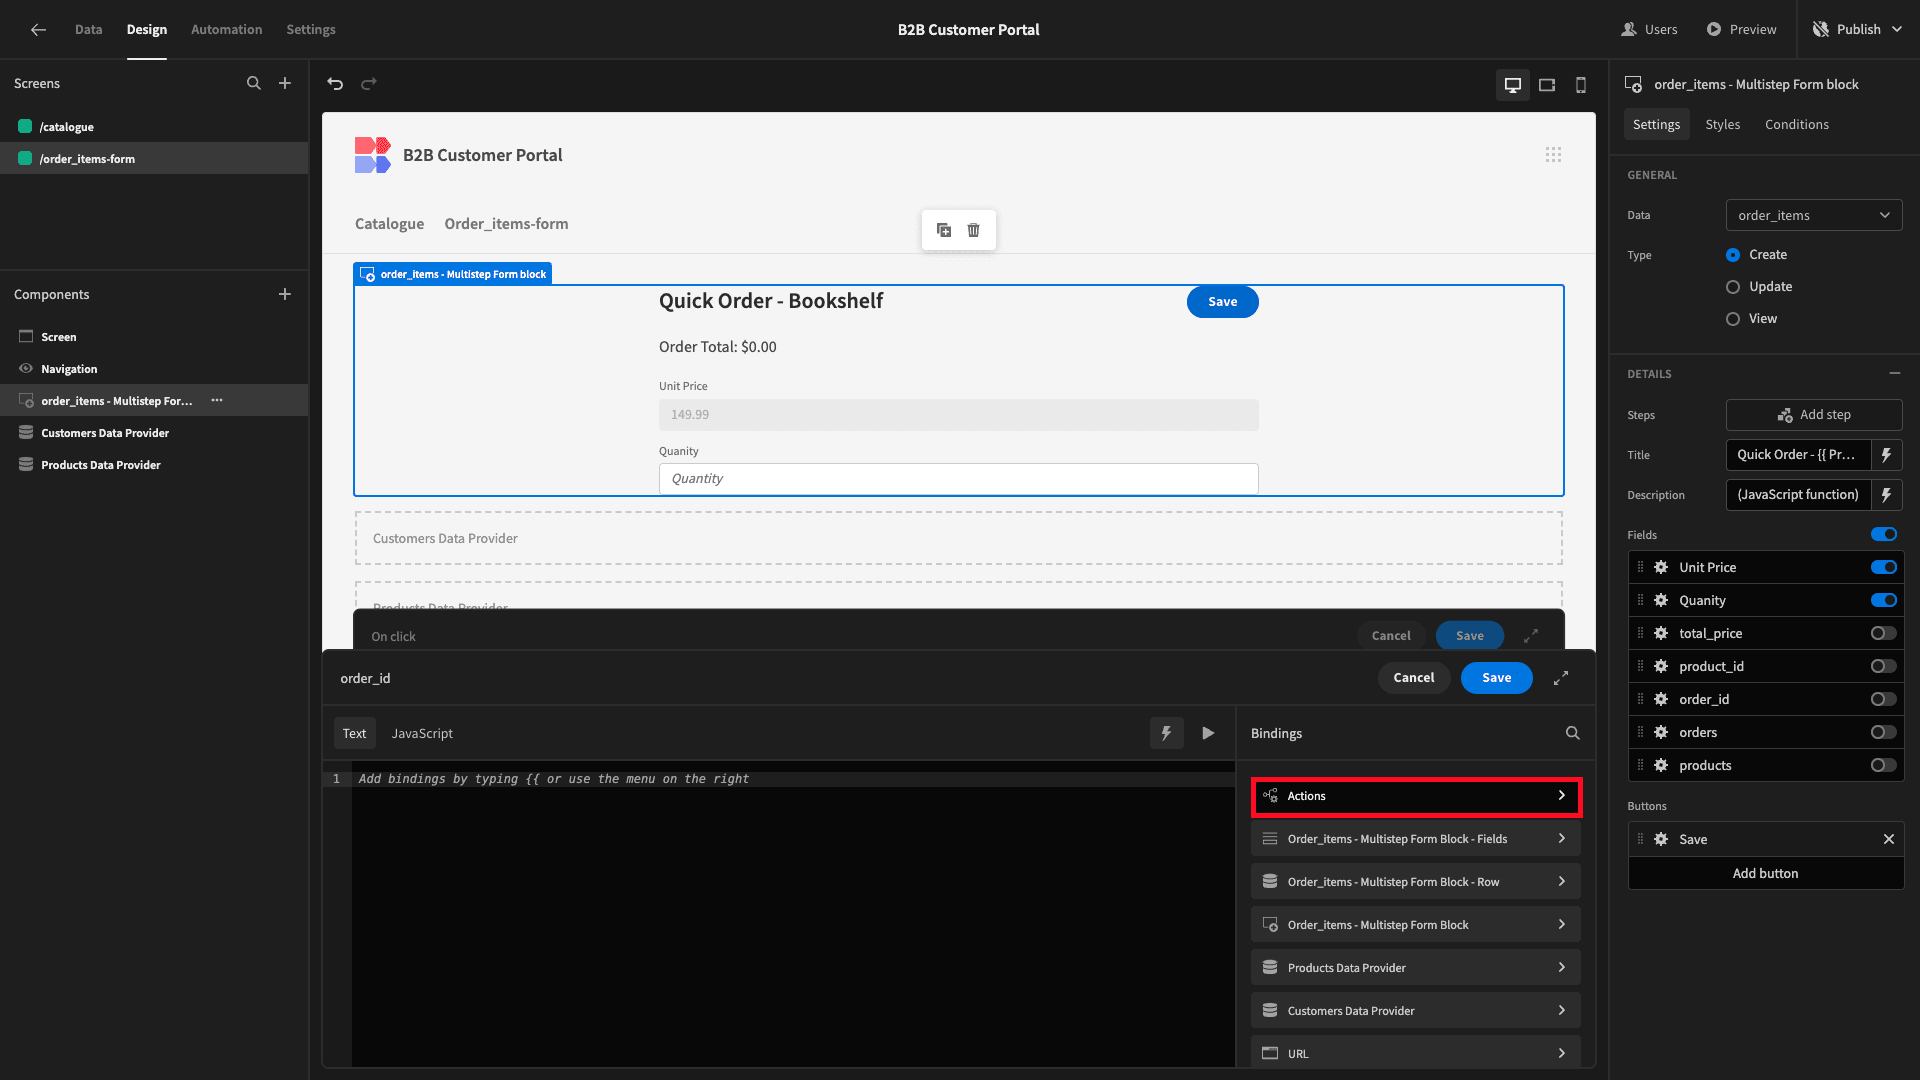
And we’ll bind this to {{ Action 2.Saved row.order_id }}.
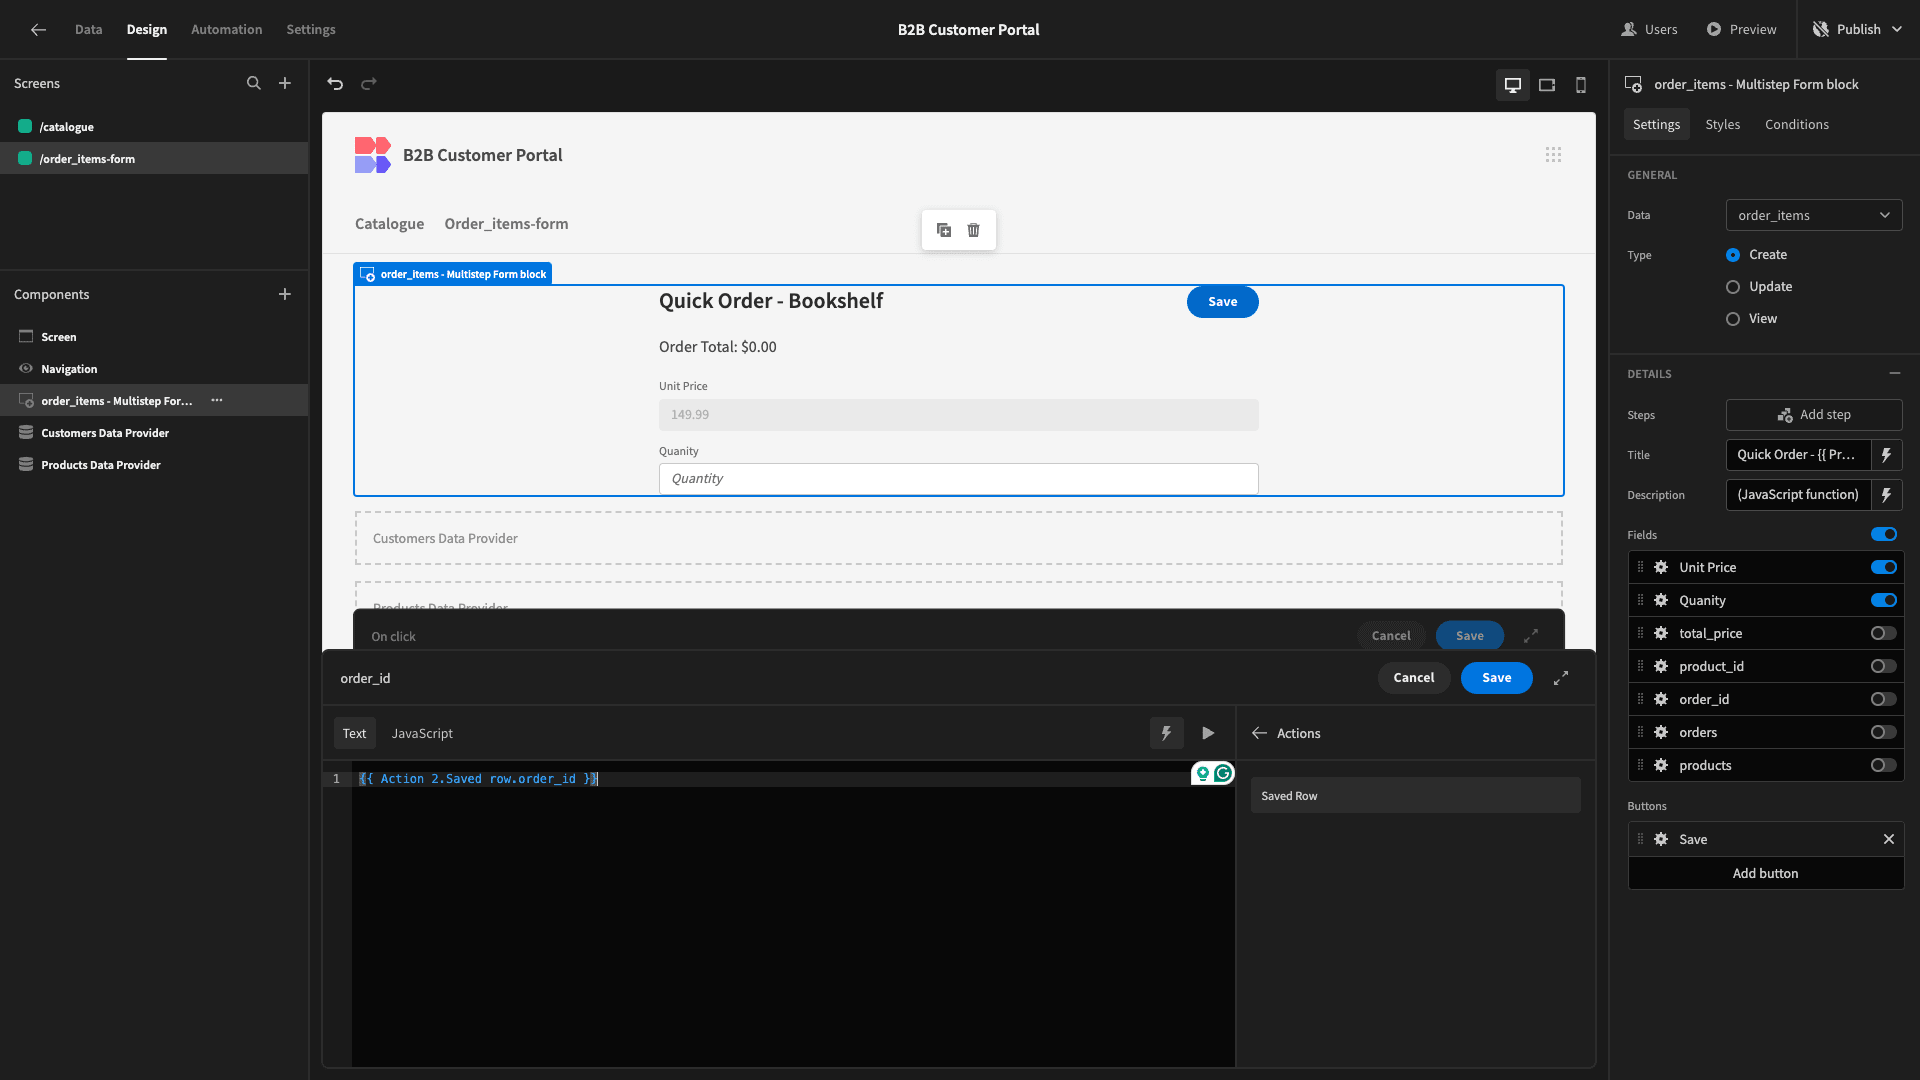
Lastly, we’ll add a Close Screen Modal action.
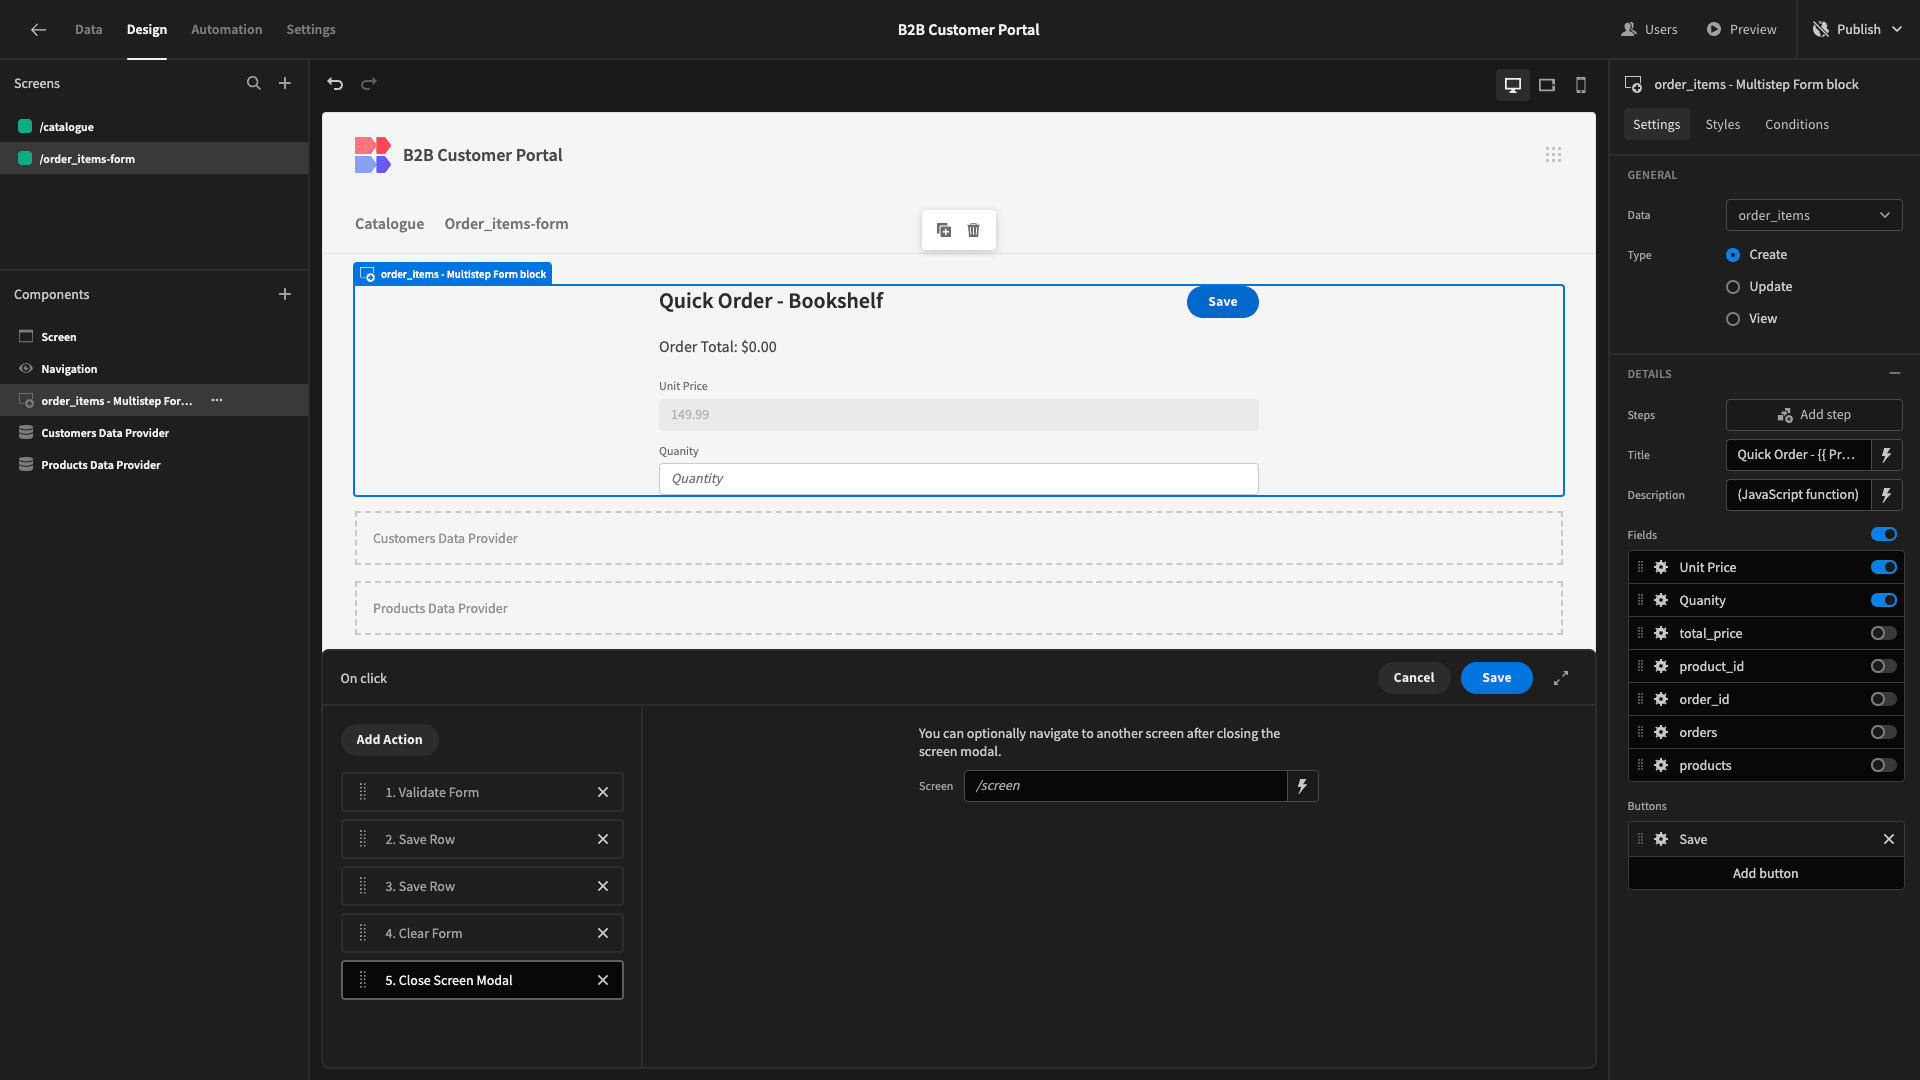
Back on our B2B customer portal’s catalogue screen, we’ll add a button action to navigate to our form, opening it in a modal.
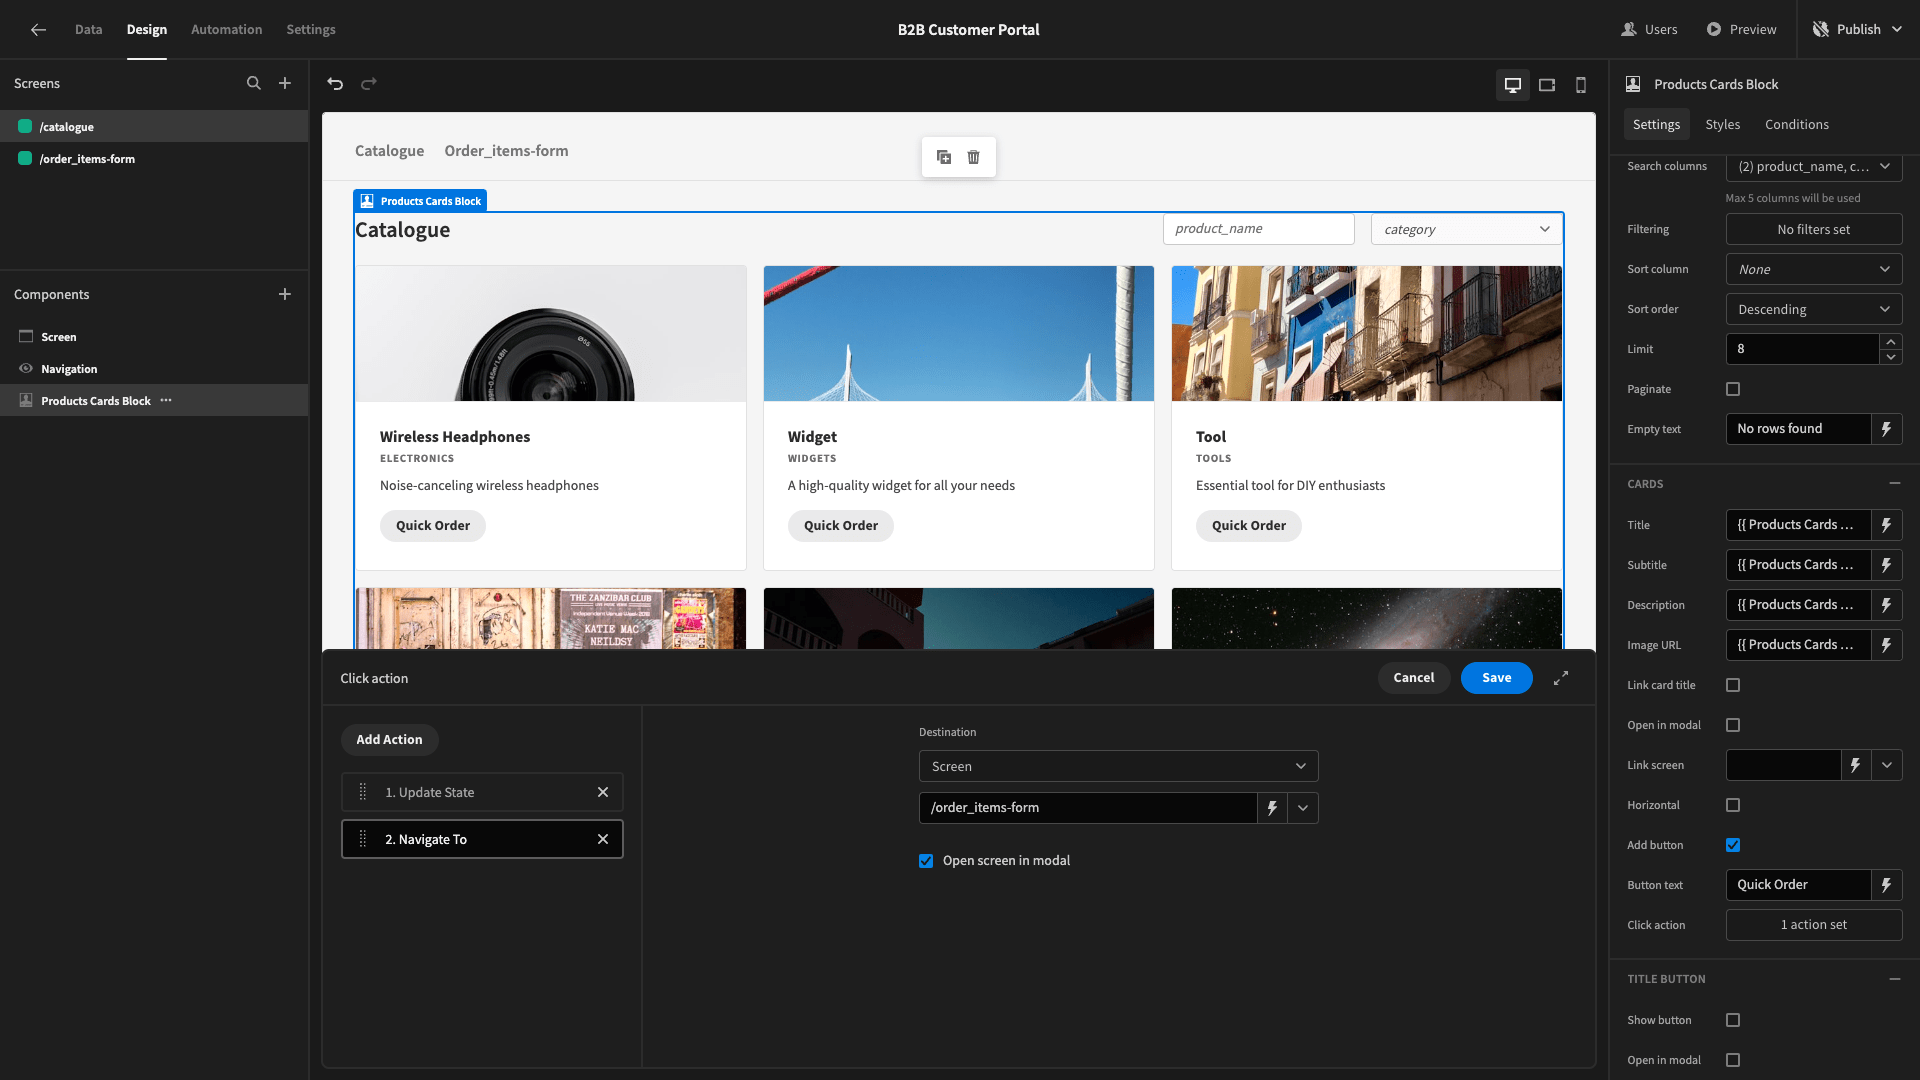
Now, we can preview our app to test that this works as we expect.
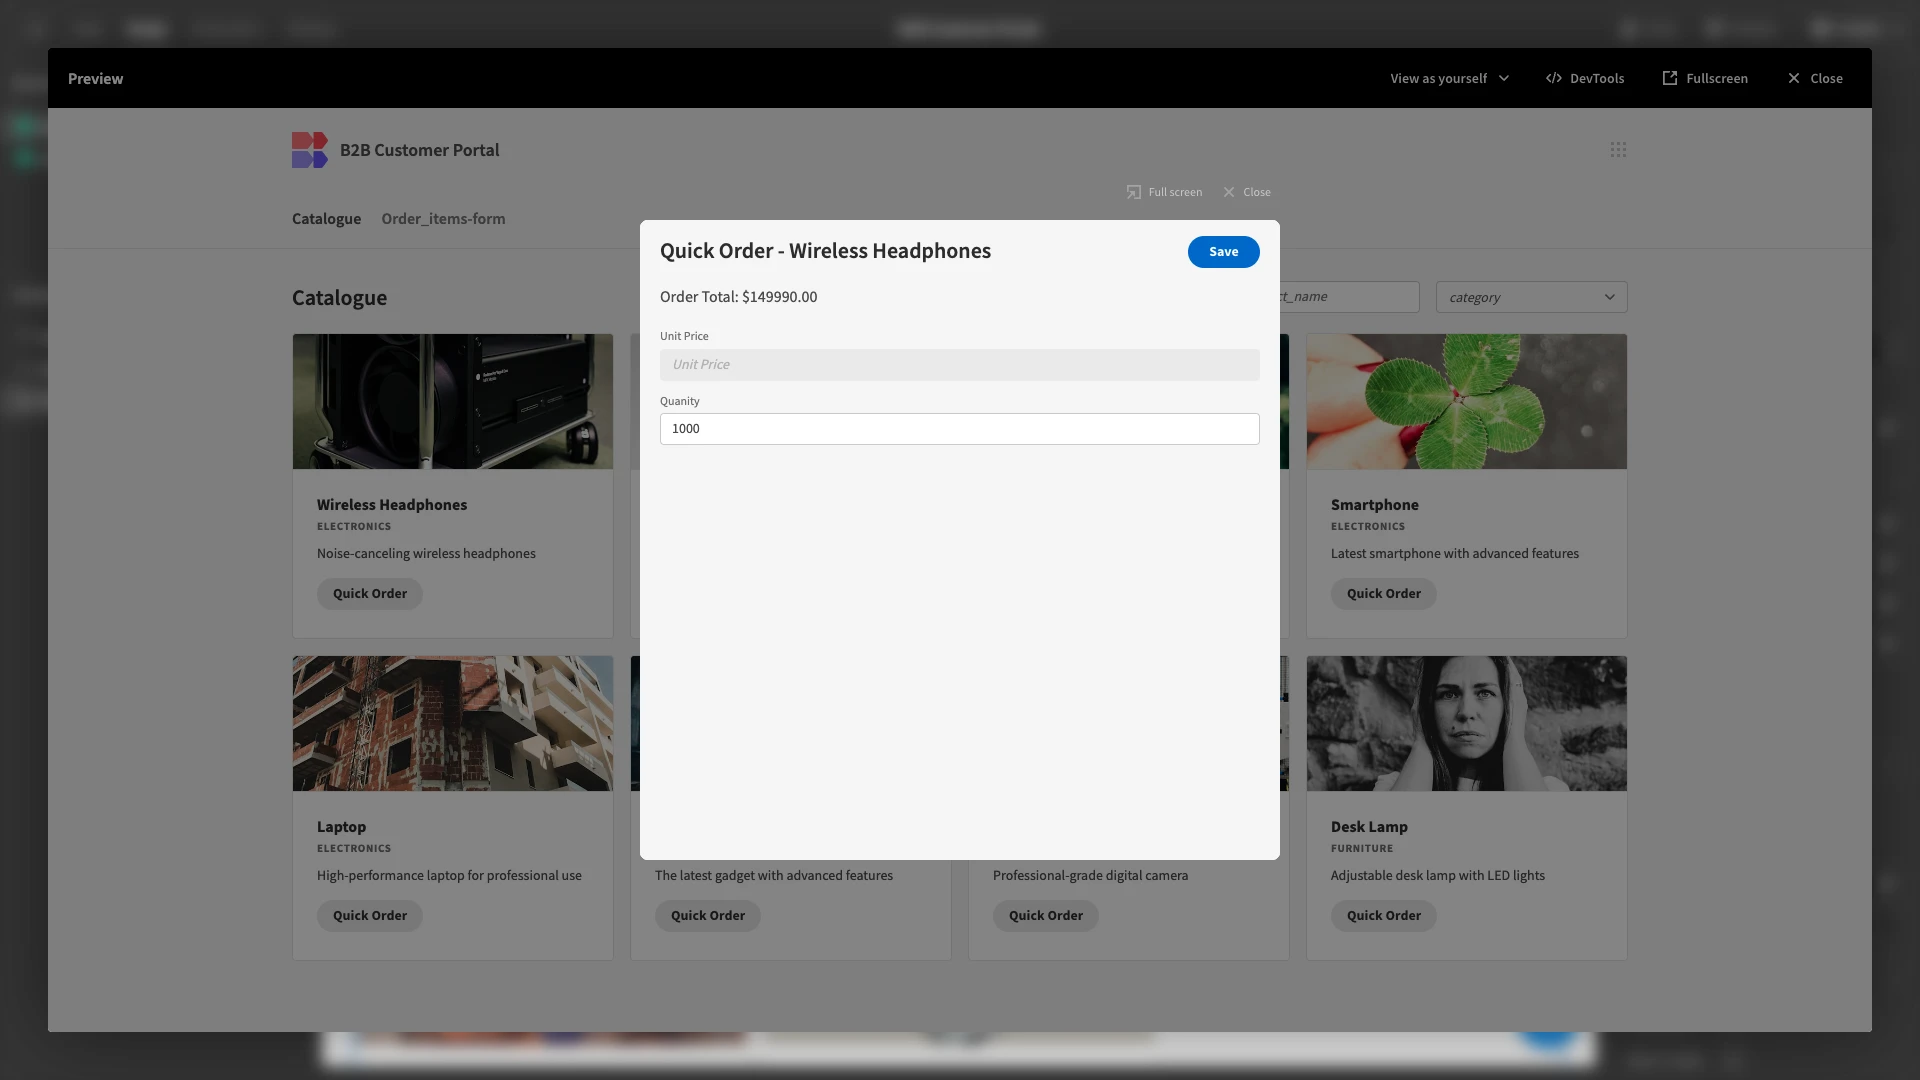
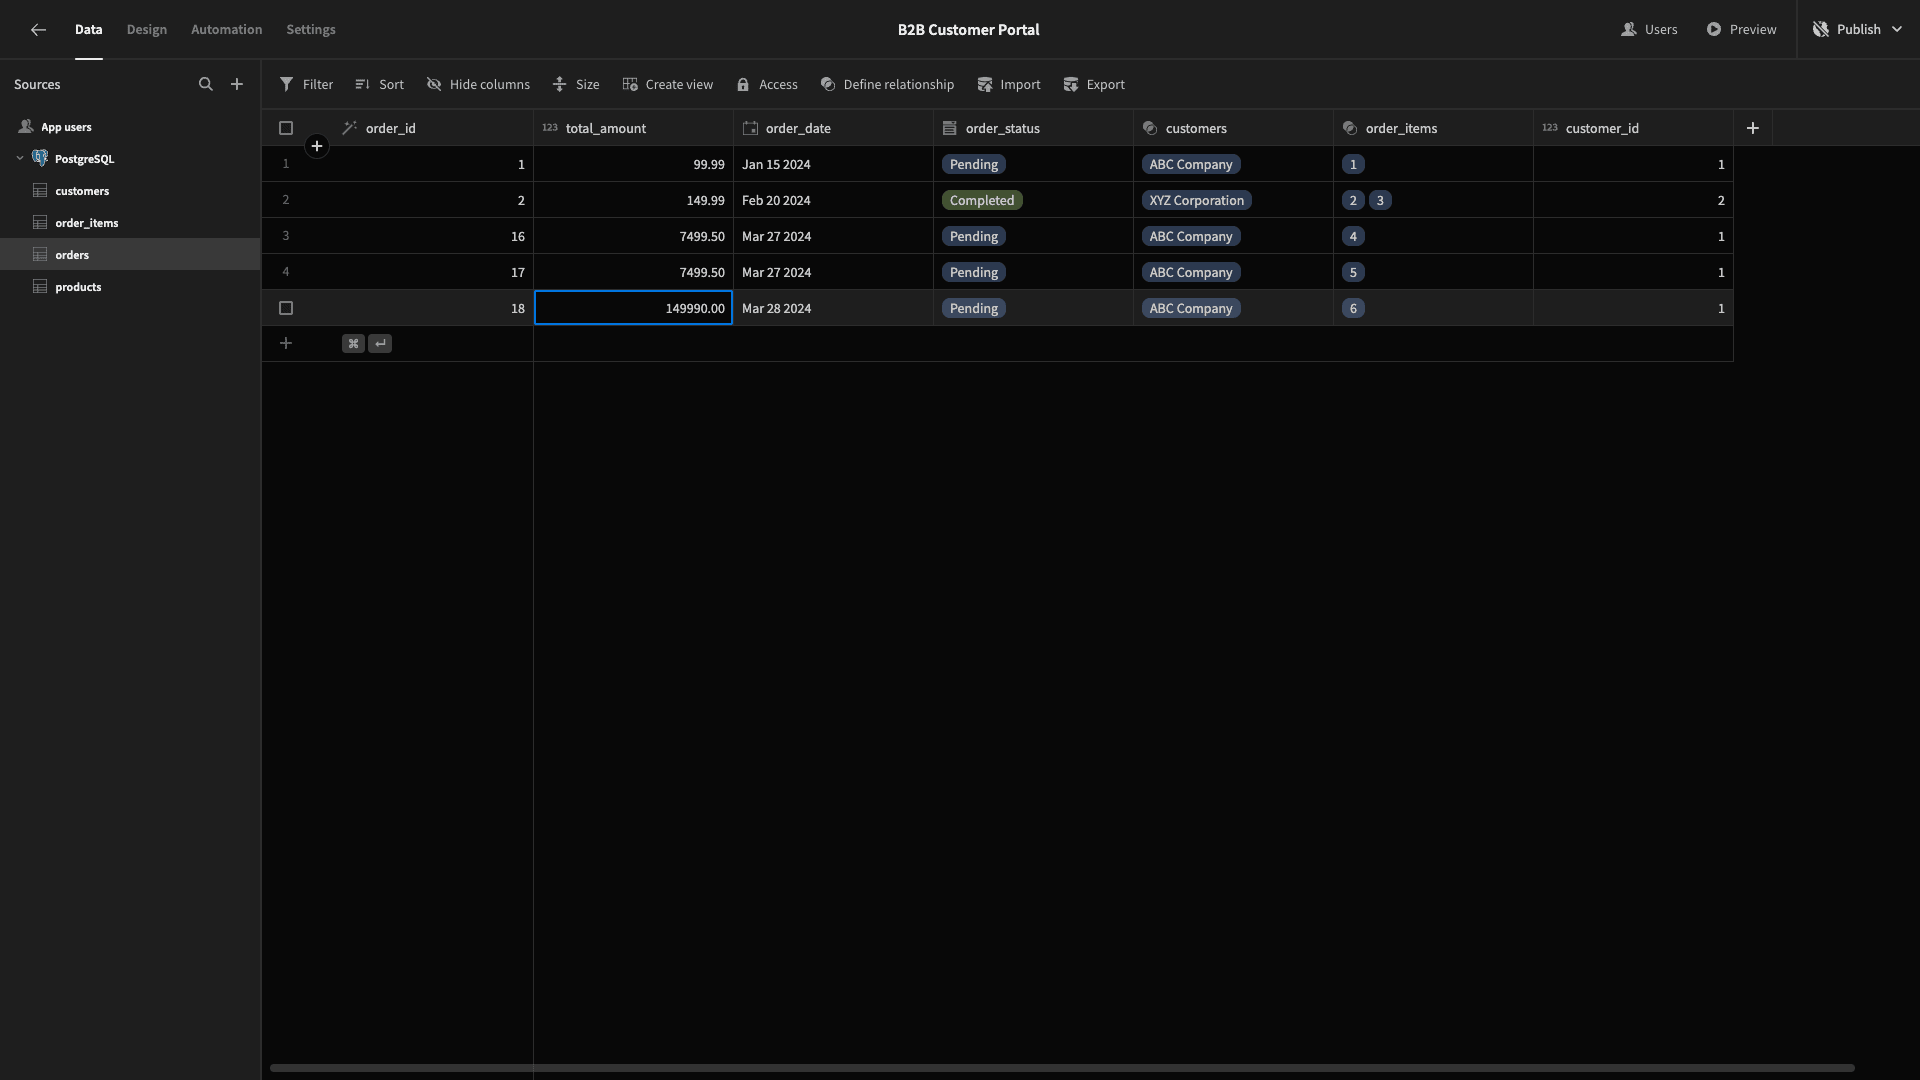
We can see that a row has been created in the order_items table.

And a related row has been created in the orders table.
4. Admin screens
Next, we can start building admin screens for our internal users. This will basically be CRUD UIs for a selection of our tables, although each one will need to be modified slightly to meet our needs.
We’ll start by hitting the plus icon to add screens again.
This time, we’re selecting the Table Layout with details panels.

This will generate a working CRUD UI based on whichever data table we select.
We can create multiple screens at a time this way. So, we’re selecting the customers, orders, and products tables.
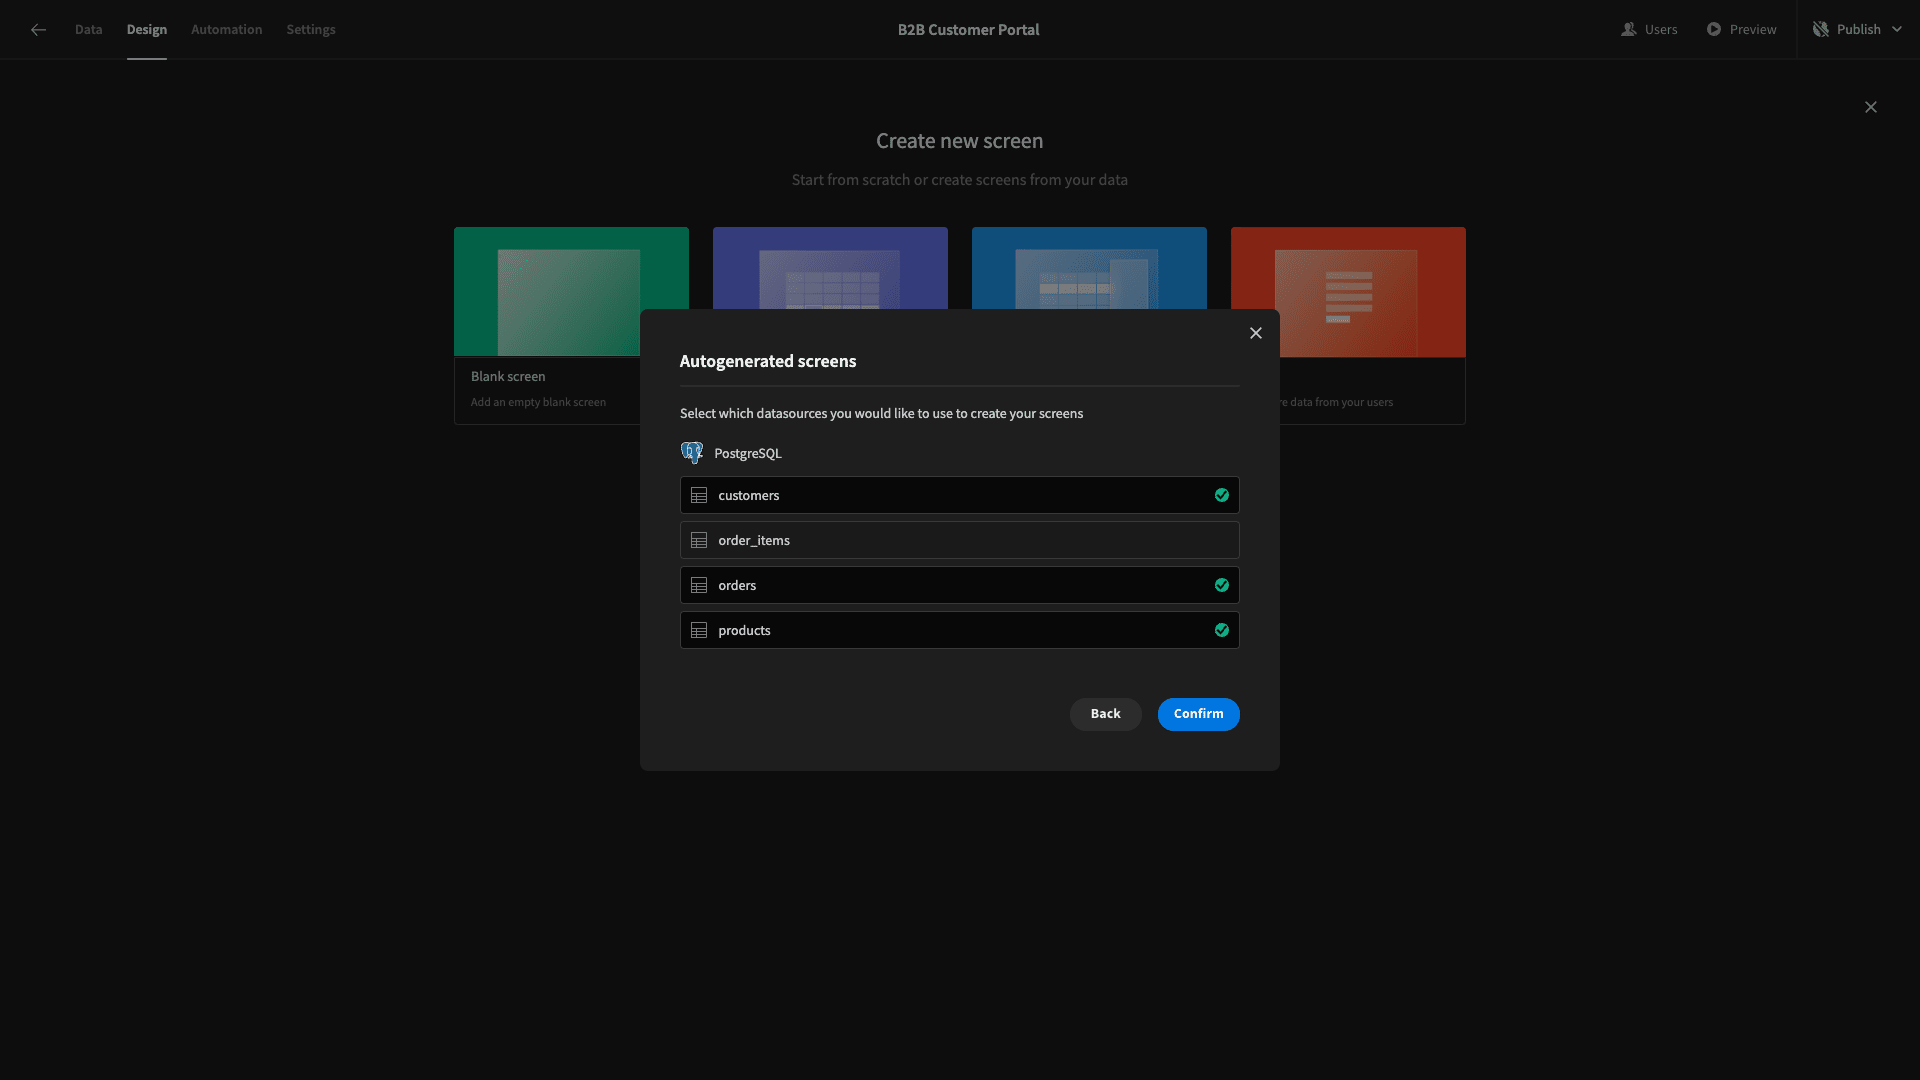
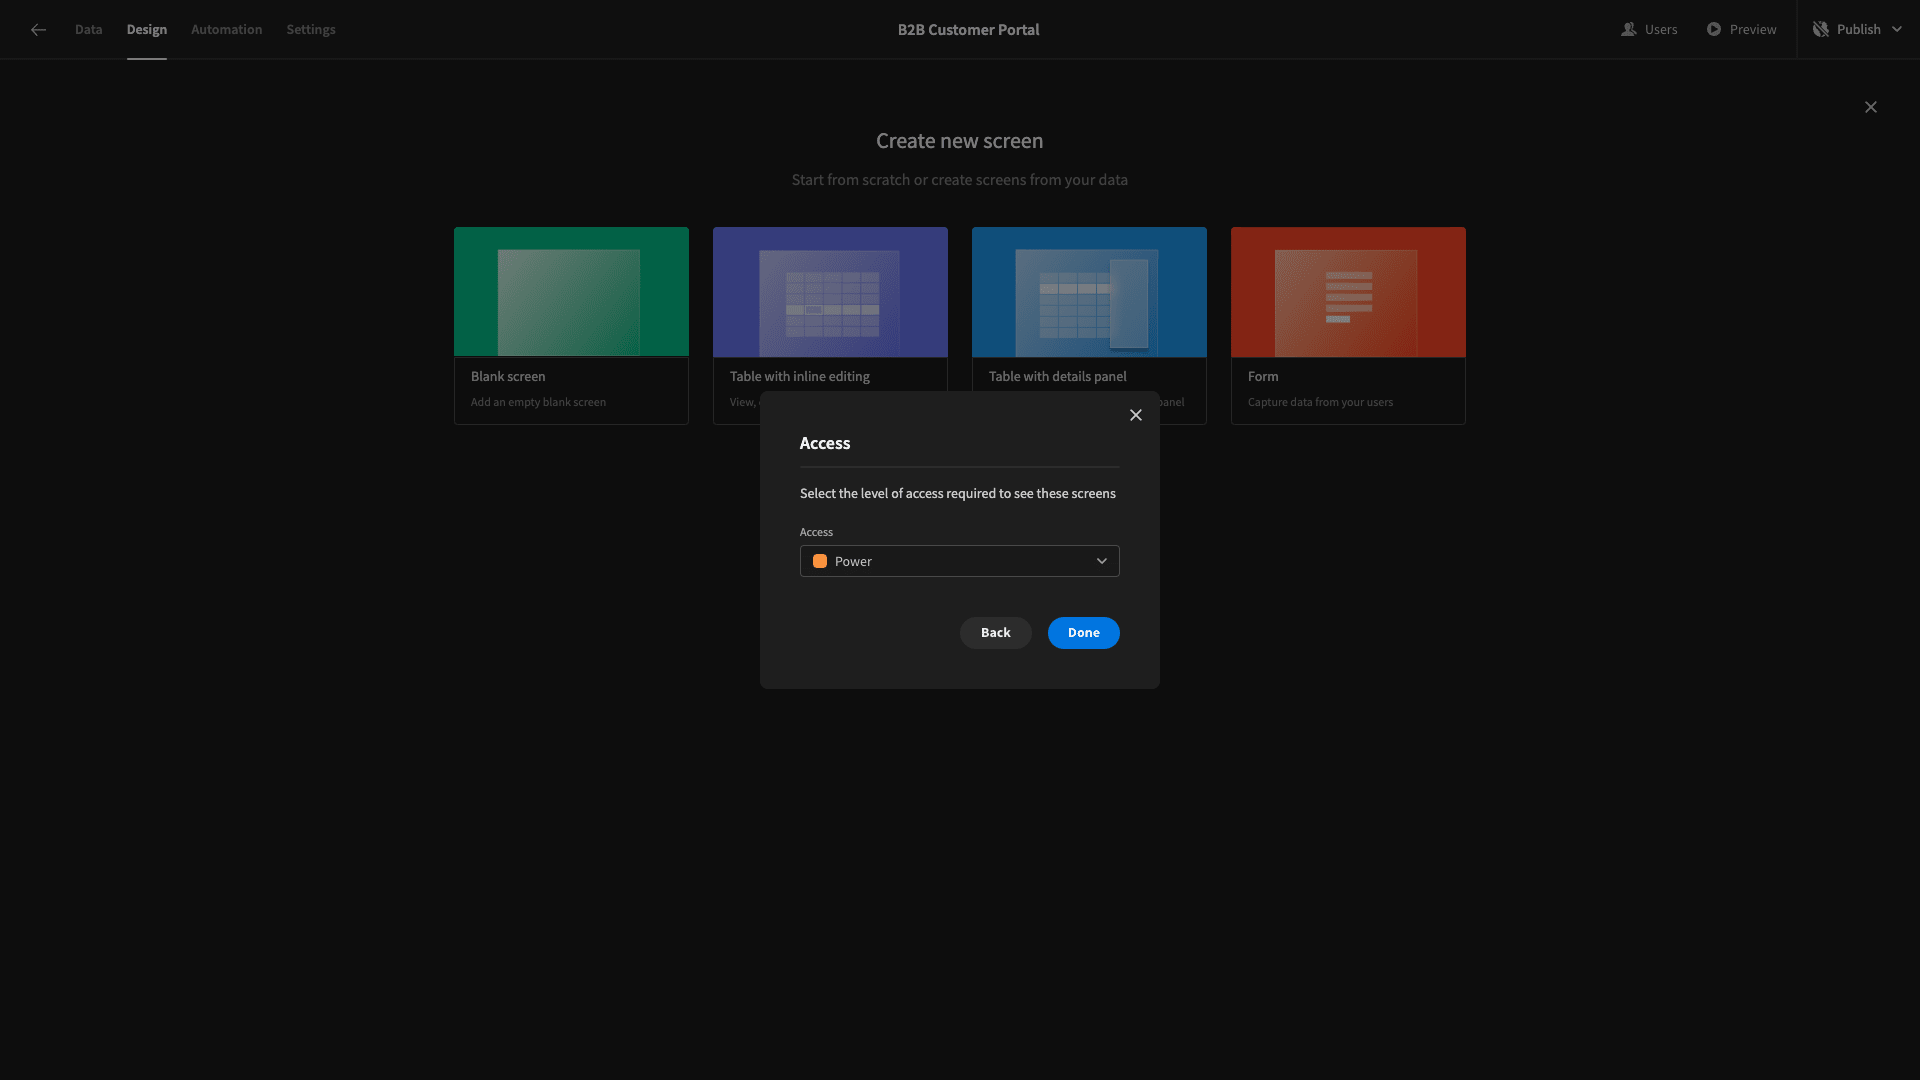
Since these screens are intended for internal users, we’ll set our minimum access role to Power.
Now, we have three new screens. Each one features a table with side-panel forms where users can create new entries or update existing ones.

We simply want to configure these to match our requirements.
Let’s take each one in turn.
Products
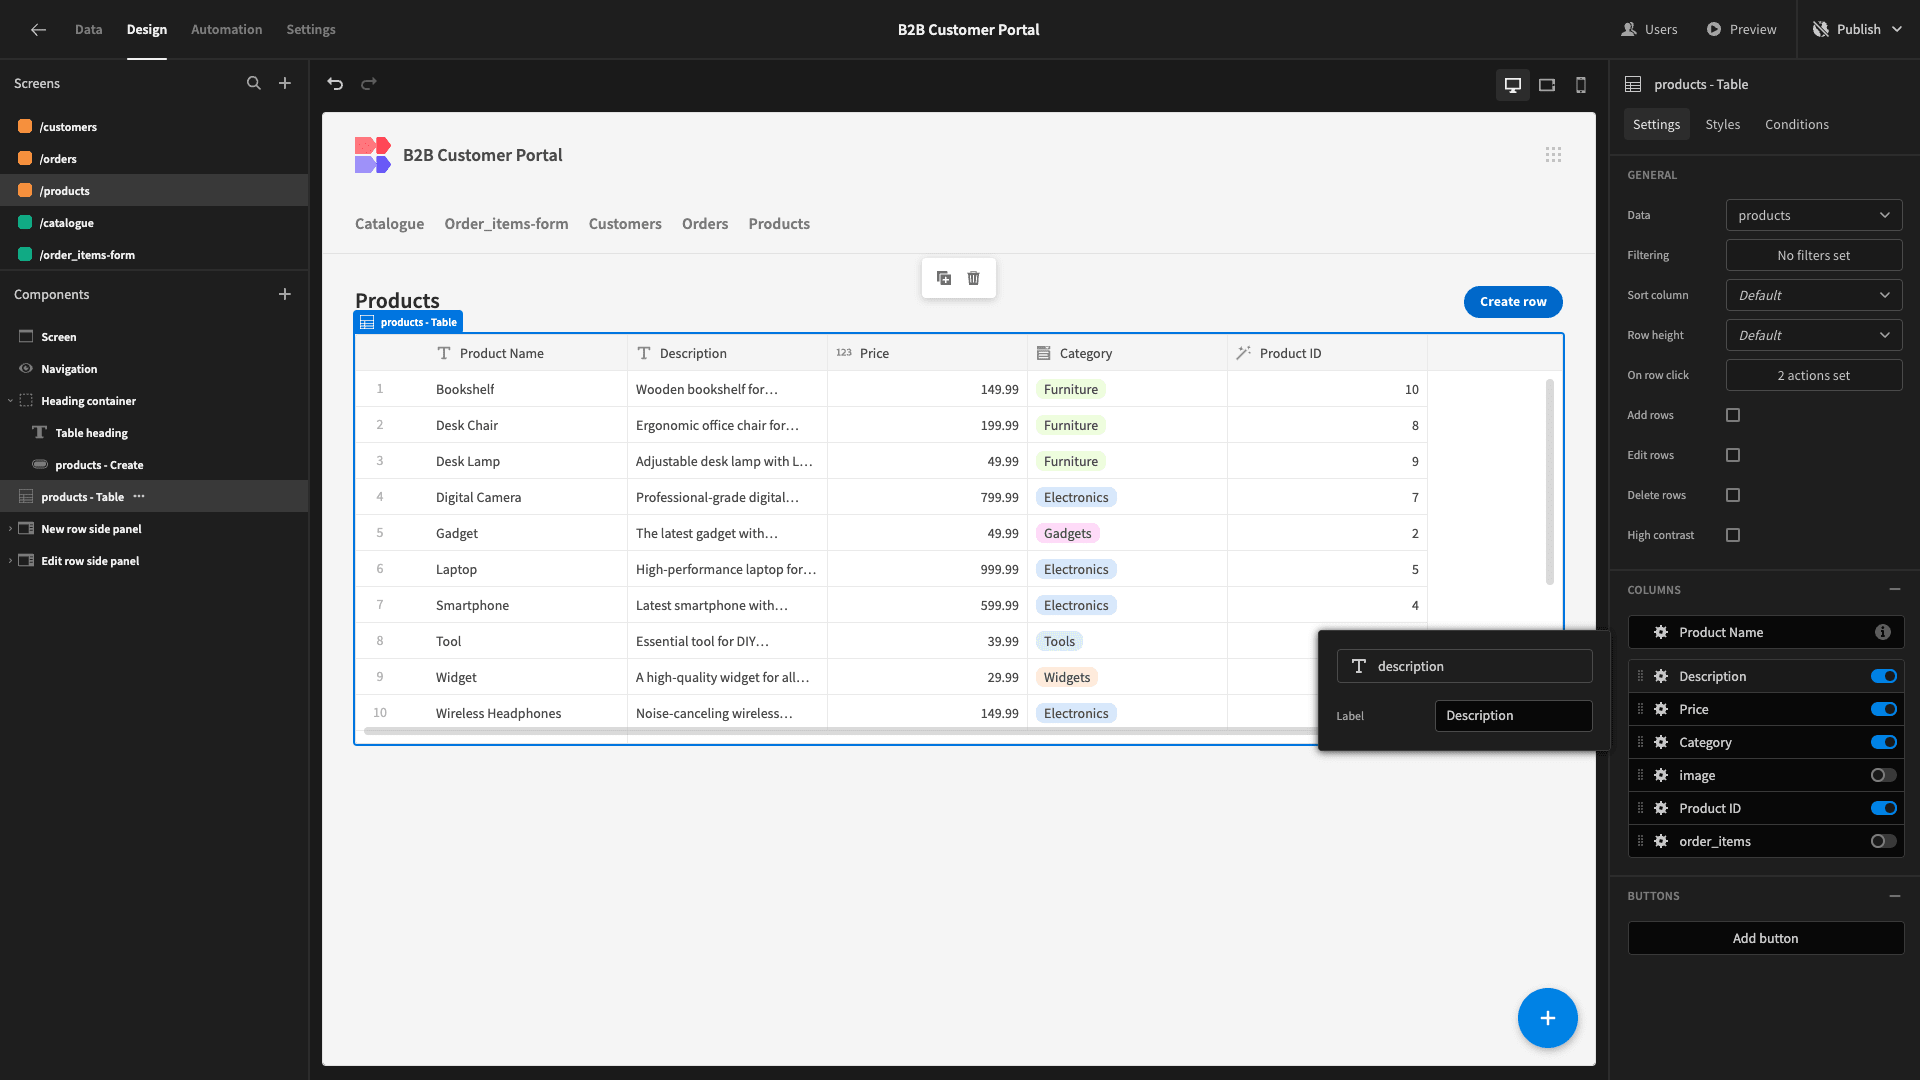
We’ll start with the products table. We want to retain more or less full CRUD functionality here, so we’re really only going to make a few UX improvements.
We’ll start with the table itself and then make a few changes to each of our forms.
First, we’ll capitalize our title.
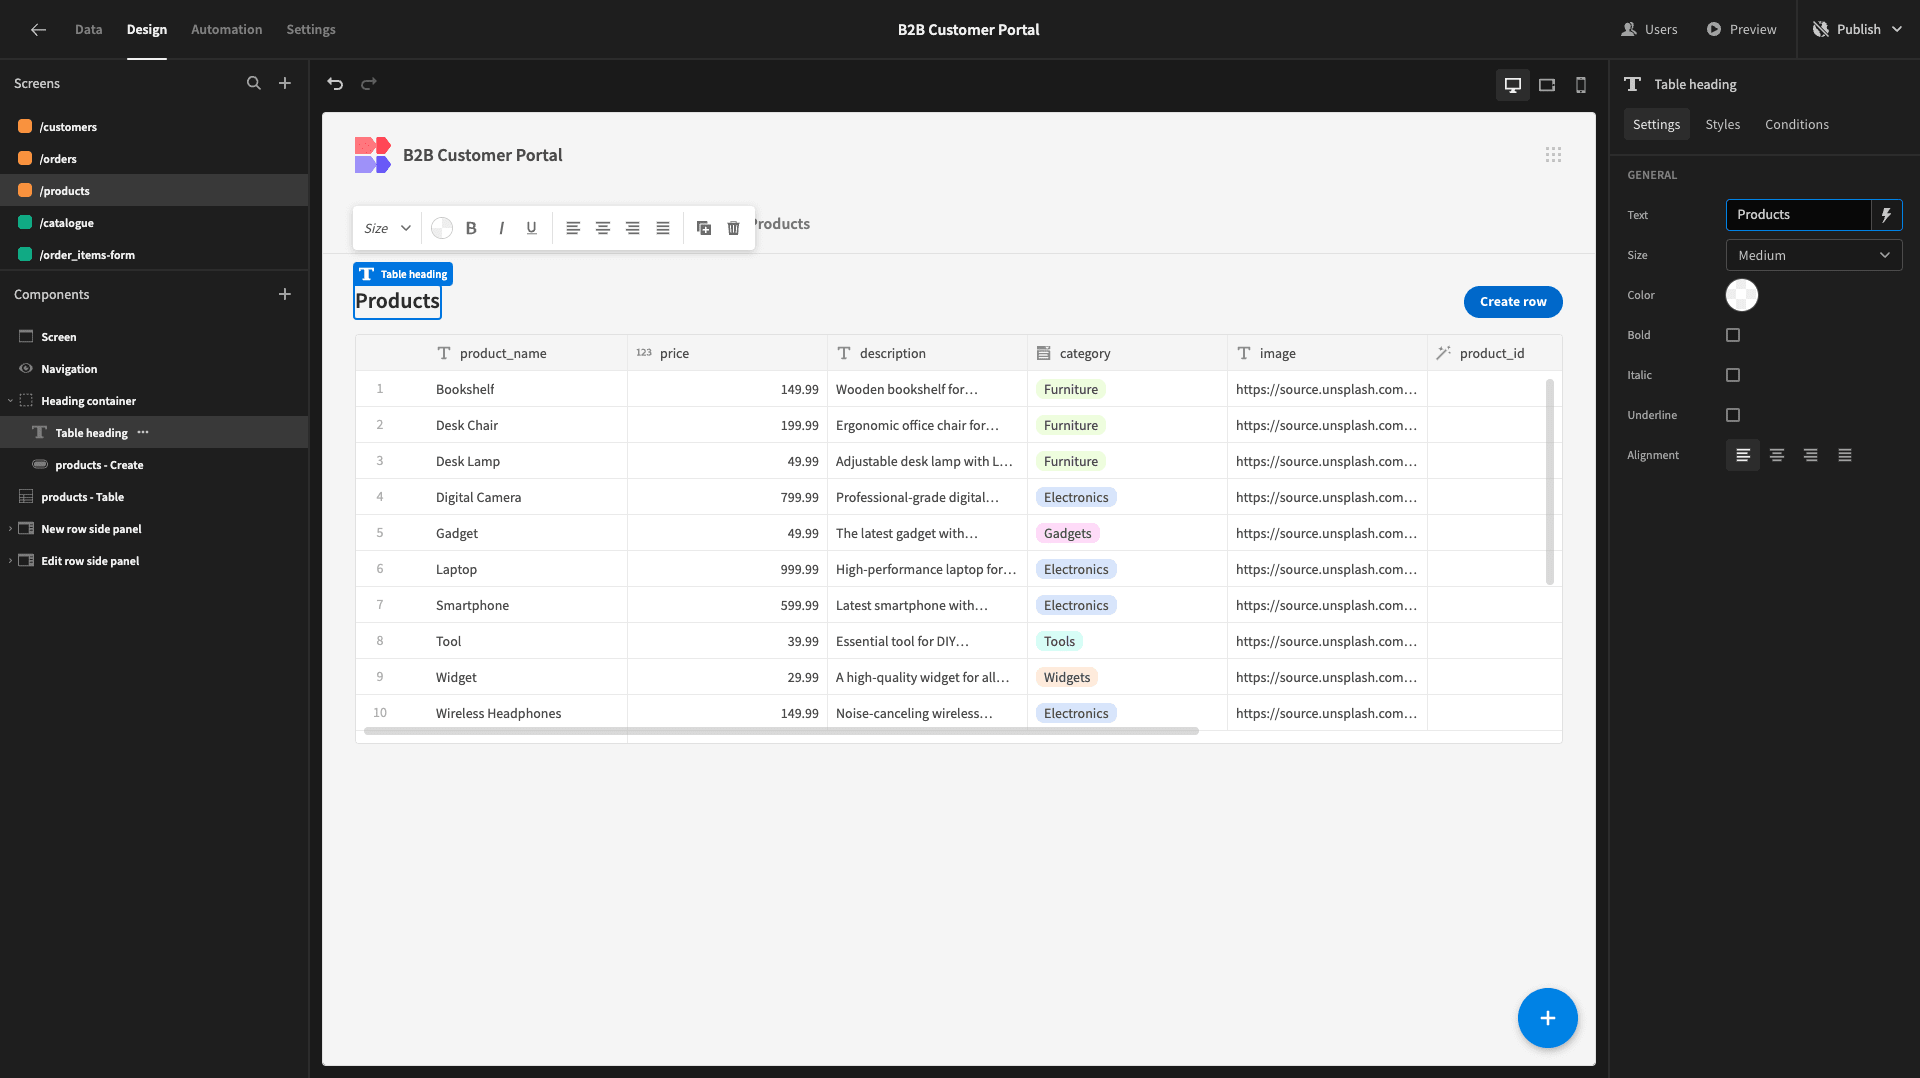
Then, we can configure which columns we want to display in our table. We’ve deselected image and order_items. We’ve also used the Label setting for each to update the headings of our remaining columns.
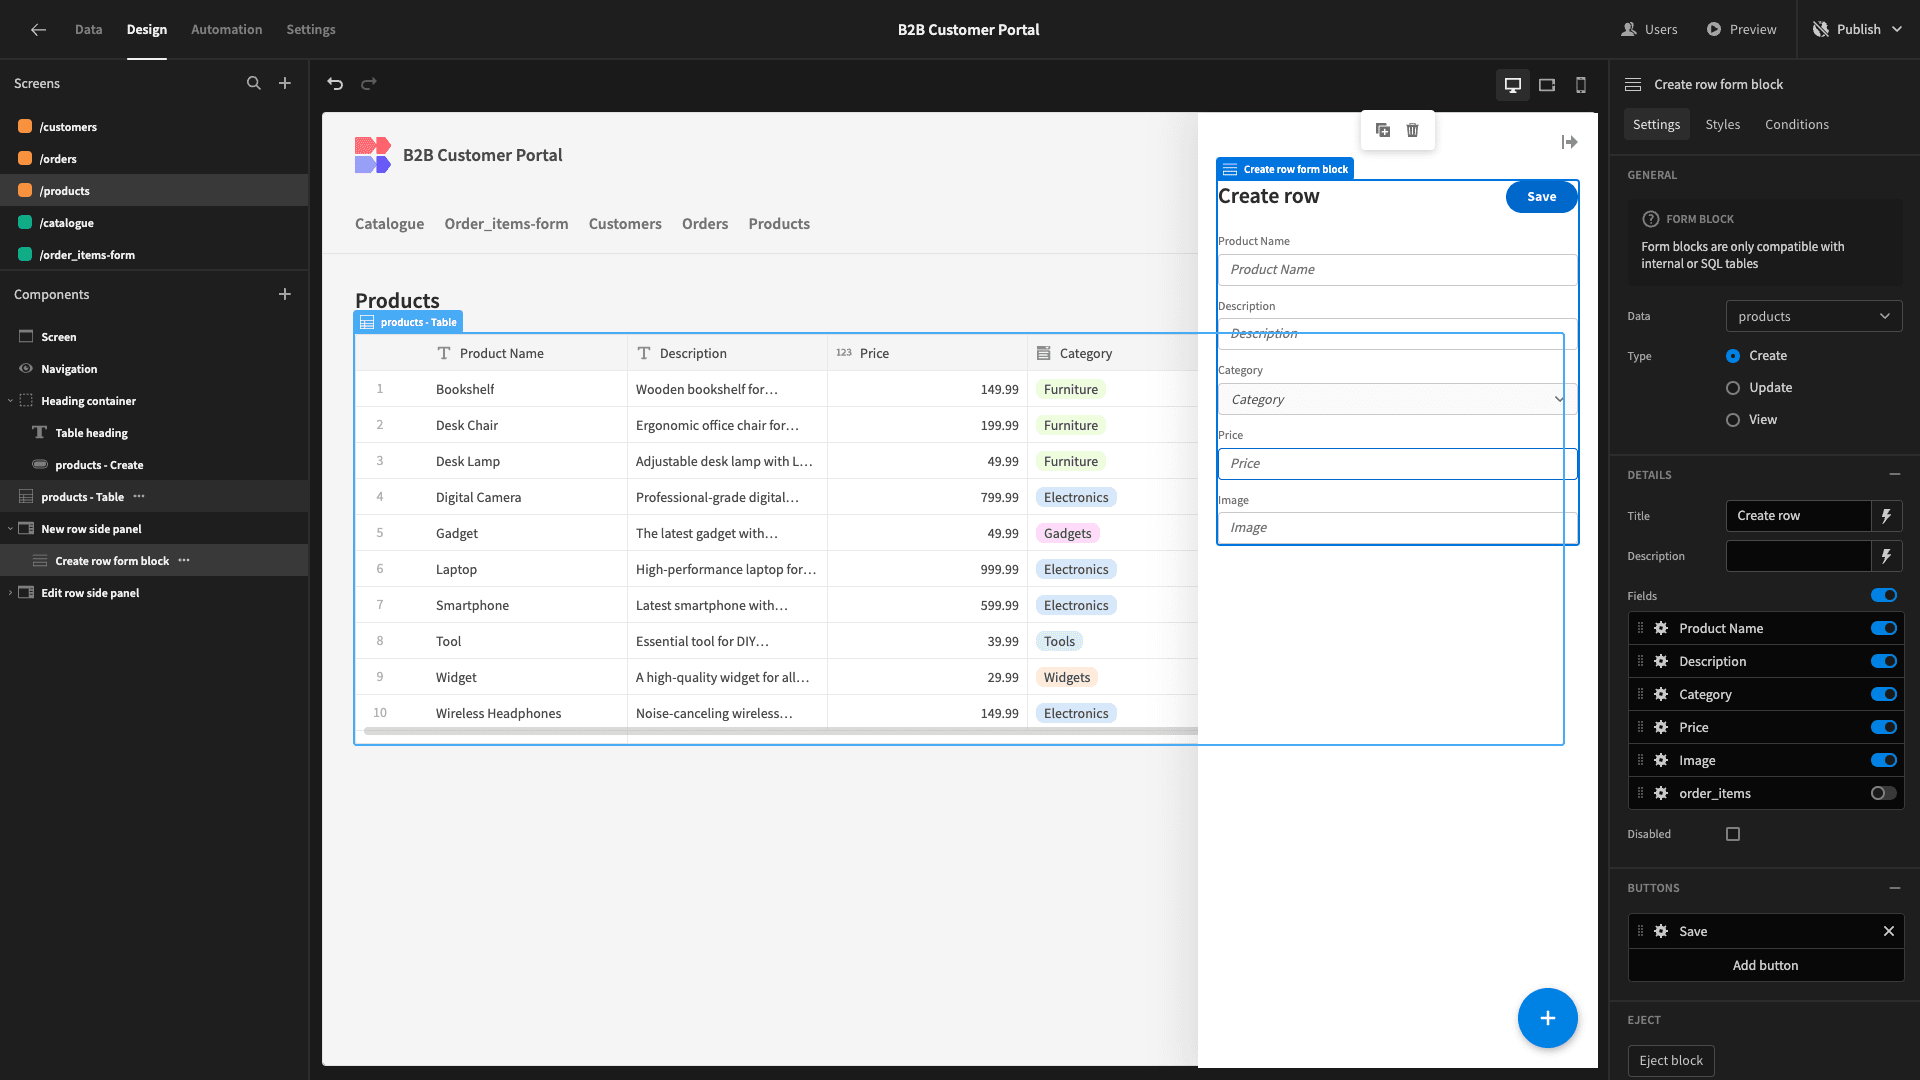
For each of our forms, all we’ll do is deselect the order_items field and update our Label and Placeholder texts.
Orders
We can follow a similar process with the orders table. However, don’t need to give our internal users full CRUD access this time - since there’s no need for them to create rows.
So, we’ll start by deleting our Button and New Row Side Panel components.
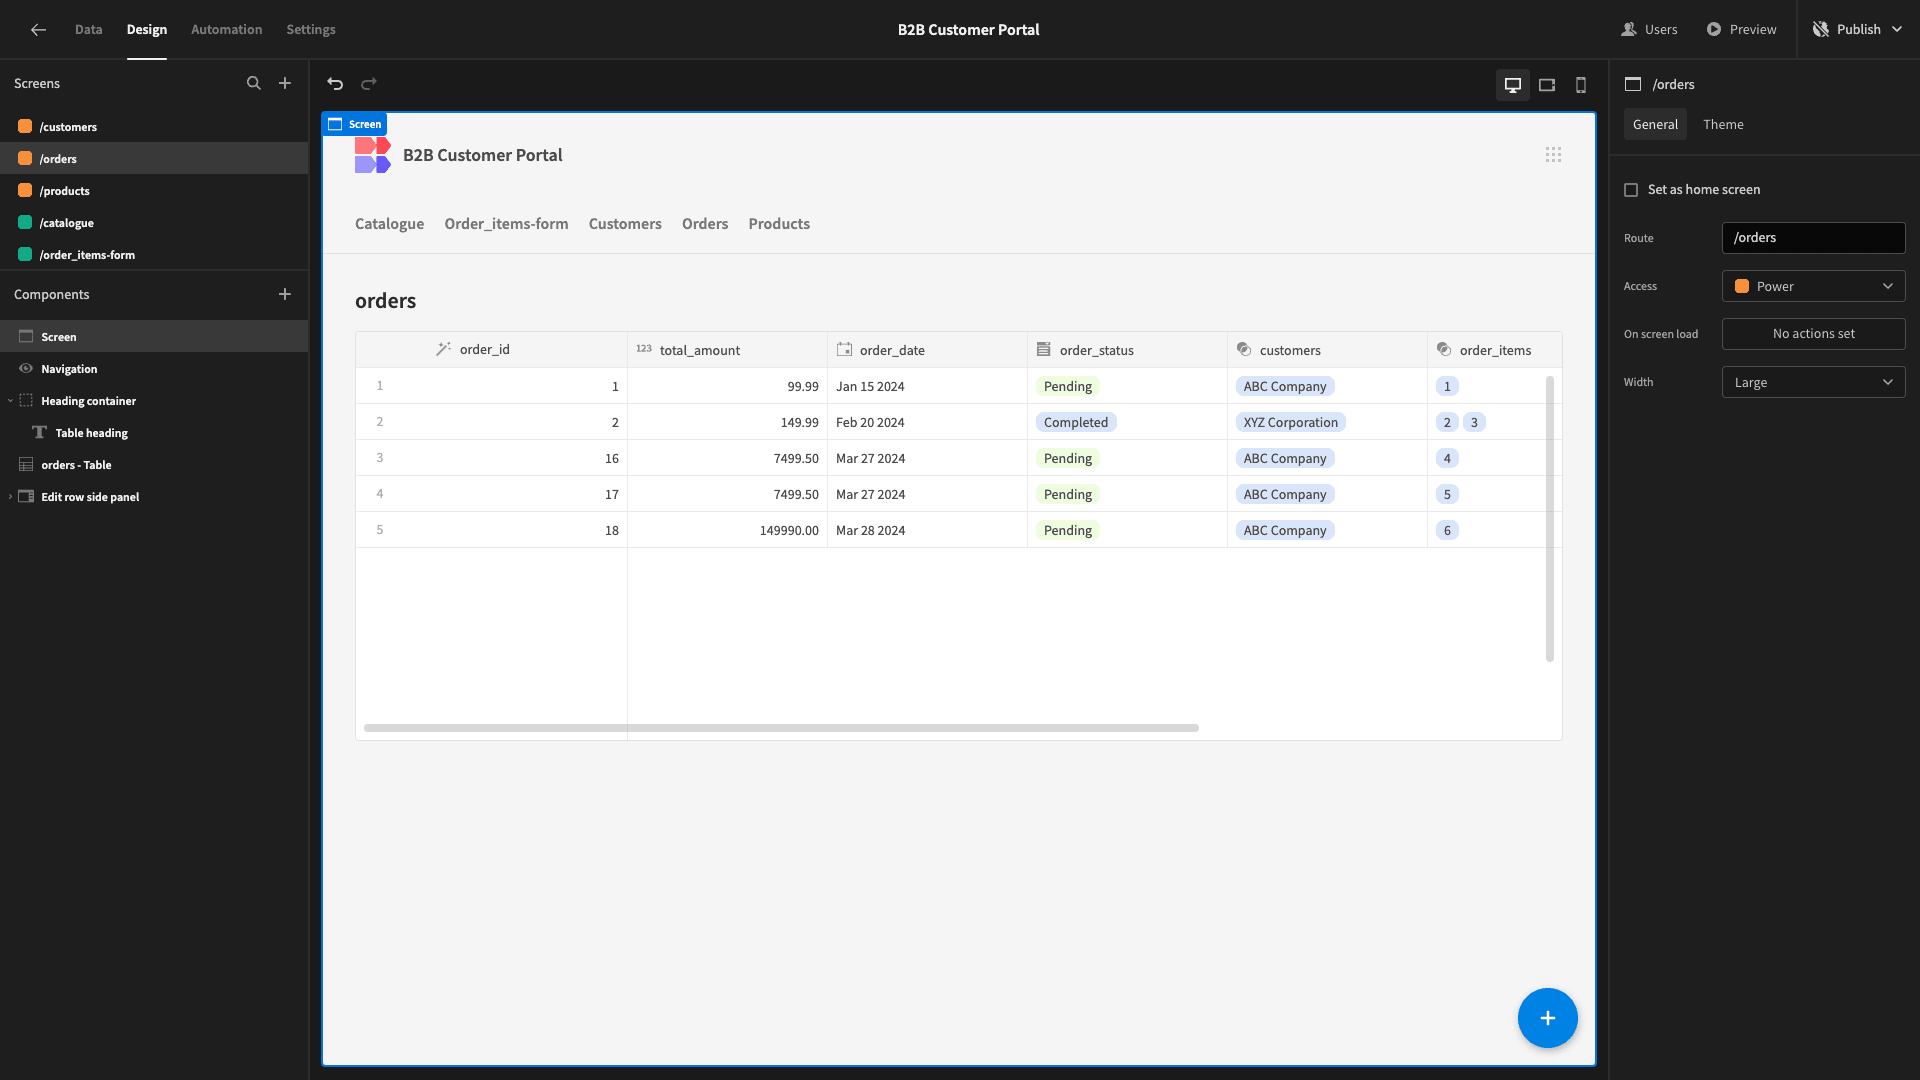
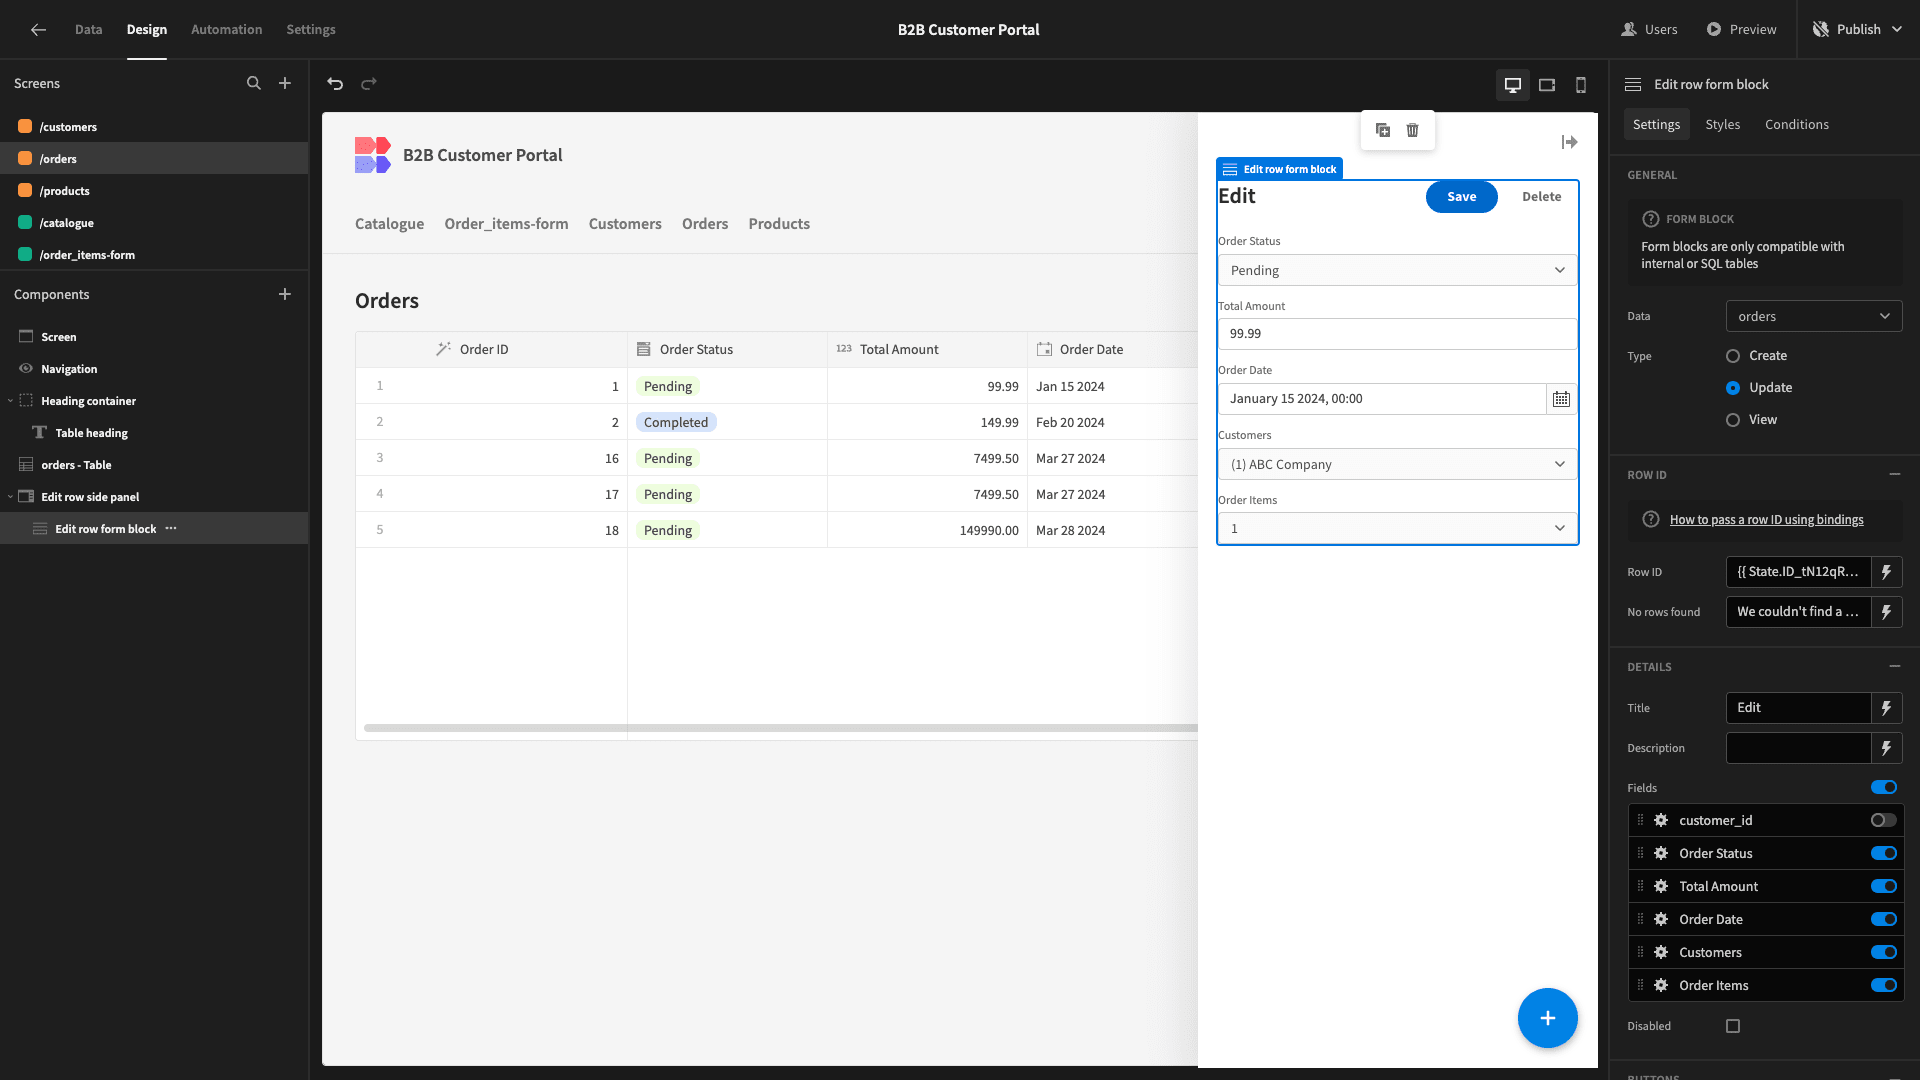
On our table, we’ll deselect the customer_id attribute and then update our display texts as before.
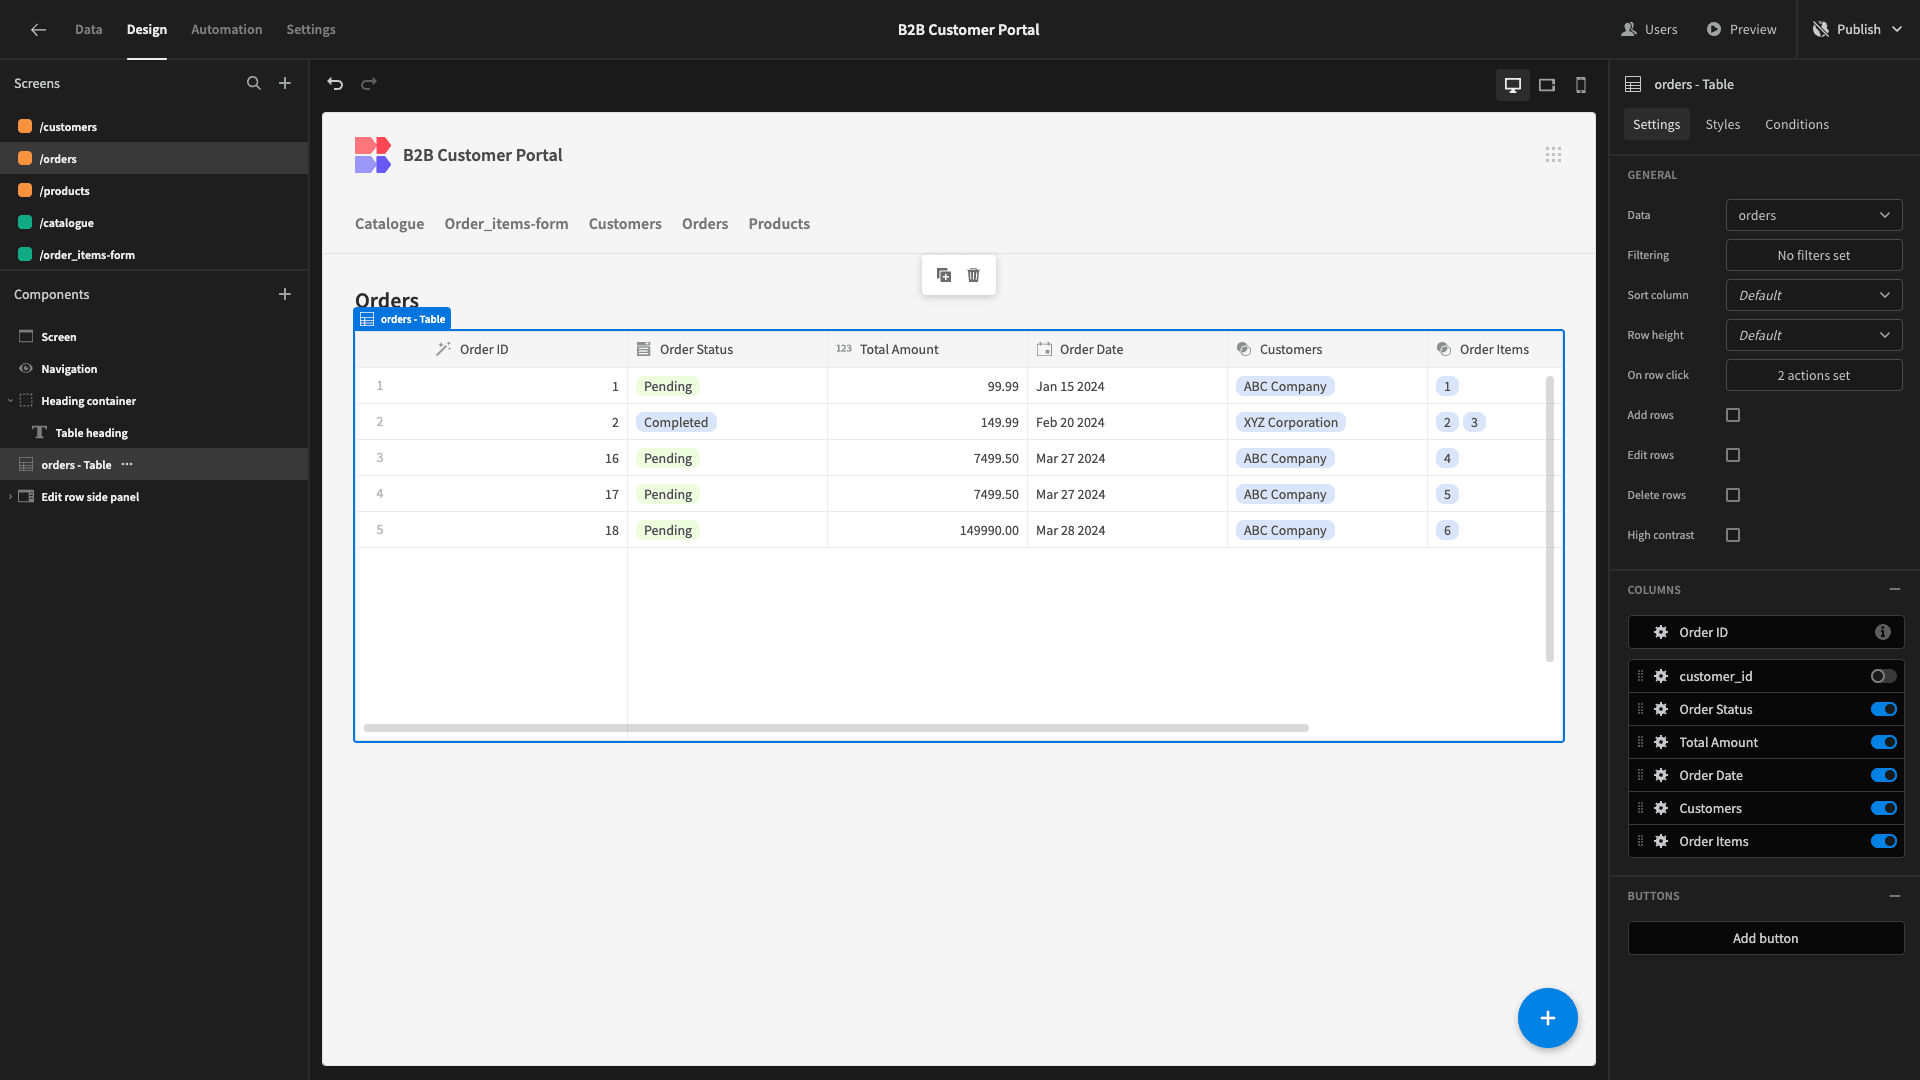
And we’ll do the exact same thing for our remaining form.
Customers
Our customers screen will also provide full CRUD functionality. On our table itself, the only fields we’ll display are company_name, customer_id, contact_person_name, contact_phone, and state.
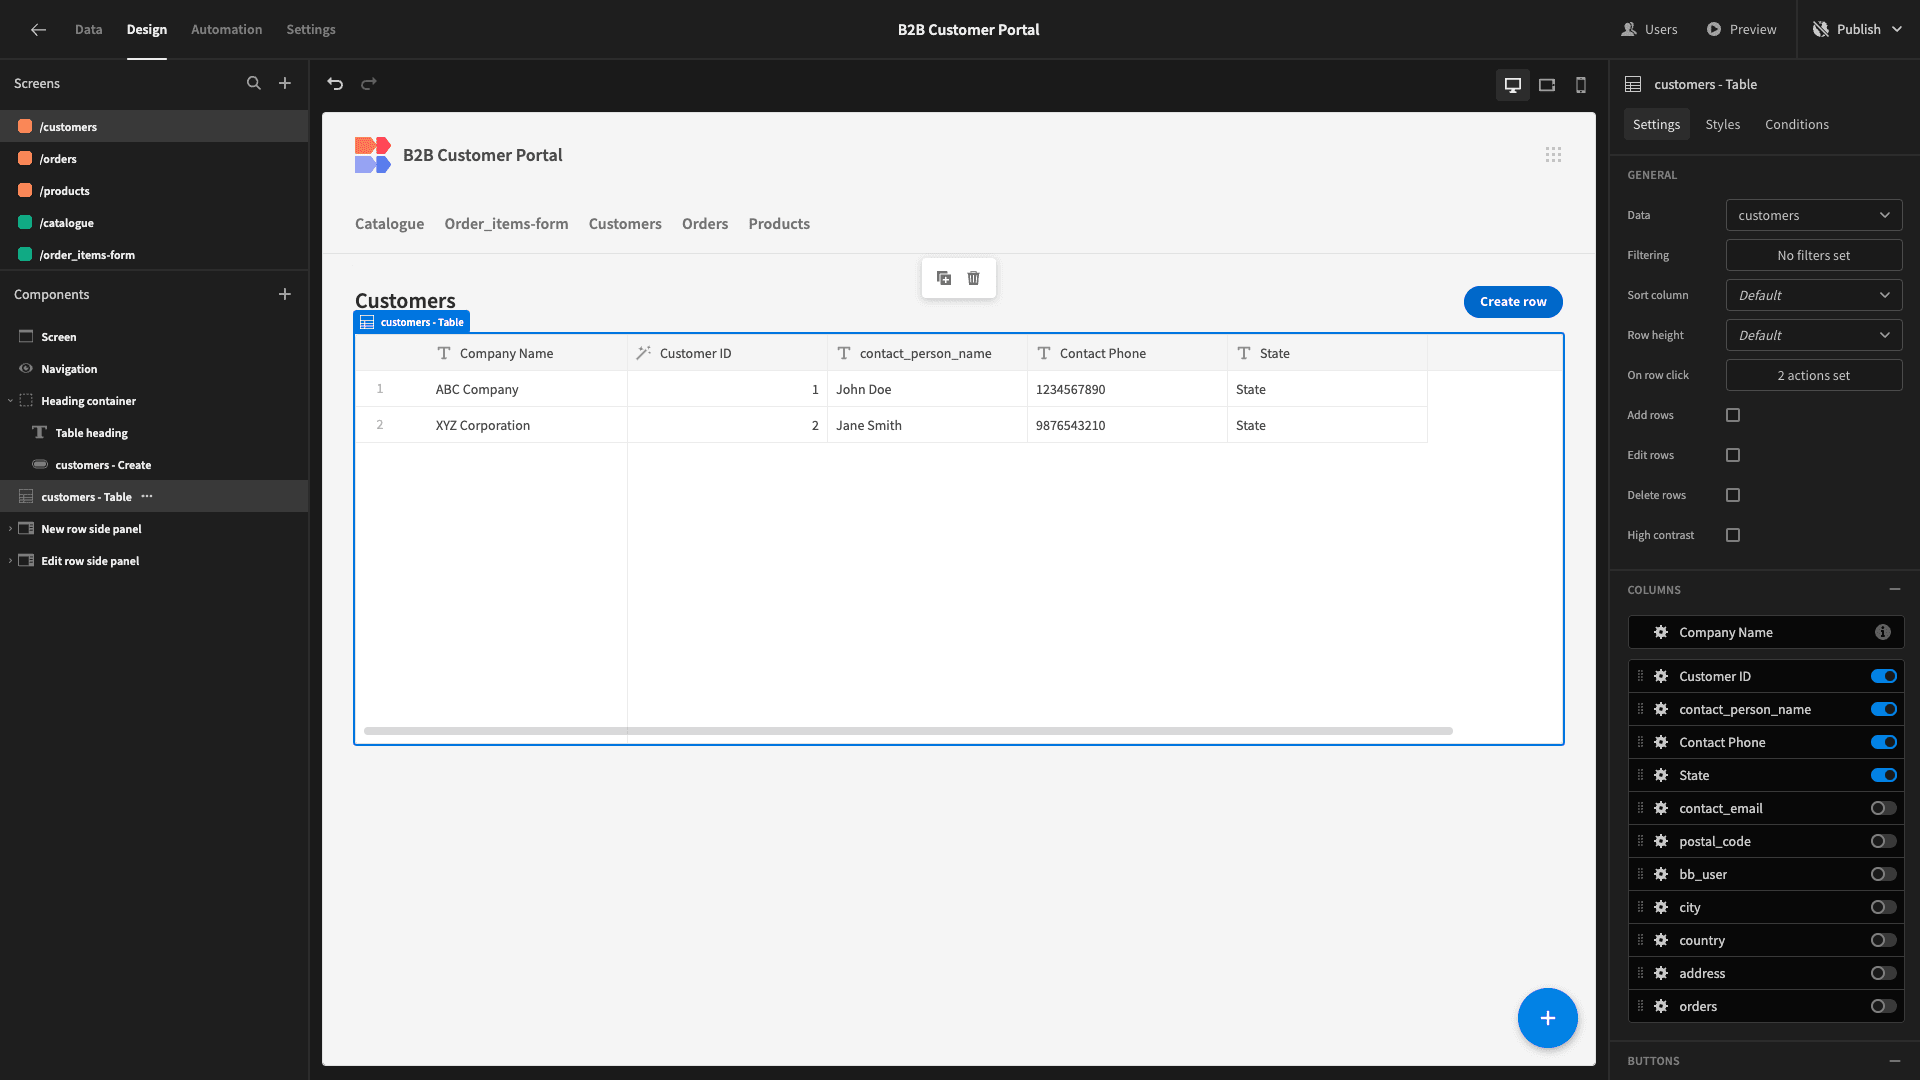
On the forms, we’ll include everything except for the orders field. We’ll also tidy up our display texts.

And that’s our admin screens done.
7. Creating an orders screen for customers
The last screen we want to build is a UI where customers can view the status of their orders and update their company information.
We’ll start by adding another screen with the Table Layout and pointing it at our orders table. This time, however, we’re using Basic for our minimum access role.
We’ll deselect the customer_id and customers columns - and update our display texts.
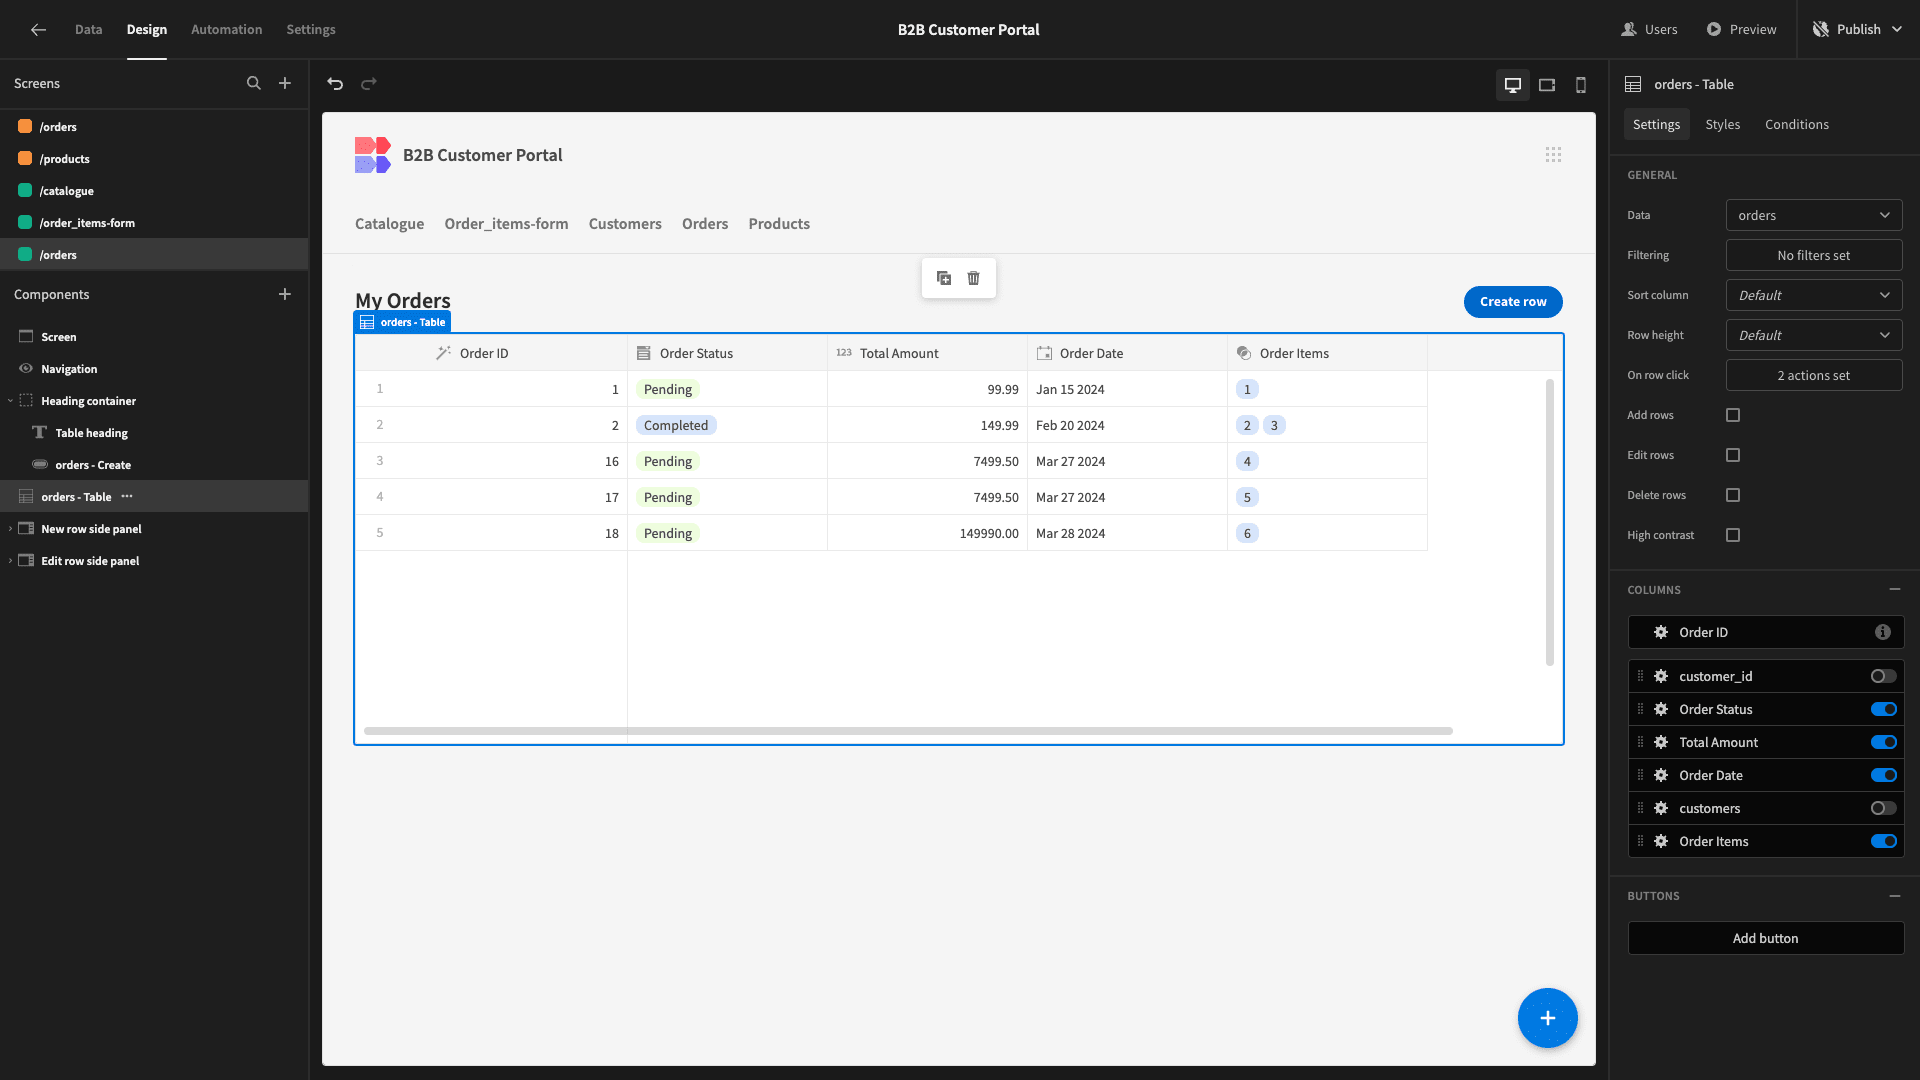
Now, we want to filter this table so that it only displays orders that are relevant to the current user. To do this, we’ll need to add a customers Data Provider again and filter it for the row where bb_user equals {{ Current User._id }}, just as we did before.
Then, we’ll add a filter to our Table so that it only displays the rows where customer_id equals {{ Customers Data Provider.Rows.0.customer_id }}.
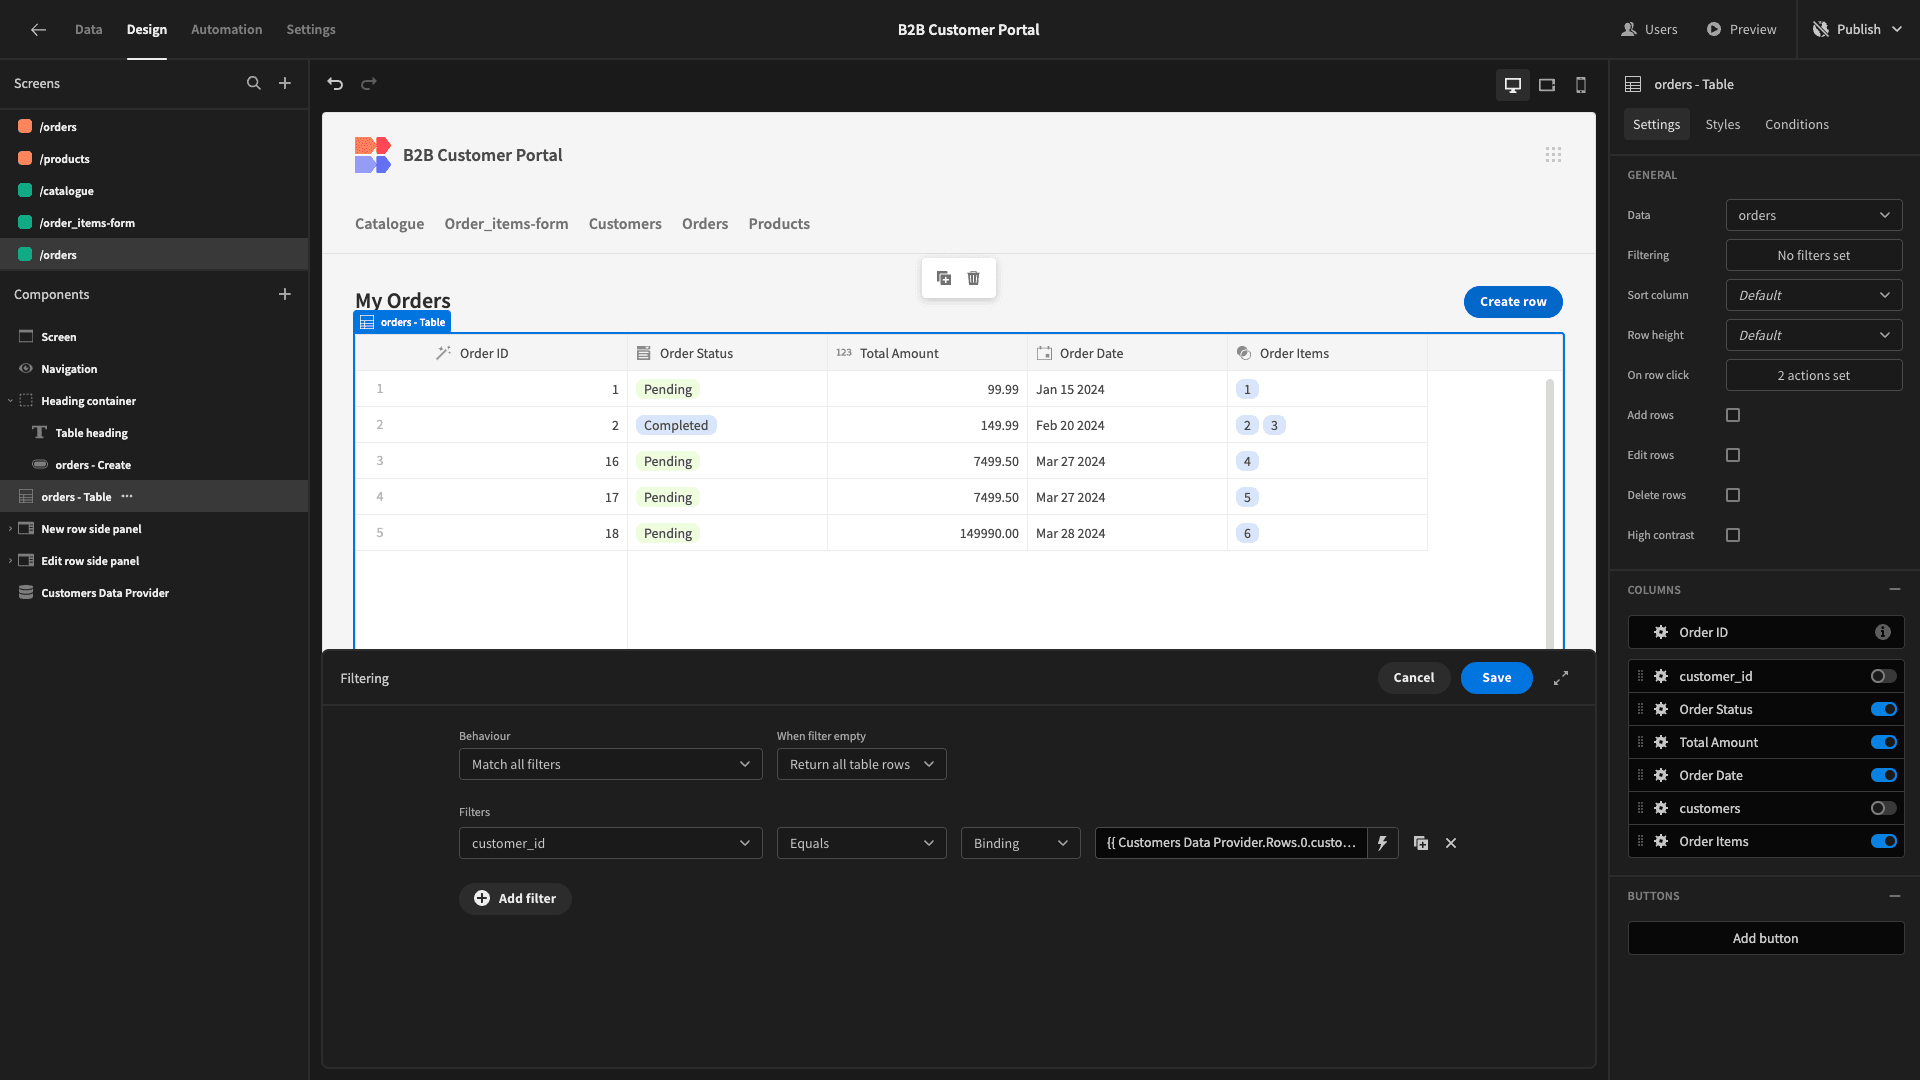
Here’s how this will look.
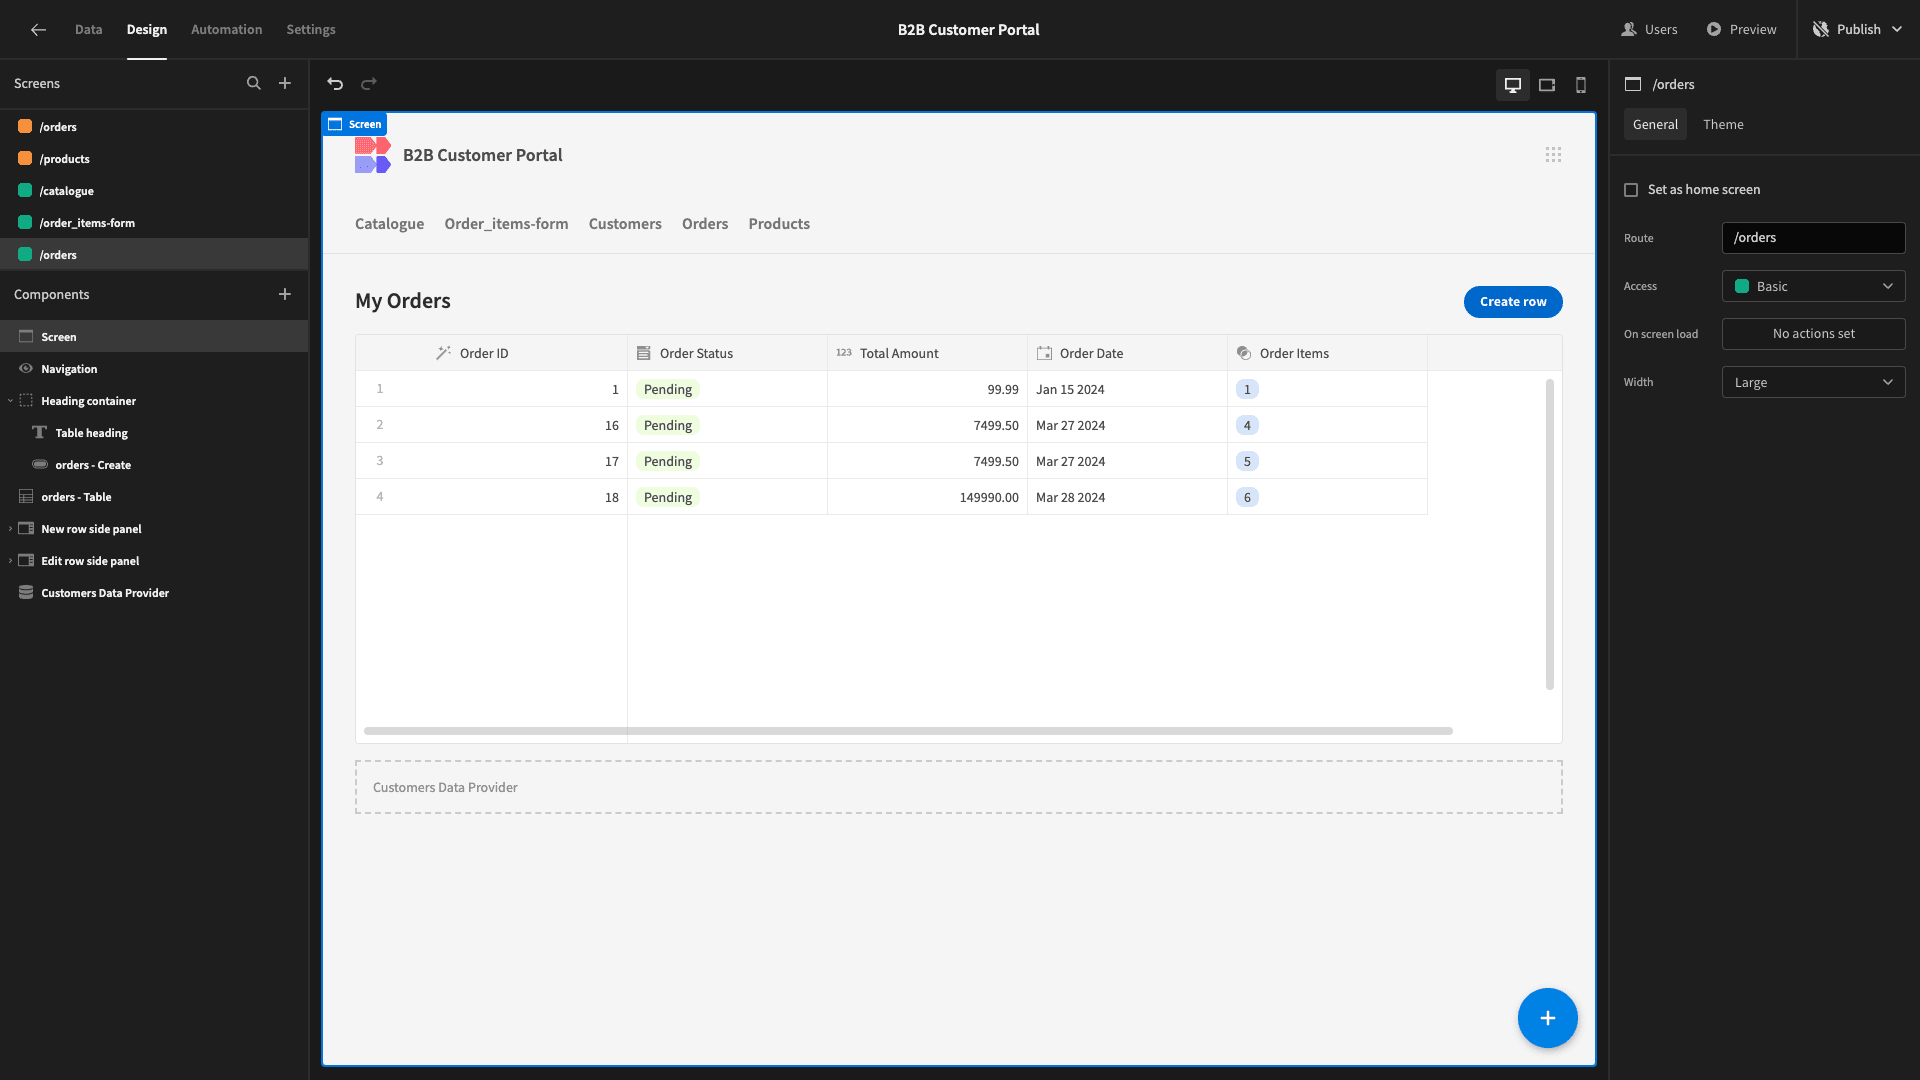
When a user clicks a row, we want them to be able to view the relevant data but not update it. So, in the existing form, we’ve changed the Type to View. We’ve also deselected the customer fields and updated our title.

Lastly, we don’t need our New Row form since we already have a form for creating orders elsewhere in our B2B customer portal.
Instead, we’re going to modify this so that customers can use it to update their company details.
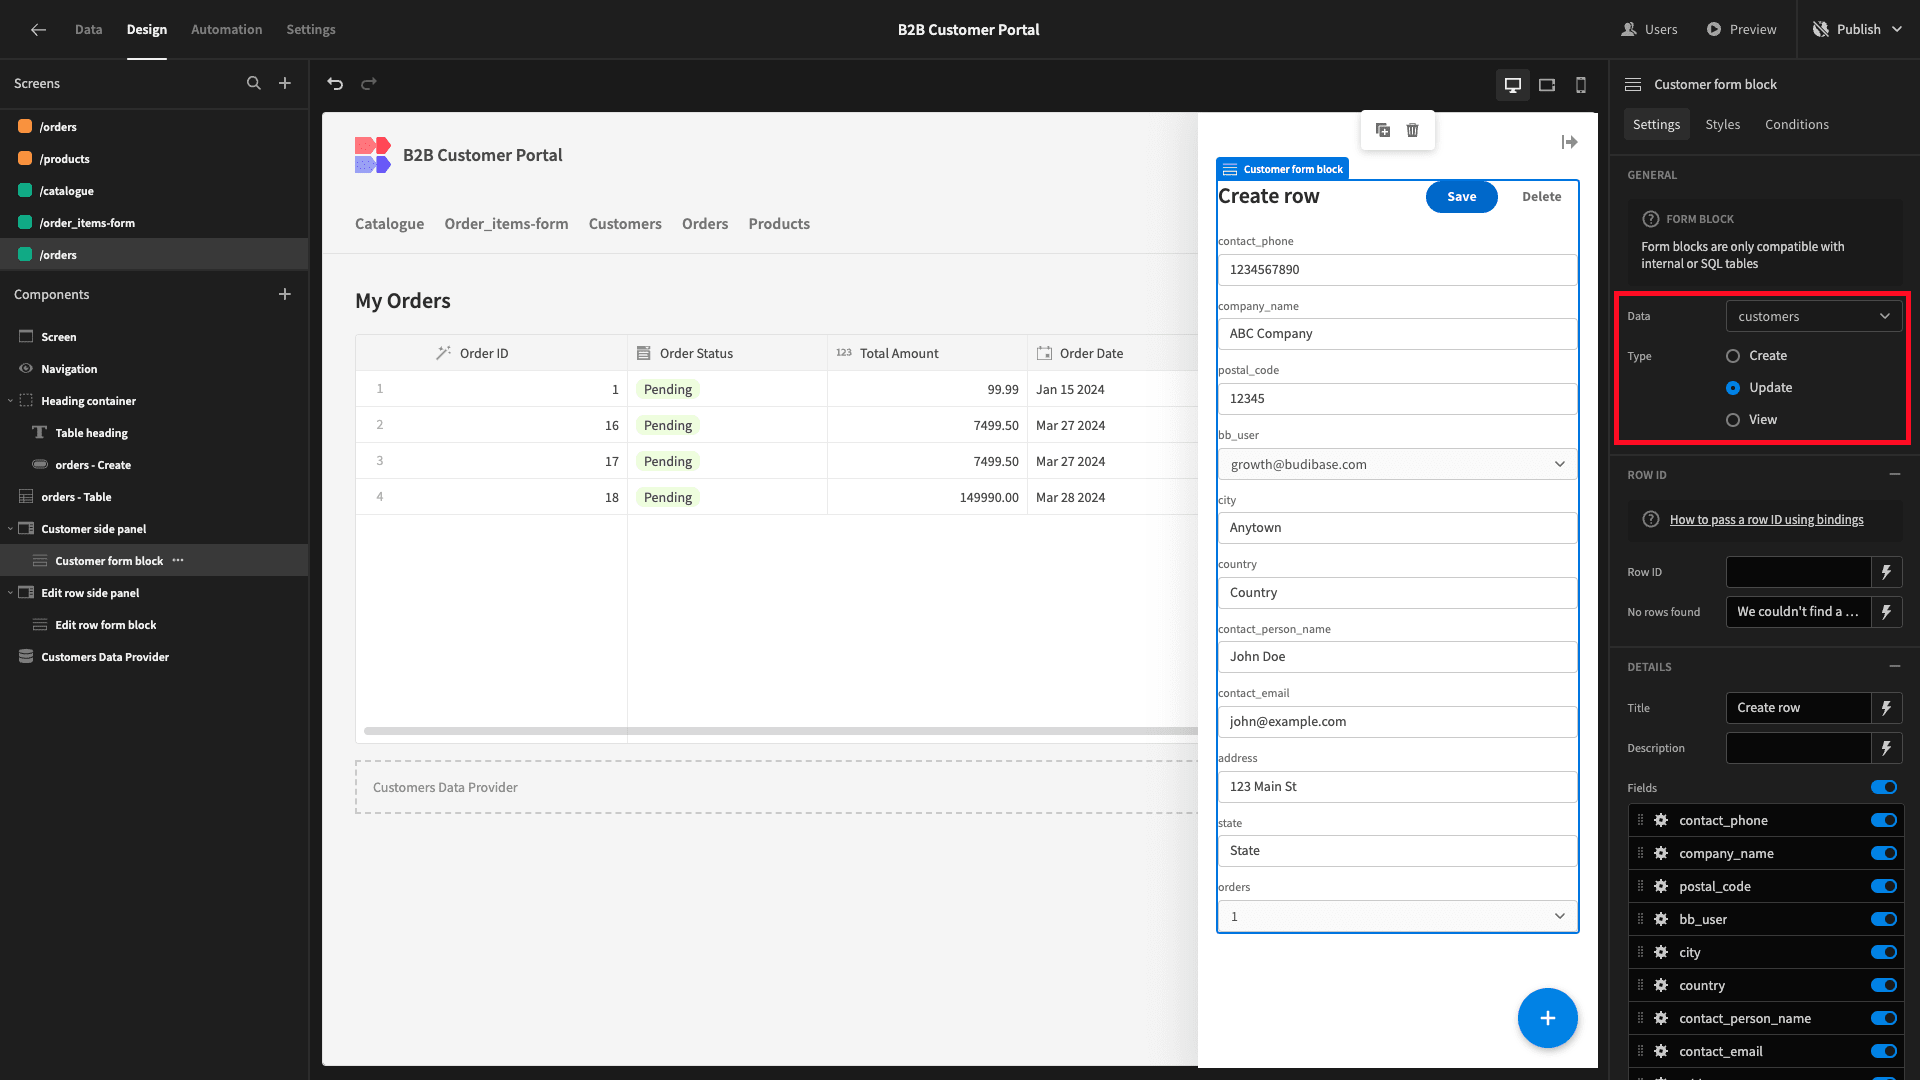
We’ll start by changing the Data to customers and the Type to Update. We’ve also updated the component names for our Side Panel and Form Block.
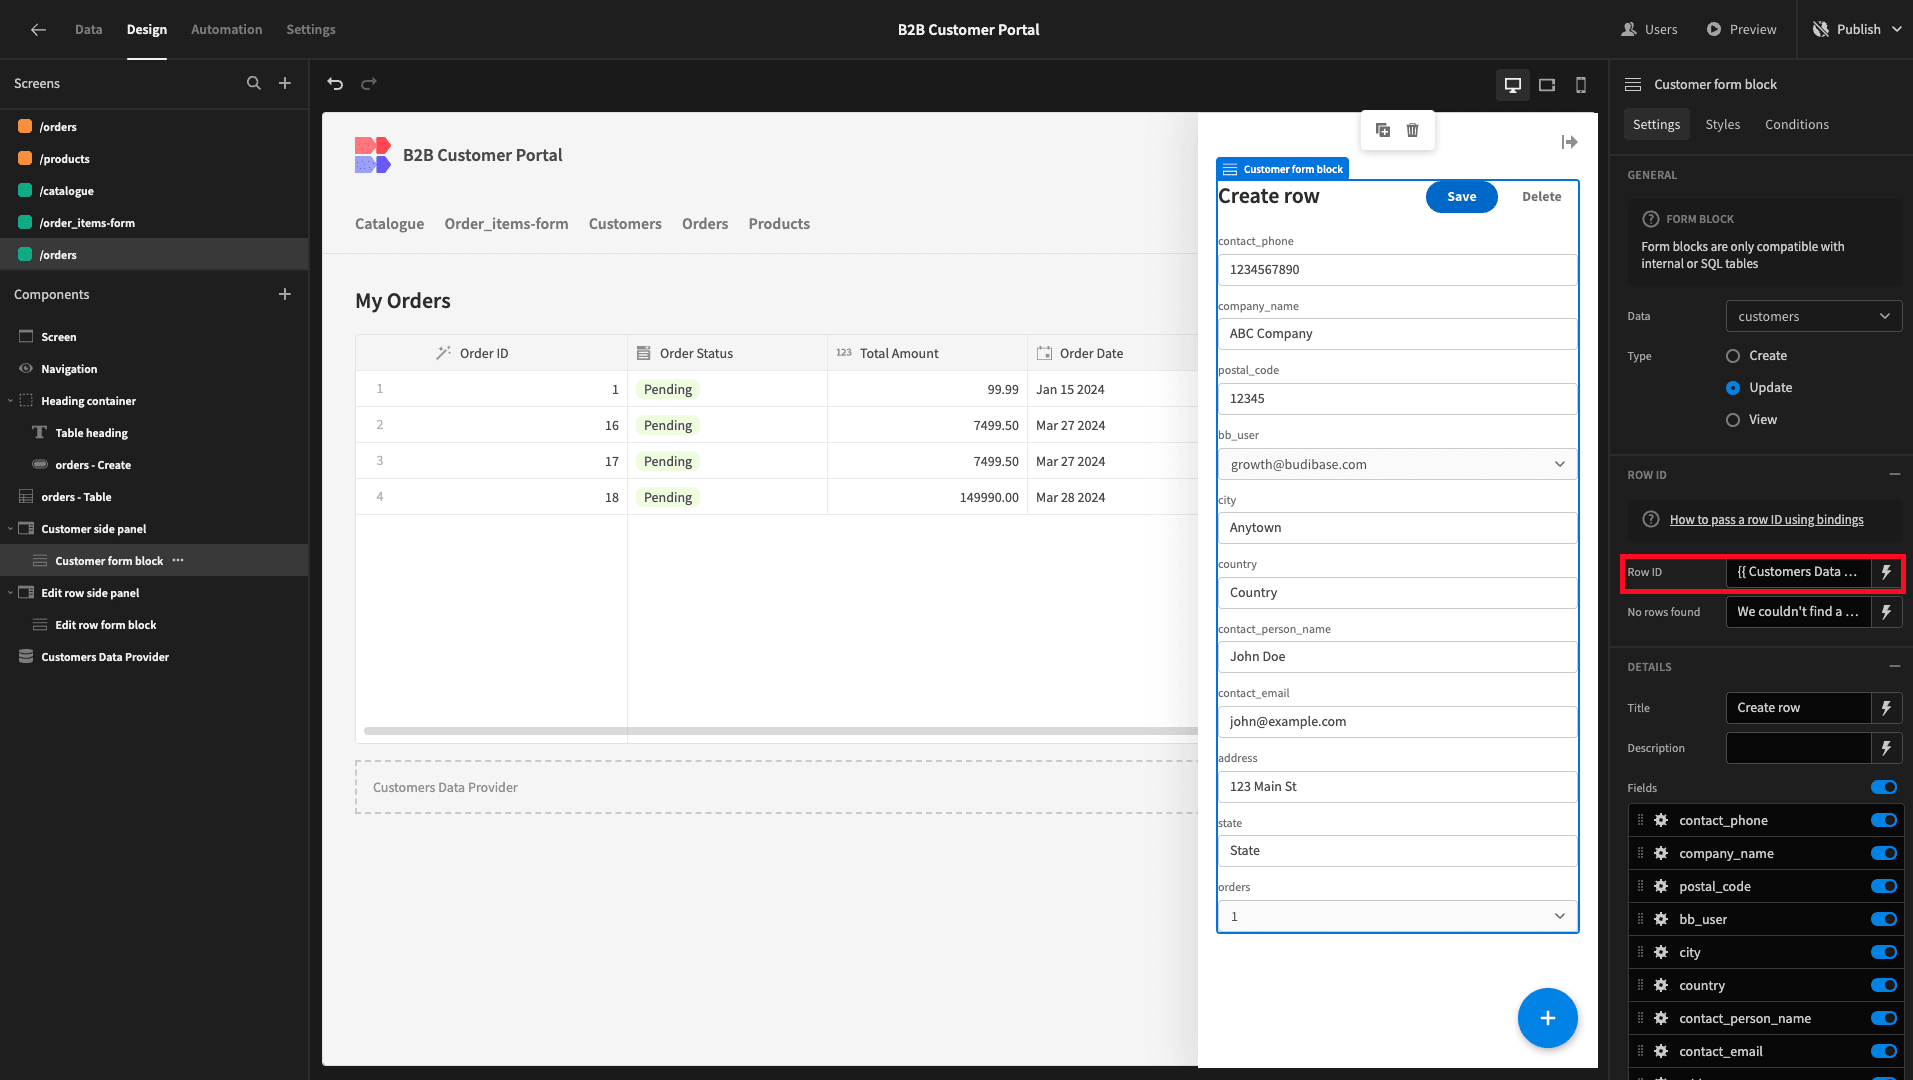
Since this is an Update form, we’ll need to specify a row. We can do this by binding the Row ID setting to {{ Customers Data Provider.Rows.0._id }}.
Then, we’ll deselect the orders and bb_user fields, update our display texts, and remove our Delete button.
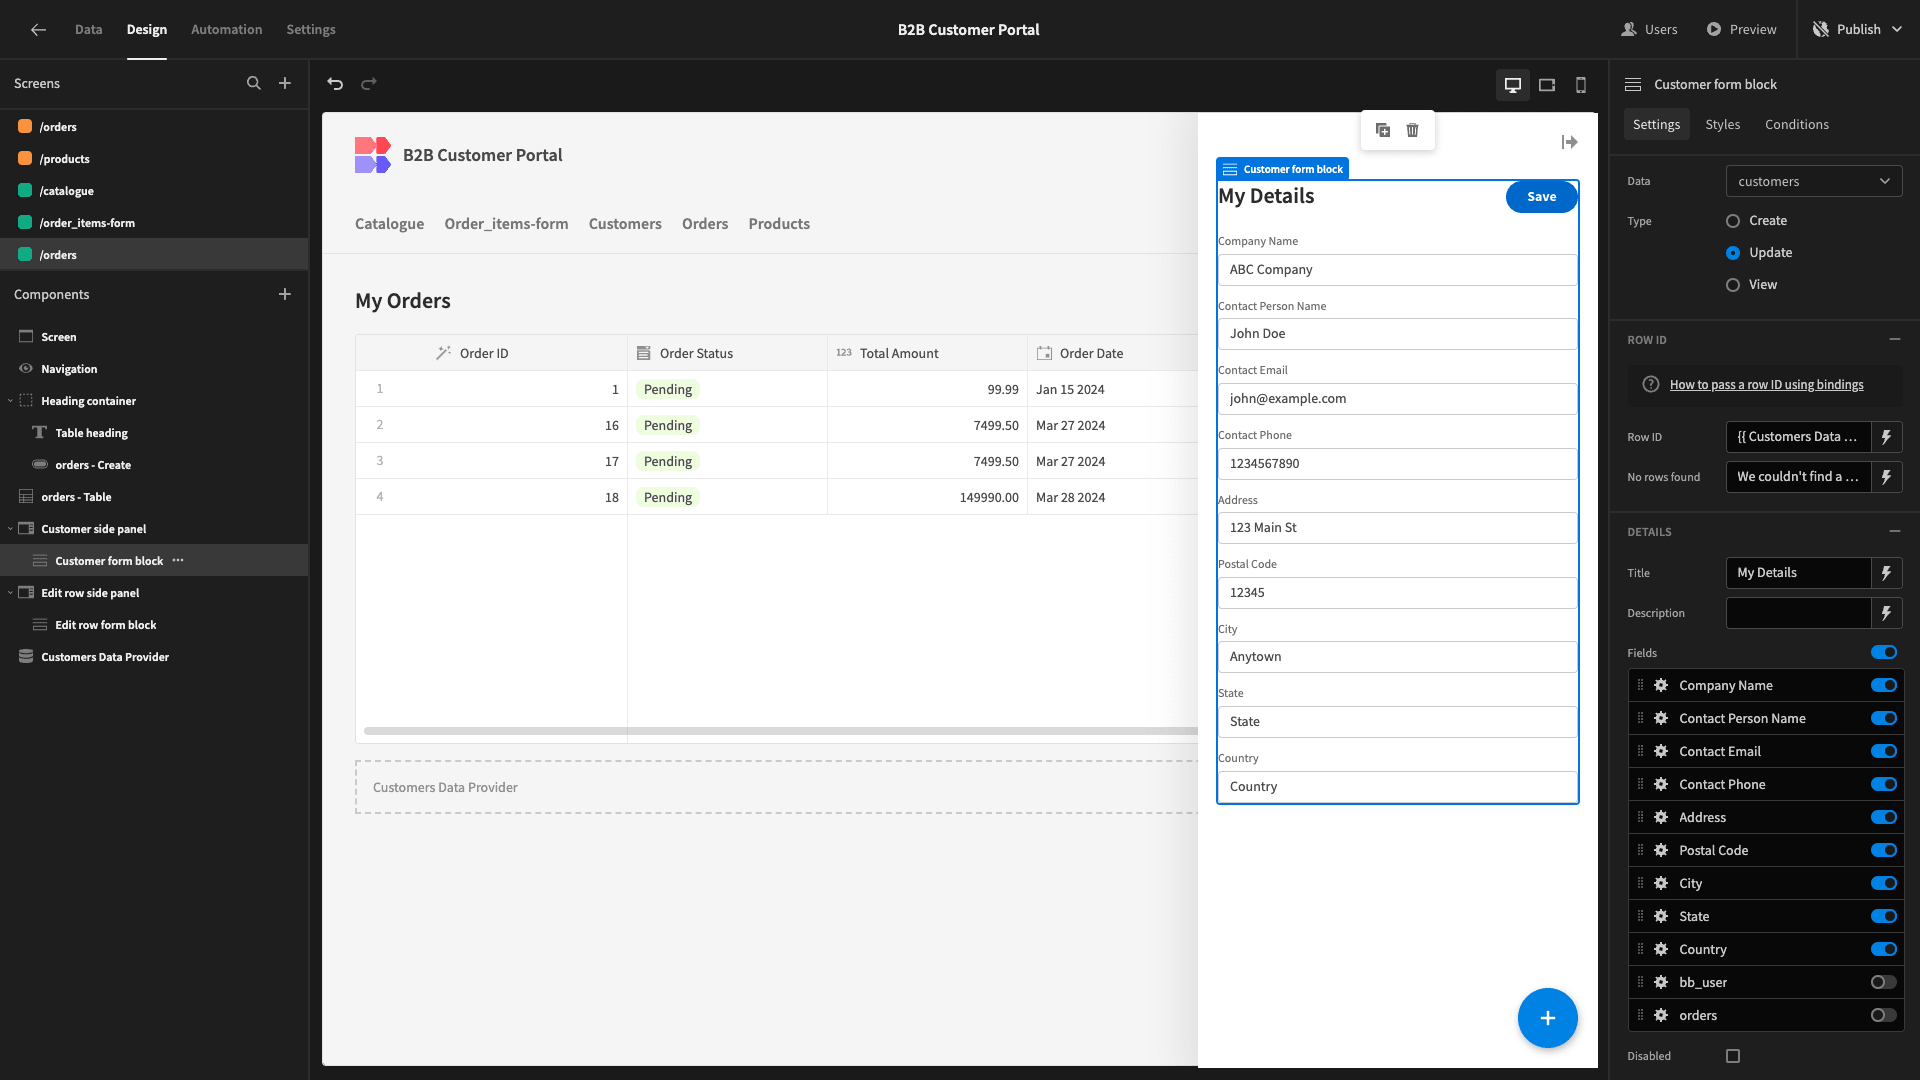
Lastly, we’ll update the text of our Create Row button to reflect our new form.

6. Design tweaks and publishing
Now, the core functionality of our B2B customer portal is complete. Before we push it live, we’re going to make a few final design tweaks.
First, under Navigation, hit Configure Links.

We’ll remove the entry for our order form and set the minimum roles for Customers and Products to Power.
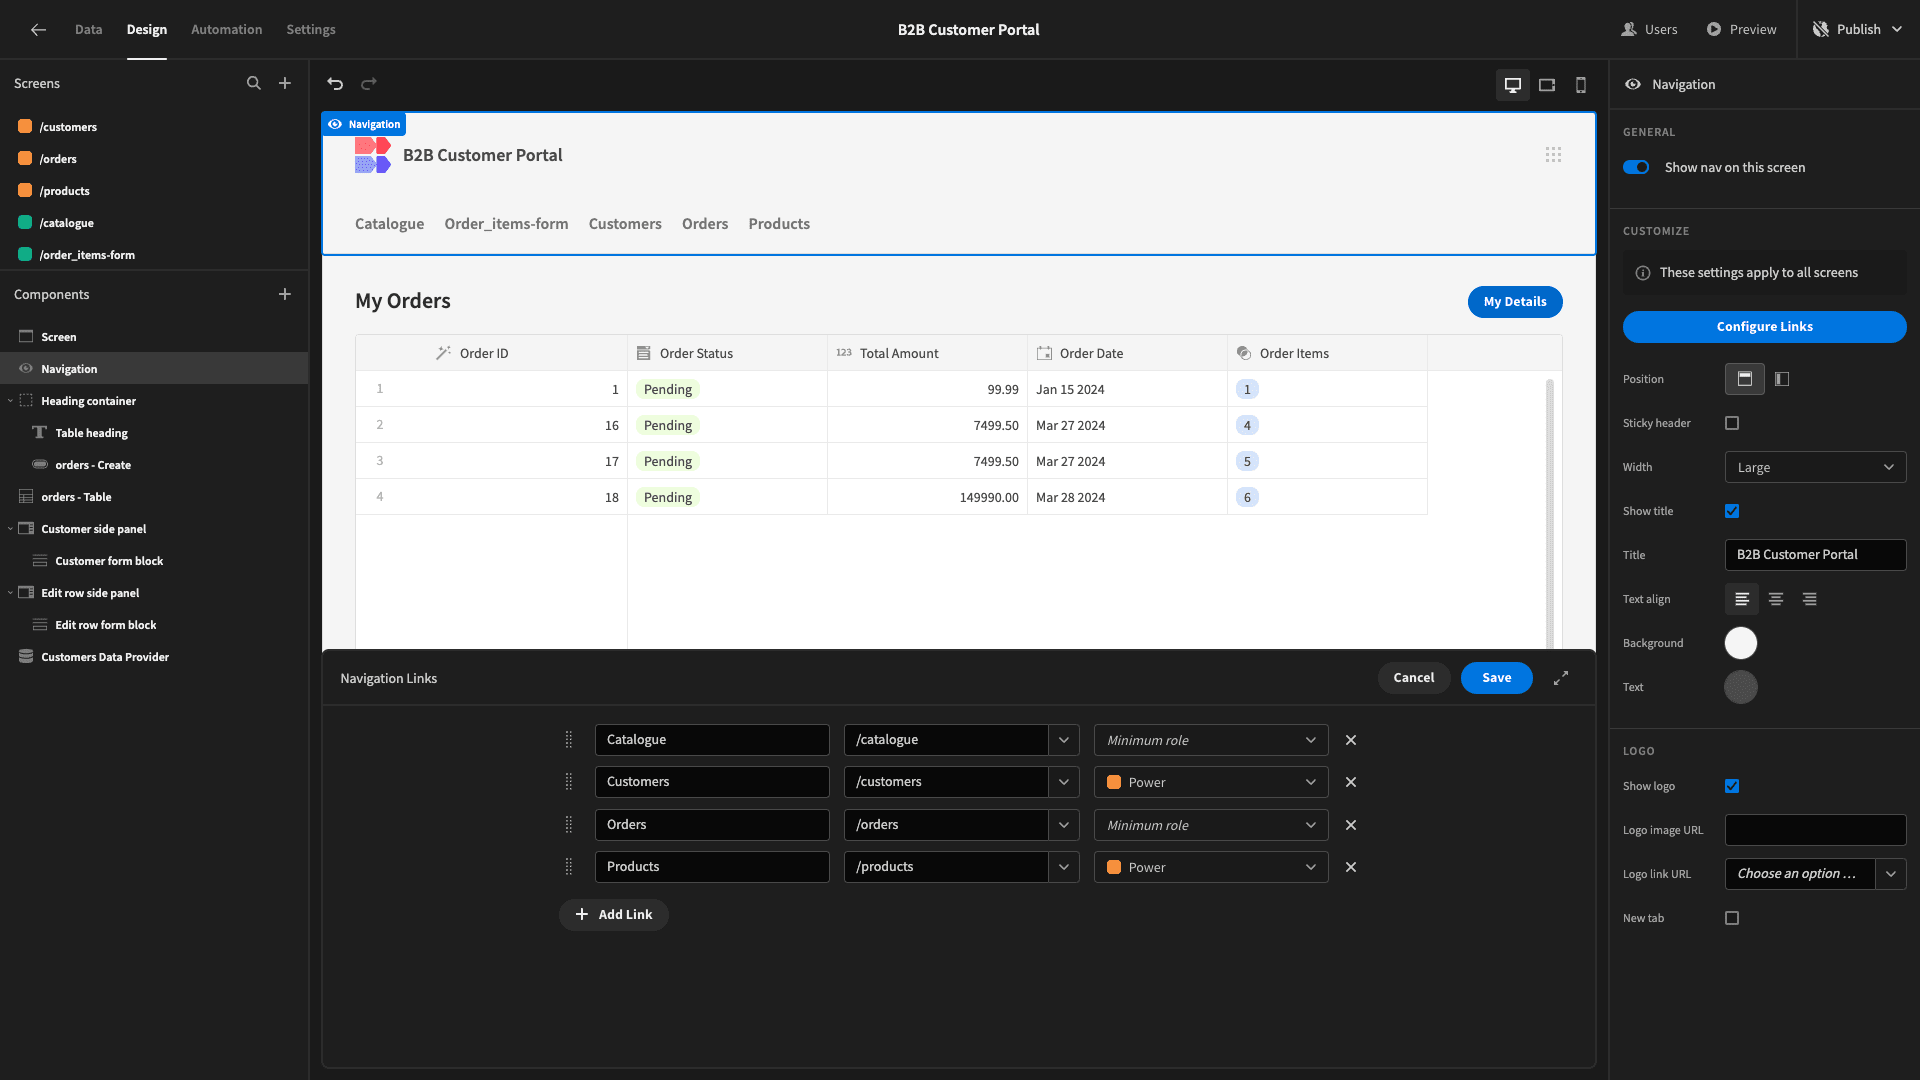
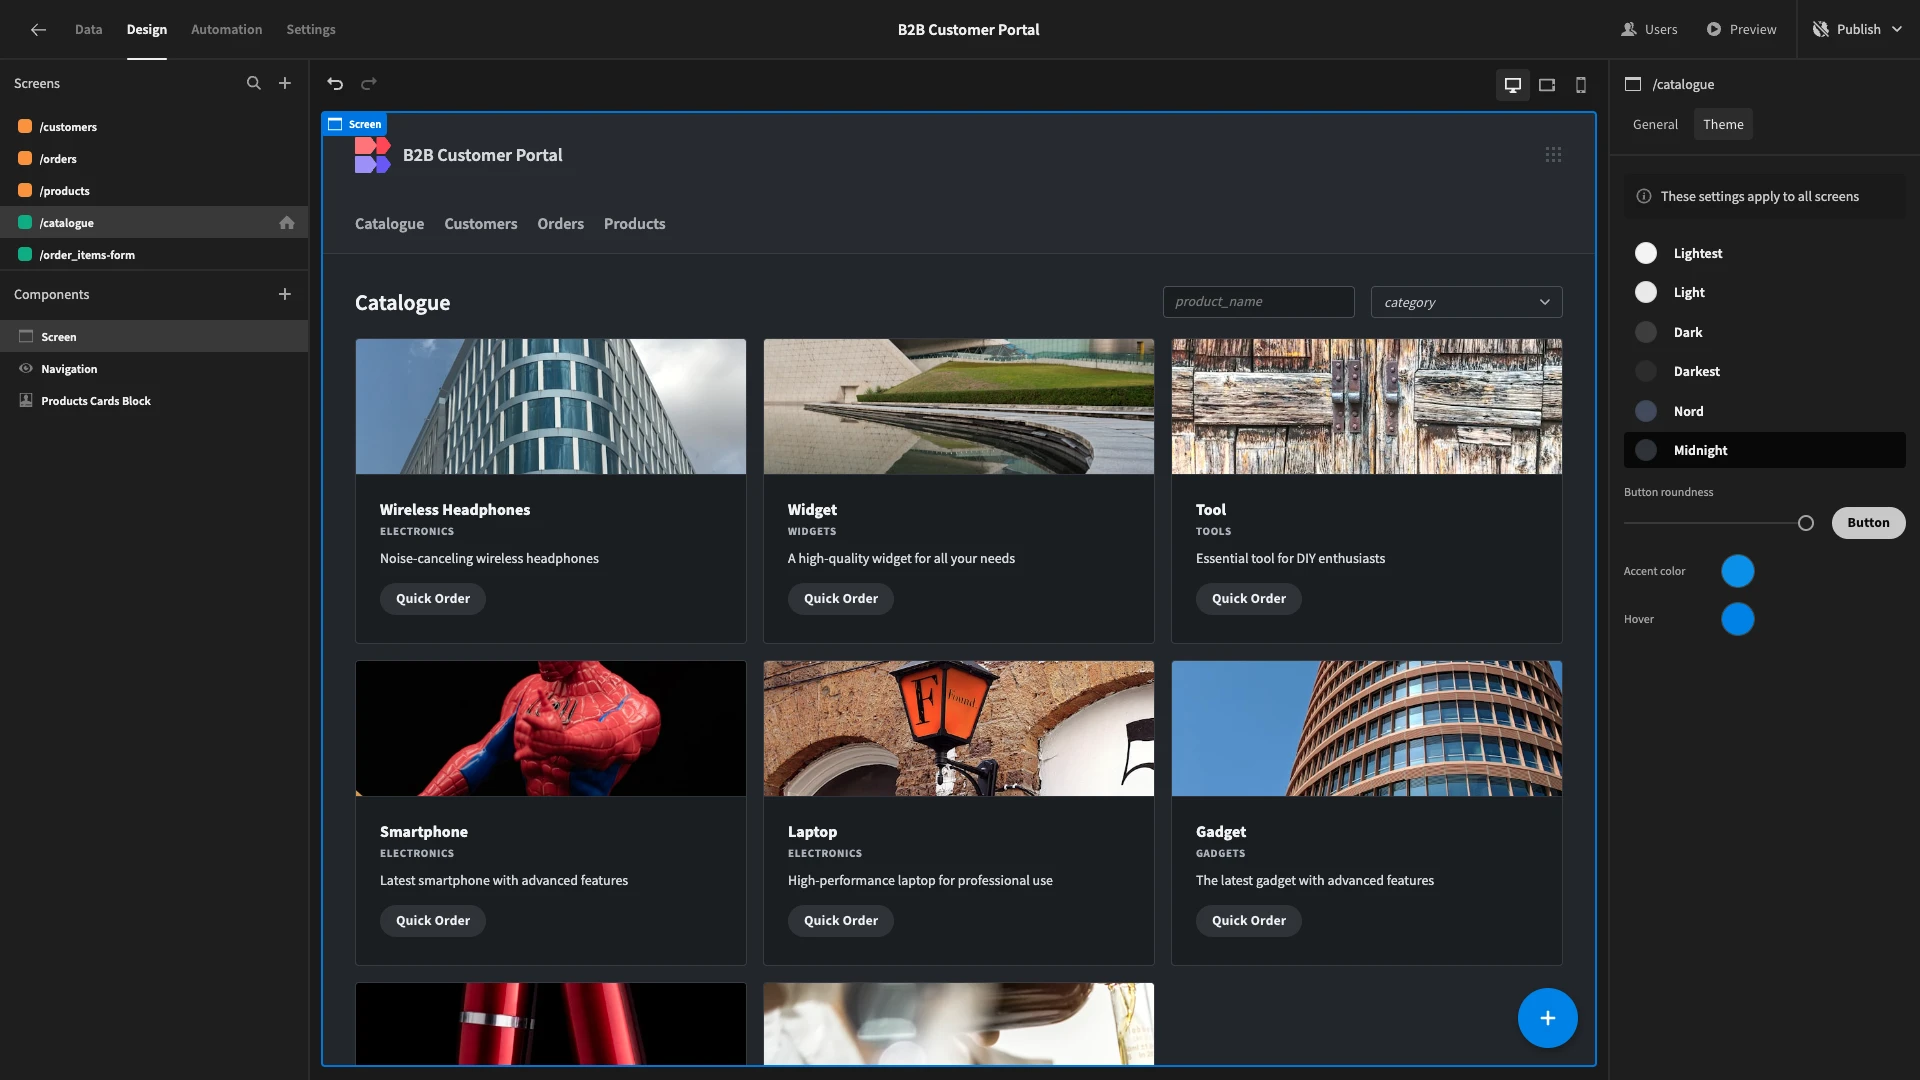
Then, we’ll set Catalogue as our home screen.

Lastly, under Screen and Theme, we’re choosing Midnight.
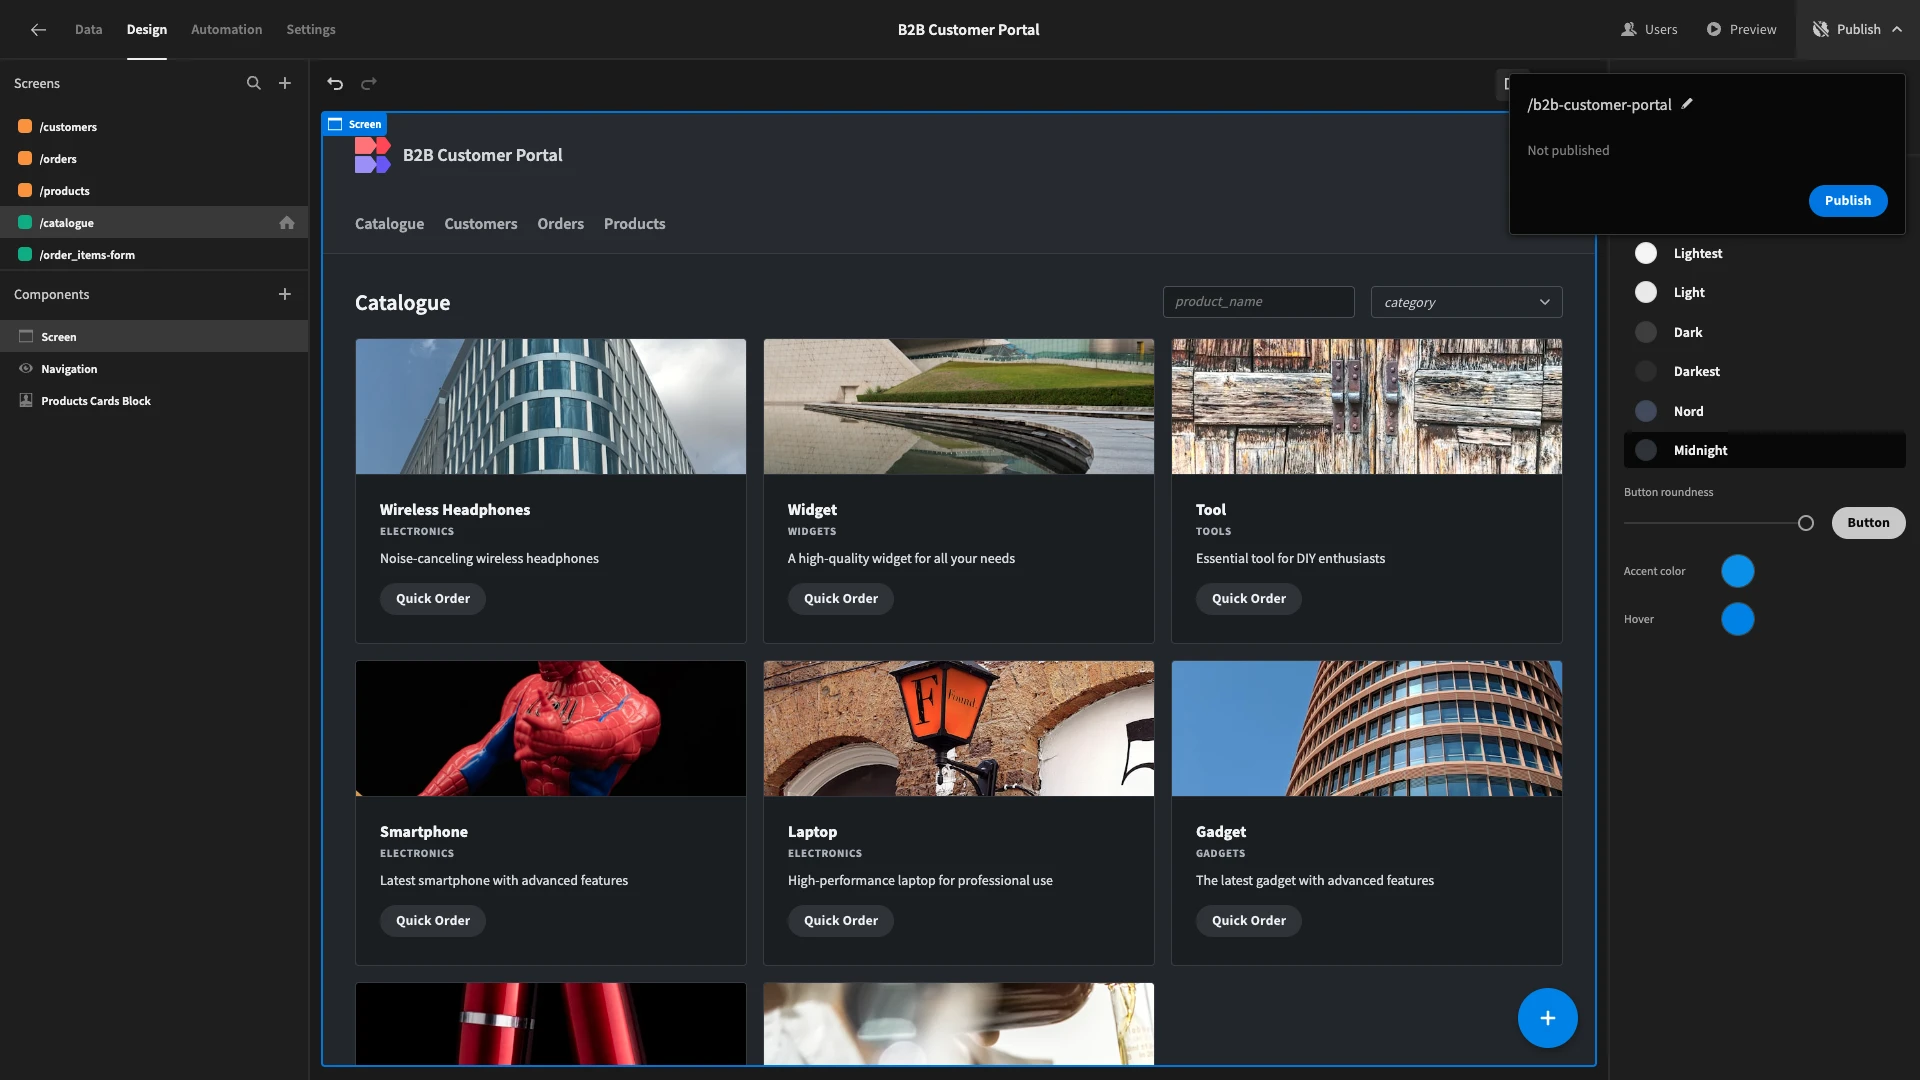
When we’re ready, we can hit Publish to push our app live.
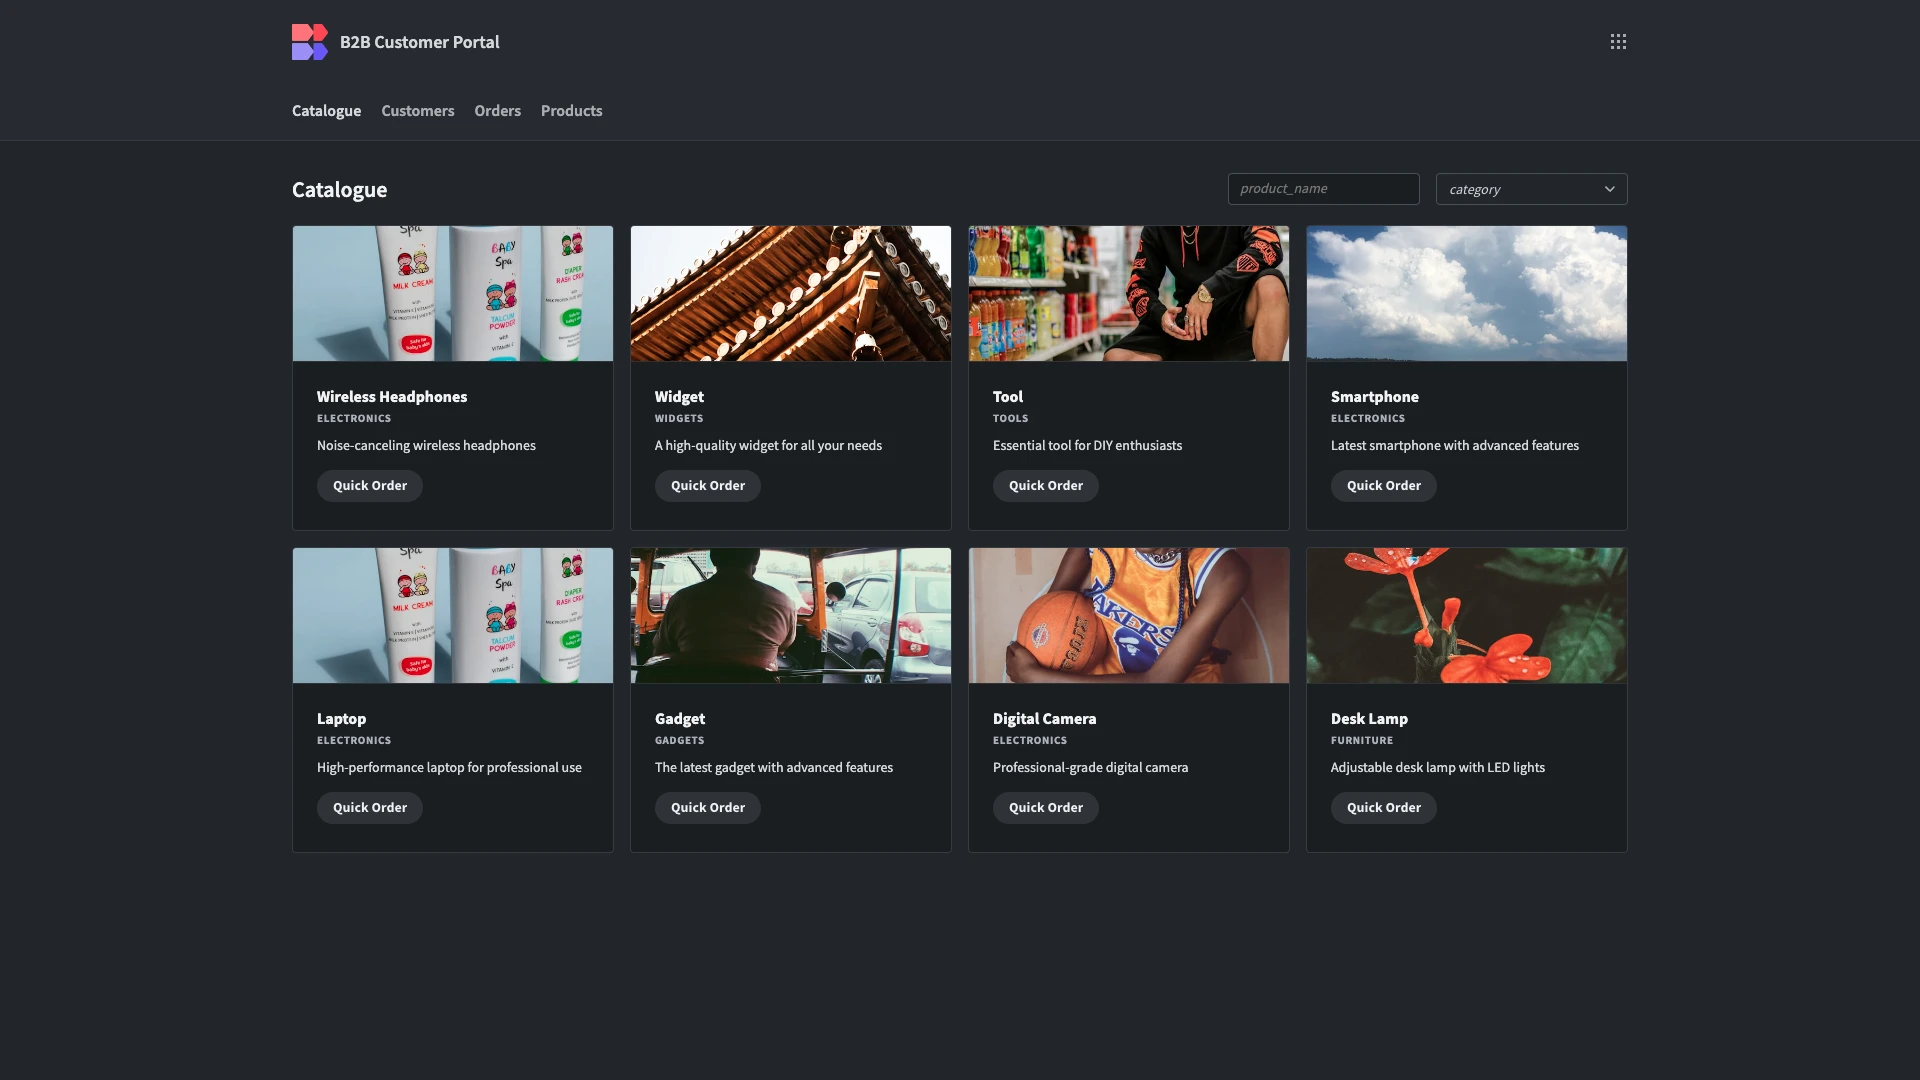
And here’s a reminder of what the finished app looks like.
Budibase is the fast, easy way to build secure portals on top of just about any data source.
To learn more, check out our portal development page.