How to Build an Employee Onboarding App in 7 Steps
Finding and hiring quality talent can be a lengthy, expensive process. So, once they’ve signed on the dotted line, we want to get our new colleagues up and running as quickly as possible. Today, we’re showing you how to build an effective employee onboarding app.
The tricky thing is that onboarding new hires brings along a whole swathe of administrative work - like introducing them to their new coworkers, getting them set up on our internal IT systems, and ensuring that they’ve read all of the relevant documentation for their role.
Along the way, we’ll see just how easy Budibase makes it to output professional applications at pace.
First, though, let’s think about a bit of background info.
What is an employee onboarding app?
An employee onboarding app is a software tool that manages the process of bringing a new hire into your organization. So, this can be anything that happens between when they accept an offer and when they are fully up to speed.
Depending on the role in question, your particular company culture, and a huge range of other factors, this could range from a relatively lightweight process to a whole mountain of paperwork.
Of course, most companies fall somewhere in between.
So, what specific tasks do onboarding apps help us to manage?
On the one hand, there will be certain kinds of tasks that involve getting relevant information about the new hire formalized and shared with relevant internal stakeholders.
For instance, adding their details to an internal data set and notifying colleagues of anything they need to do as part of the onboarding process. As follow-on actions, they might need to do things like create our new hire’s email address or schedule introductions.
On the other hand, we have tasks relating to ensuring that a new hire has absorbed certain training credentials. So, for legal reasons, we might need a clear record that they’ve read and understood our policies around things like fire safety or disciplinary processes.
Why build a tool for onboarding employees?
Okay, so you might be thinking aren’t there plenty of HR tools out there already? And you’d be right. But, there’s also a strong case for going custom here rather than opting for a COTS onboarding app.
The thing is, any process application is only going to be effective if it accurately reflects the underlying business logic that we’re trying to implement.
At the same time - onboarding apps are relatively simple tools. So, building our own can often be a more cost-effective way to achieve the capabilities we need - rather than paying a recurring SaaS license.
With Budibase, we can build a working employee onboarding app in a fraction of the time that hard-coding a solution would take.
Let’s check out how!
What are we building?
Our employee onboarding app will handle three distinct workflows:
- Notifying the new line manager and ensuring that they fulfill their responsibilities - including scheduling introductions and assigning a buddy for the new colleague.
- Notifying the IT team to set our new hires up with the credentials they need for their role.
- Enabling the new hire to read required documents and create a record to confirm that they have done so.
To achieve this, our application will have three screens:
- An intake form for HR to fill in when a new hire accepts an offer.
- A CRUD screen for other colleagues to view or update entries.
- A screen where new hires can read and confirm that they have read the required documentation.
This will be supported by several automations that are triggered by various user actions within our onboarding process.
How to build an employee onboarding app with Budibase in 7 steps
So, let’s jump right in. If you haven’t already, sign up for a free Budibase account to build along with us.
1. Create a new application
Our first step is to create a new application in the Budibase portal. We have the option of importing an app, starting with a template, or building from scratch.
Today, we’re going to start from scratch.
We can give our a name, which will be used to populate our onboarding app’s URL slug:

Then, we’ll be prompted to choose a data source:

Budibase offers unparalleled external data support. So, you can choose from a range of dedicated connectors for SQL, Mongo, REST, Google Sheets, and many more - or you can choose to use our internal table to get started.
You could go with wherever your data lives - but we’re going to choose Postgres.
2. Configure our data source
Next, we’ll be prompted to configure our data source. In the first instance, this means entering our credentials - including where our data is hosted, the port, and our username and password:

We’ll then be offered the chance to choose which of our database tables we’d like to fetch. So, we can pull all of our tables into the backend of our Budibase app - or just a selection.
Our database only actually has one table - called new_hires - so we don’t need to worry too much about this.
When we connect to Postgres or other SQL-derived DBMSs, we can immediately access and edit our data within Budibase’s backend:

Budibase also gives us the option to write and save custom queries to use in our application’s front-end or automated processes.
This gives us a huge amount of flexibility for handling data in more complex use cases - since we can effectively do anything that we could in SQL.
But, for today, we’ll be able to do everything we want with Budibase’s native CRUD functionality.
3. Build our onboarding kick-off form
Now we can start building our first UI.
Head to the design section and create a new blank screen:

We’ll then be prompted to give this a URL extension. We’ll call it /onboarding:

On this screen, we want to build a form that HR colleagues can fill in with a new hire’s details to kick off the onboarding process.
We’ll start by adding a form block. Basically, this is a prebuilt form that will auto-populate based on the schema of whatever table we point it at.

The first thing we’ll do is add a title - Enter new hire details:

No we have a fully functioning form - but it isn’t exactly pretty. To improve on this, we’re going to do a few things:
- Remove any attributes that aren’t required to kick off our onboarding process.
- Stylize our labels to be more readable - ie removing the camel case.
- Putting our fields in a more logical order.
- Change the size to large.
We can do all of this under fields on the right-hand side:

When we’re done, our form will look like this:

The next thing we want to do is add a few form rules. Specifically, we want some of our fields to be required - while others can be optional. The fields we want to be required are:
- Name.
- Manager.
- IT lead.
We can do this by opening the validation rules drawer under the settings for each individual form field:

If these were already in place as constraints within our database, we wouldn’t need to do this manually as Budibase would pull these from the schema - but we do have that option if not.
That’s our form completed.
4. Automate emails to line managers and the IT team
Nest, we want to start automating some logic. Our first automation is going to notify the IT team and the new hire’s manager that they have to complete certain tasks. So, we’re going to send emails to whatever email addresses our HR team provides for these fields.
Head to the Automation tab and hit create automation. You’ll then be prompted to choose a trigger and a name. We’re using a row created trigger - and we’ll call our automation NewHireCreated.

First off, we need to select the table that our table will watch for new rows. Our app only has one table so this part is easy:

Next, we’re going to add a Send Email action.

Note that we’ll need to have our SMTP credentials set up in Budibase for this to work.
Here are the fields that we can configure in our email action:

This first one will be the email that we send to our new hire’s manager. So, under send to, we’ll use this binding to get their email address from the trigger row - {{ trigger.row.Manager }}.
For the subject line, we’ll use:
1{{ trigger.row.Name }} has been hired!
Finally, we can use HTML to populate our actual email body. Ours will look something like this:
 1<p>Hi,</p>
 2
 3<p>{{ trigger.row.Name }} has been hired and you are their manager. Congrats. There are a few tasks that you’ll need to do before they start. Here they are:</p>
 4
 5<ul>
 6
 7<li>Email the company to let them know.</li>
 8
 9<li>Schedule the first day meetings.</li>
10
11<li>Line up the 1:1s for the next few weeks. </li>
12
13<li>Assign a buddy who will look after the new hire in their first few weeks</li>
14
15<ul>
16
17<p>{{ trigger.row.HRLead }} is taking the lead in HR and would love to answer any questions you might have</p>
18
19<p>Thanks!</p>
We’ll then add a second send email action, this time binding the email address for the IT Lead to the send to field - and populating the relevant responsibilities in the email body.
One of these responsibilities will be to create an email address for our new colleague and add it to their entry in our employee onboarding app. We’ll provide a UI where they can do this a little later.

That’s our first automation finished.
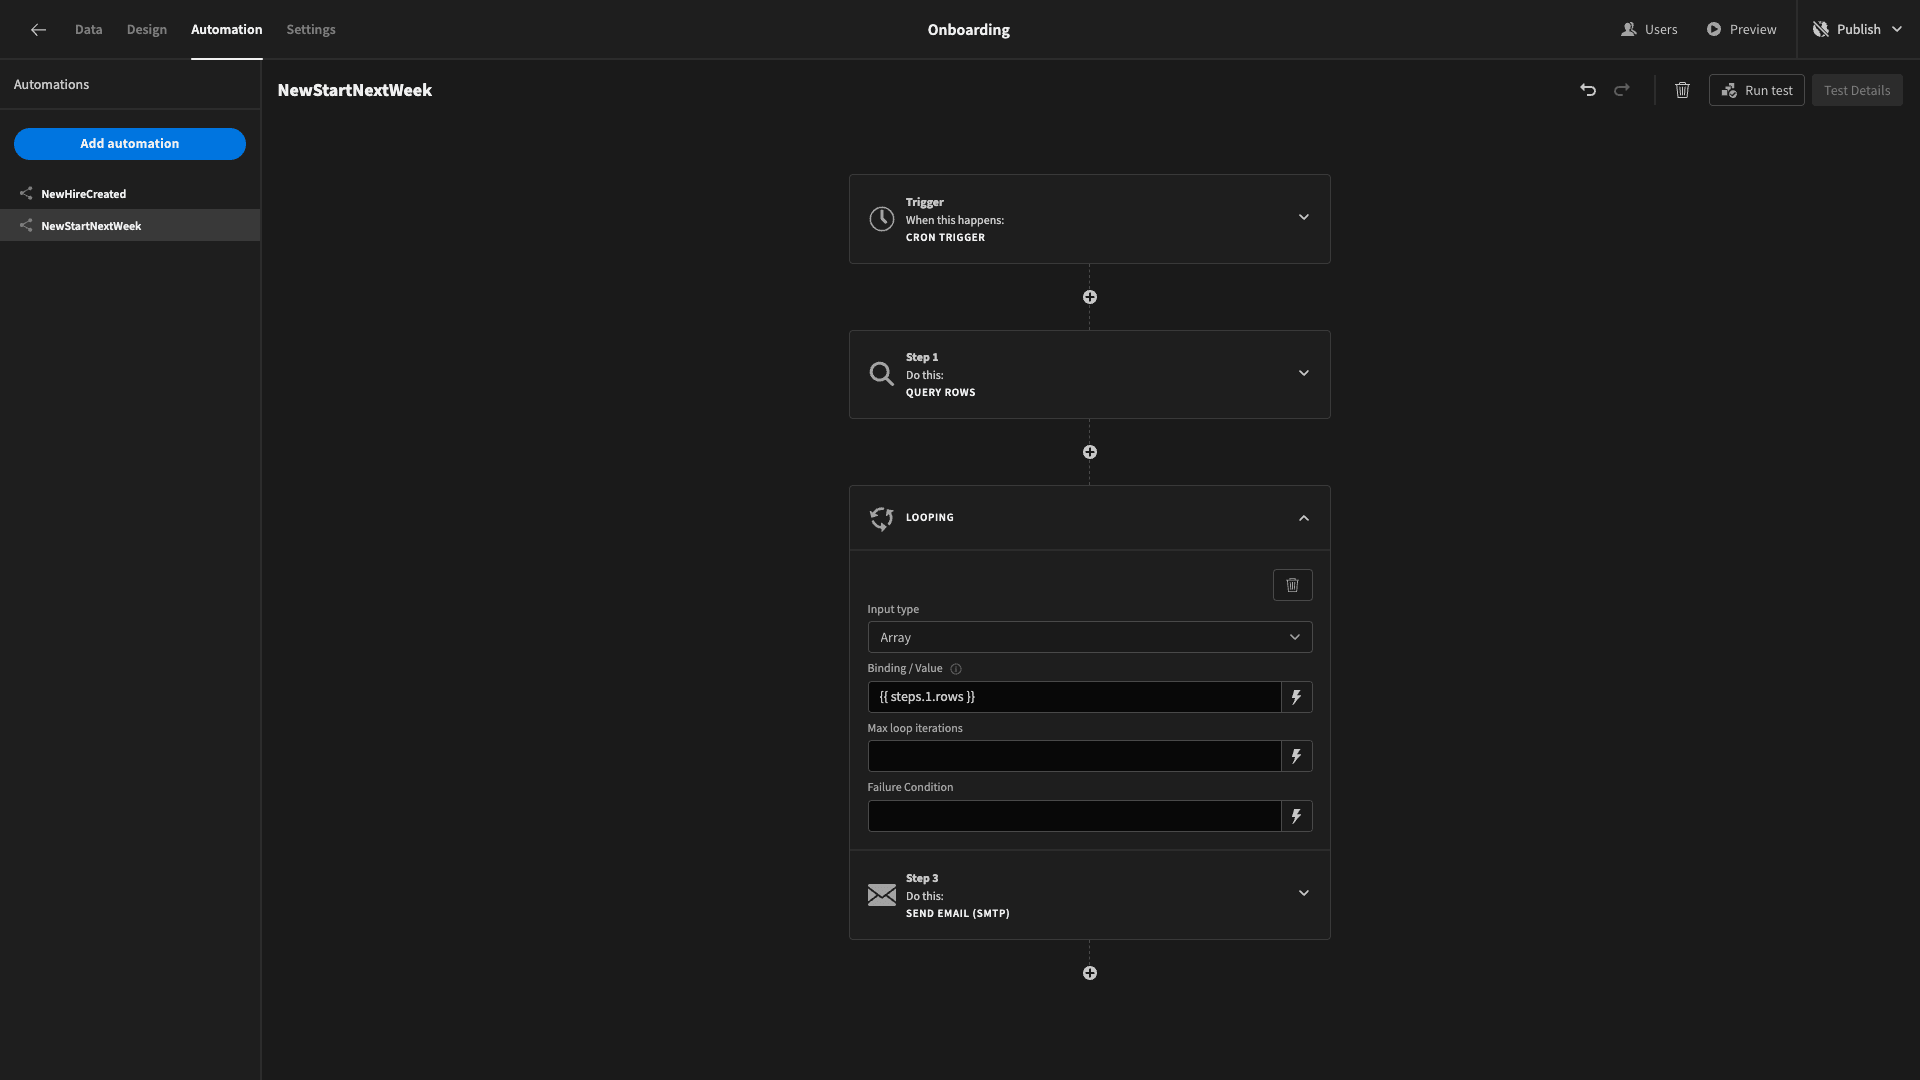
5. Add an automation for follow-up emails
Next, we’re going to add a second automation to remind everybody they need to complete their tasks the Friday before an employee is due to start. We’ll call this one NewStartNextWeek.
This time, for our trigger, we’ll choose a Chron:

This allows us to set our automation to run regularly at a defined time. We’ll be prompted to set a chron expression. This is a series of digits that relate to the minute, hour, day, and month we want to use as our trigger.
Ours is 09**6. This means our automation will run at 9 AM every Friday.

Next, we want to query our new_hires table and retrieve any rows with a start date attribute between our trigger and the following Saturday morning. So, we’ll add a query rows automation action:

We’ll point this to our table and then hit define filters:

We’ll add two filters. One will be that the start date should be more than the current date. In handlebars, this is expressed as {{ date }}.
The other will be that the start date is less than the following JavaScript expression:
1const nextWeek = new Date();
2
3nextWeek.setDate(nextWeek.getDate() + 8);
4
5return nextWeek;
This just adds 8 days onto the current date.

We’ll add another send email block, but this time we’ll use looping to send individuals for any new hire that fits into our defined timeframe with the binding {{ steps.1.rows }}.
For the email block itself we’ll use the following binding as the recipients:
1{{ loop.currentItem.ITLead }}, {{ loop.currentItem.Manager }}, {{ loop.currentItem.HRLead }}And we can use whatever subject line and email body we want to remind all of these stakeholders of their respective responsibilities.

6. Create a CRUD screen for managing entries
Now, we need somewhere for IT leads and managers to be able to view and update details about new hires. Create a new screen, but this time instead of blank we’ll choose table:

We’ll be asked to pick the data table we want to build this around. Again though, our application only actually has one:

Straight off the bat, this gives us a fully functioning CRUD UI:

Users can click a row to access an update form in the side panel

All we’re going to do here is reduce the number of fields that we can see in our table without clicking through. So, we’ll hit configure columns and then choose add all:
We can use the Xs to remove anything we don’t want. We’re going to take out everything except Name, StartDate, and Manager:

Now our table looks like this:

7. Build a screen for new hires to read onboarding documentation
Lastly, we want to build a UI that will enable our new hires to read any required documentation. Once they’ve done this, we want to create a record of it. We’ll create another blank screen and call it /documents.

On this, we’ll place a form component. We’re not actually going to use this to update any data per se. Instead, its purpose is to enable us to navigate through multiple embedded documents on a single screen.
To achieve this, we’ll start by adding a form step component. Inside this, we’ll add an embed.

Now, we can use HTML to embed whatever documents we want in here.
For our first one, we’ll use the following HTML:
1<object data=”yourexampleurl.com” type=application/pdf width=”100” height=”100”>
2
3<p>Couldn’t embed the pdf. Read it here: <ahref=”yourexampleurl.com”> Health and Safety </a></p> </object>
Basically, what this will do is embed the document we add a link to and allow it to take up 100% of the space allocated to the embed component. There’s also a paragraph that will show up if the embed fails, providing a direct link to the resource.

Now, we want the user to be able to confirm they’ve read it and move to the next document they need to read.
So, we’ll add a paragraph and a button - and wrap these in a container.

The button will be set to increment to form step as its only on-click action:

We can repeat this for as many documents as we need the new hire to read.
Once they’ve read all of the documentation, we’ll provide one final form step. This will ask them to reconfirm that they’ve ready everything - and then update their employee record to that effect.
So, we start with a form step with a headline, a paragraph, and a button wrapped in a container:

The last thing we need to do is create an automation flow so that each time a user clicks on this button - the appropriate record is updated.
We’ll call this new automation UpdateDocumentRead, and user an app action trigger:

App action triggers allow us to set fields for data that we want to collect whenever the rule is initiated. We’re adding one, called email. Later, we’ll bind this to the current user’s email when we set our button action.
Next, we’ll add a query rows action - with the filter set to find any entries where the email matches the one we’ve just set as a field:

Finally, we’ll add an update rows action - with the DocumentsRead attribute set to true, and all of the other fields set to their existing values:

And finally, we can go back to the Design tab to set our button to trigger this automation:

Hopefully you found this guide helpful. If you enjoyed it, you might also like to check out our guide to building an inventory management app for free .